
Simple Photoshop Type Effects
Quick, creative, and nondestructive methods for melding text and image


This article appears in Issue 33 of CreativePro Magazine.
Here are some simple yet effective techniques for integrating type and images in Photoshop. You can complete each of them in a matter of minutes, and all the techniques are completely nondestructive.
Create a Picture in Text with a Clipping Mask
One of the simplest and most effective type effects is to use a clipping mask to convert any image or text to the shape of the letterforms (Figure 1).

Figure 1
Start with a solid color layer, an image layer, and a type layer (Figure 2).

Figure 2
Drag the image layer above the type layer.
Target the image layer, and from the Layers panel menu, choose Create Clipping Mask (Command+Option+G/Ctrl+Alt+G).
Add a Blend Mode and Layer Mask
Building on the previous technique, you can combine a clipping mask with a blend mode and layer mask to integrate the type into the scene (Figure 3).

Figure 3
Put a texture layer above the type layer, then choose Create Clipping Mask (Command+Option+G/Ctrl+Alt+G) from the Layers panel menu (Figure 4).
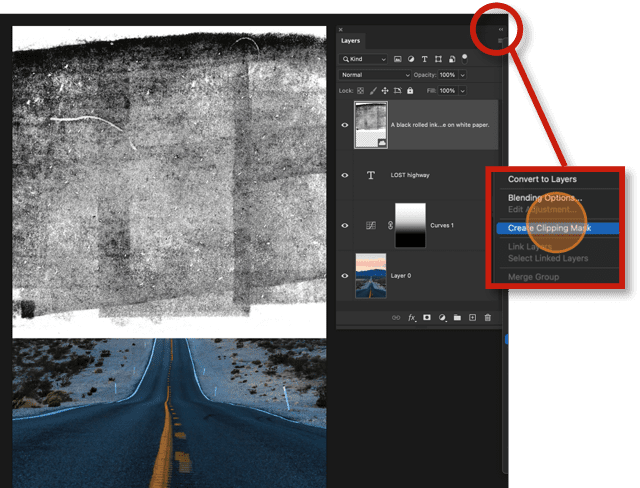
Figure 4
Select the texture layer and the type layer and press Command/Ctrl+G to put them into a layer group, then change the blend mode of the group to Screen (Figure 5).

Figure 5
To create more interaction between the type and the landscape, you can bring the mountains
in front of the type. Hide the visibility of all layers except the image layer. Select this layer and choose Select > Sky.
Turn back on the visibility of the layers. Select the group and convert the selection into a layer mask.
Tip: This simple trick of making a selection on one layer and then using that selection as a mask for another layer has many uses.
Create a Knockout
A knockout lets you punch a hole through one or more layers to reveal the image beneath (Figure 6).

Figure 6
Start with a type layer, a shape layer of solid color, and an image layer (Figure 7).
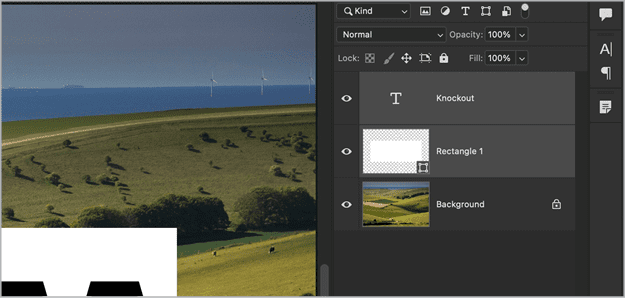
Figure 7
Select the top two layers (the type layer and the shape layer) and combine them in a group (Command/Ctrl+G).
Double-click to the right of the layer thumbnail to enter Blending Options. Set the Knockout to Shallow and the Fill Opacity to 0 (Figure 8).

Figure 8
Add (Extreme) Perspective
Here’s how to create the effect of type in perspective that will conjure up the feel of the open road (Figure 9).

Figure 9
Start with a layer of paragraph text. You can convert point type to paragraph text by choosing Type > Convert to Paragraph Text.
Open the Character and Paragraph panels.
On the Paragraph panel, choose Justify All alignment. This alignment option is available for paragraph text only, hence the earlier step.
Make each line as big as possible without breaking the text frame.
With the type formats applied, convert the type layer to a Smart Object.
Choose Edit > Free Transform. Holding Command+Option+Shift (Ctrl+Alt+Shift), pull the corner handles to change the edges of the type to follow the contour of the road (Figure 10).

Figure 10
To integrate the texture of the road into the letters, the key is to add the image layer as a layer mask to the type layer.
Hide the type layer. Then, on the Channels panel, Command/Ctrl-click the RGB channel to make a luminance selection of the visible layers.
Return to the Layers panel, show the type layer, then click the Add Layer Mask icon to convert the selection into a layer mask (Figure 11).
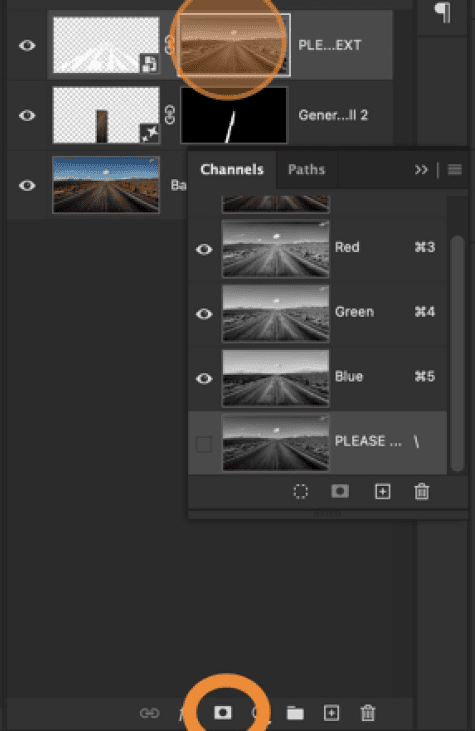
Figure 11
You can control the strength of the mask by adjusting its contrast. With the layer mask selected, press Command/Ctrl+L to bring up the Levels dialog box and experiment with the position of the white, black, and midpoint sliders.
Displaced Type
To make the displaced type effect, where your type responds to the shape and texture of an image layer below (as in Figure 12), you need a displacement map. This involves making a high-contrast, grayscale copy of the image layer and applying that copy to the type layer using the Displace filter.

Figure 12
Start with the arrangement of layers shown in Figure 13, and convert both the image layer and text layer to Smart Objects.

Figure 13
If you want the texture only, but not the color, of the image layer, apply a Black & White adjustment to the image layer.
Change the blend mode of the image layer to Multiply to combine it with the solid color fill layer beneath.
With only the image layer visible, choose Image > Duplicate. Make sure Duplicate Merged Layers Only is selected, so that you end up with a single layer image (Figure 14).

Figure 14
Save this duplicate as a Photoshop (PSD) file.
Return to the original document, and select the type layer.
Choose Filter > Distort > Displace, and select the displacement map image.
Experiment with horizontal and vertical scale values. For a stronger effect you can also increase the contrast of the displacement map image (Figure 15).
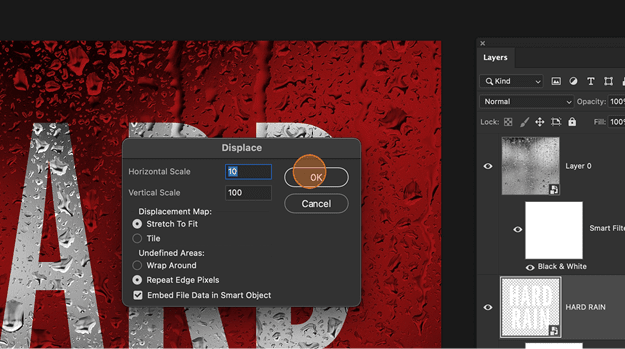
Figure 15
Entwined Type
The trick with the entwined type technique, used to create Figure 16, is to duplicate the image layer mask to the type layer, invert it, and the activate the type layer as a selection so that you can selectively paint back in the branches within the letter shapes. This will give the impression that some branches are in front, and others are behind the type.
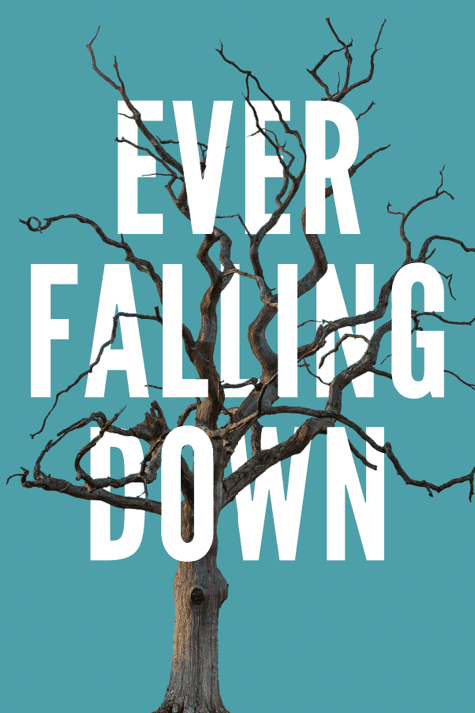
Figure 16
Choose Select > Subject to select the tree.
Convert the selection to a layer mask.
Refine the mask in Select and Mask (Figure 17).
Figure 17
Add a solid color fill layer beneath.
Add a type layer above (Figure 18).
Figure 18
Duplicate the layer mask to the type layer. (Drag while holding Option/Alt.)
Now press Command/Ctrl+I to invert the mask. Command/Ctrl-click the type layer thumbnail to activate a selection of the type (Figure 19).
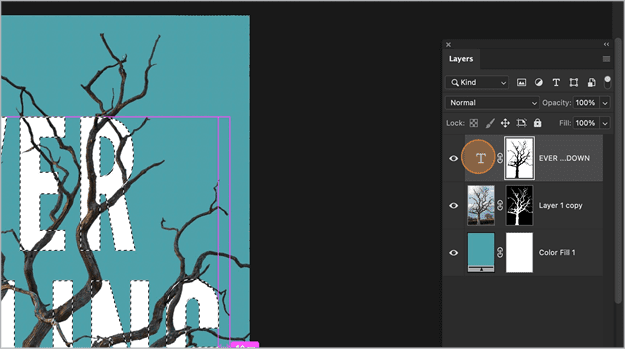
Figure 19
Make sure you have the layer mask of the type layer selected.
With a round, hard-edged brush (Figure 20), paint in white over the letters that you want to appear in front of the branches (Figure 21).

Figure 20
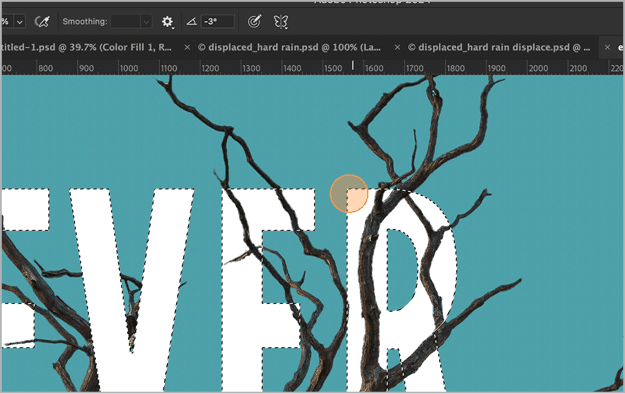
Figure 21
Custom Warped Type
Here’s how you can apply a free-form warp and texture to type—and still have the type remain editable. This technique, used to create Figure 22, uses layer groups to allow you to apply more than one mask to the type.
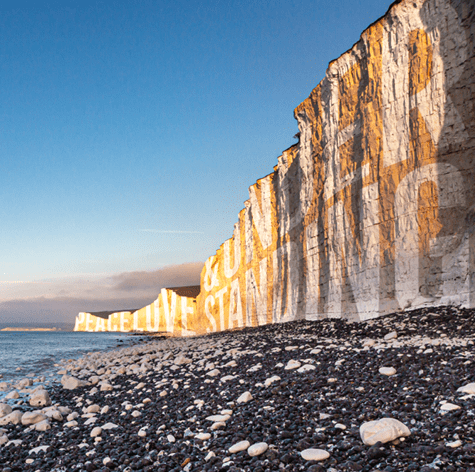
Figure 22
Start with three separate type layers. Convert each to a Smart Object. This is essential for making the effect nondestructive.
Press Command/Ctrl+T to do a first-pass transform on each layer. Hold Command/Ctrl to distort as necessary (Figure 23).
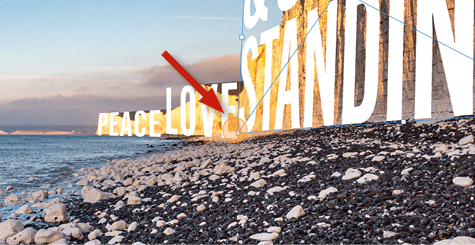
Figure 23
Hide the type layers, and make a subject selection of the cliffs.
Turn back on the visibility of the type layers. Combine them in a group.
Convert the selection into a layer mask for the group (Figure 24).
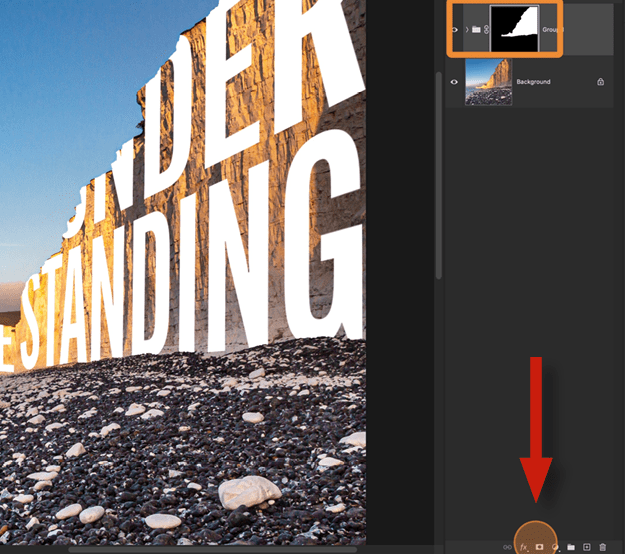
Figure 24
One by one, warp the type layers into shape (Figure 25).
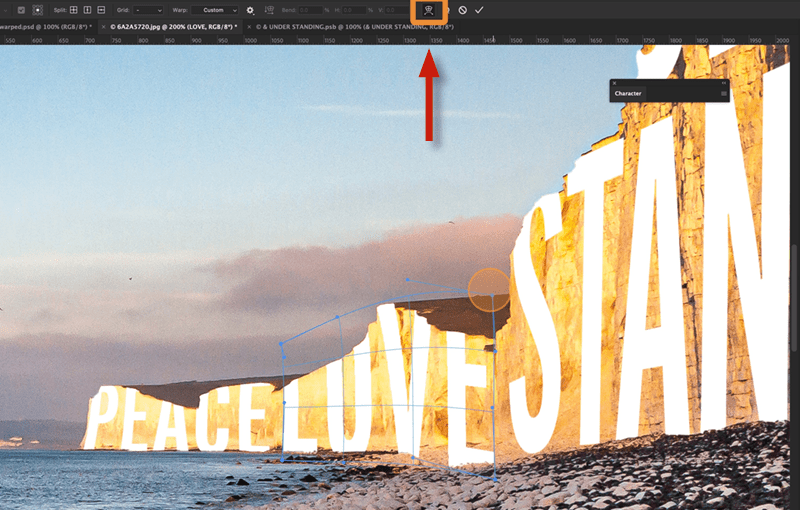
Figure 24
For more flexibility, increase the warp grid size (Figure 26).
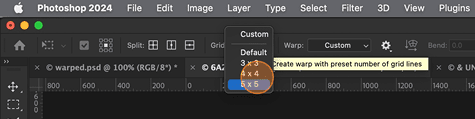
Figure 26
Carefully drag from the grid nodes to massage the shape (Figure 27).
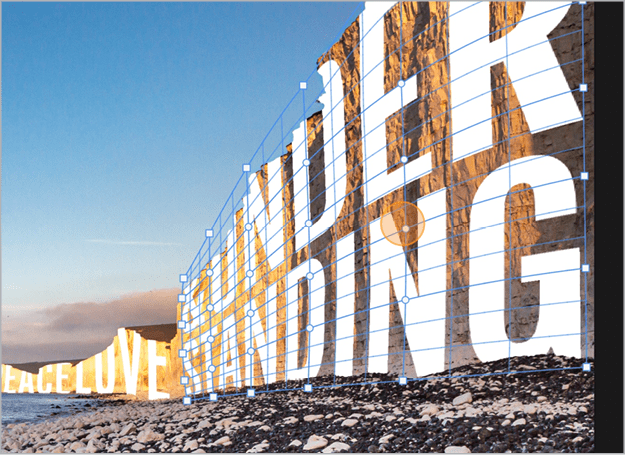
Figure 27
To add an additional mask, nest the group inside another group.
Hide all layers except the image layer. Go to the Channels panel, and Command/Ctrl-click to make a luminance selection (Figure 28).
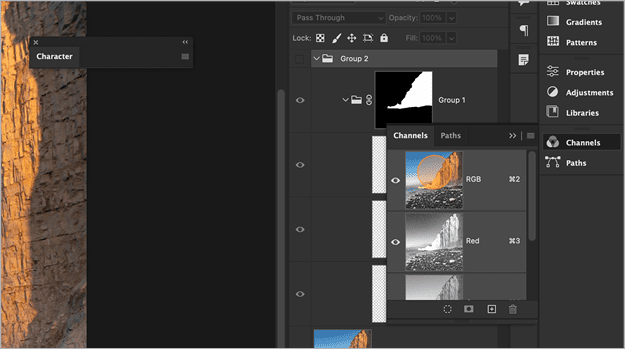
Figure 28
Return to the Layers panel. Turn on the visibility of all layers, and convert the selection into a layer mask for the group.
Commenting is easier and faster when you're logged in!

Recommended for you

How to Create Long Shadows on Editable Text in PowerPoint
Learn how to create long text shadows in PowerPoint and keep the text editable.
InDesign-Only Type Effects
Nigel French demonstrates scads of eye-catching effects you can create without o...
dot-font: Seven Principles of Typographic Contrast
Carl Dair, an expert typographer, reveals the secrets of typographic contrast in...