
Scanning 101: Sharpening Your Images
Today’s scanners — even low-cost models aimed at SOHO users or consumers — do a good job of capturing the subtle tonal gradations in black-and-white or color photographs. But whether as an artifact of the scanning process itself or as the result of an out-of-focus original, digital images created with a desktop scanner are often slightly blurry. Knowing the right way to sharpen them will save you time and aggravation, and possibly even keep your image files smaller.
Guess Again
Your instincts may tell you that the best way to improve focus and enhance detail is to increase the resolution of a scanned photograph, but your instincts would be wrong. Images intended for the Web will not be improved by increasing the resolution, because screen images are typically displayed at 72 ppi (pixels per inch). Higher resolutions simply increase file size and download times. If you are working in a print production environment there is, likewise, an optimum scanning resolution for your intended output device. For an explanation of how to compute the best scanning resolution for print, see the previous Scanning 101 column on that topic.
Often, the best way to punch up a scanned photograph is to leave the resolution alone, and to improve the relationship between the tonal values instead. Take a look at the images below. These two images were scanned at the same resolution — 72 pixels ppi — and yet the second image looks more detailed.


The first picture above exhibits the soft anti-aliased edges common to scanned photographs. The second contains more contrast along the edges of elements, an effect that makes the image appear brighter and that emphasizes details. The effect was achieved using a specialized Photoshop image editing filter called Unsharp Mask. Similar filters can also be found in other software.
Despite its name, unsharp masking is basically a sharpening routine. But don’t confuse it with simple sharpening filters. Straightforward sharpening filters increase the contrast between adjacent pixels indiscriminately. As a result they quickly introduce artifacts into a picture by highlighting stray pixels. Simple sharpening filters can also generate noise in graduated tonal areas (like the sky) and can create noticeable patterning effects in subtly textured areas (like water ripples). Unsharp masking compensates for this phenomenon by combining smoothing and sharpening operations. This combination may sound counter-productive, but the final effect is that unsharp masking (used appropriately) only increases the contrast of adjacent pixels along the edges of elements.
Here’s how it works: First the picture is smoothed or blurred slightly (unsharpened), and the contrast is reduced just enough to eradicate stray noise or dirt and to further blend areas of gradual tonal transition. The filter then looks for neighboring pixels with a certain level of contrast, and it increases the contrast of these pixels further, providing the sharpening effect.
The images below provide an up-close look at unsharp masking in action. Notice how the broad, even tones remain unchanged. However, the border between the letters and the background changes dramatically. The edges of the dark letters become darker after sharpening, while the edges of the light background become lighter.


Scan Soft, Sharpen Later
Because unsharp masking is such a useful function, scanner manufacturers usually include it as part of their scanner driver software, so that you can scan a picture and apply an unsharp mask filter simultaneously.
But there are two reasons why you should not apply an unsharp mask filter at this point in the production cycle. First, most desktop scanners provide unsharp masking as a toggle function. You can turn it on or off, but you have no control over the process. Second, the effects of unsharp masking can be magnified or distorted by other image correction filters. So it is best to apply unsharp masking last, after you have adjusted the picture’s gamma, removed any color casts, or otherwise cleaned up the image.
If you want to produce high-quality images, you should use a robust image-editing program that offers meaningful controls as part of its unsharp masking filter. Adobe PhotoShop allows you to enter explicit values for three separate parameters: Amount, Radius, and Threshold. We explain each of these settings below.

A third advantage of using unsharp masking from within an image-editing application (rather than a scanning utility): You’ll have the ability to preview and undo the filter effect. This capability also affords you the opportunity to experiment with filter settings until you find the optimum values for the particular image at hand.
This article was last modified on January 6, 2023
This article was first published on October 25, 2000
Commenting is easier and faster when you're logged in!

Recommended for you

How Do I Place Thee?
How do I Place thee? Let me count the ways. I place thee from File > Place, and...
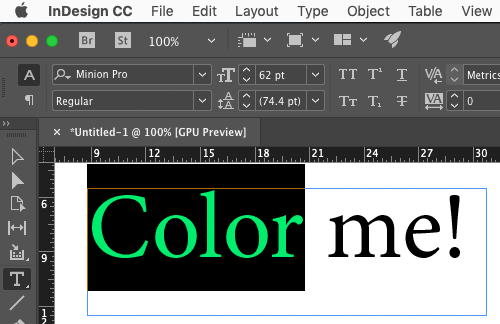
Use Split Window when Applying Colors to Text
How to fix the problem of seeing selected text in inverted colors in InDesign.

The Oldest Living Things in the World
What’s old? Is an iPhone 4 old? Sure, just ask any teen. How about Windows XP? T...