


Smooth Move
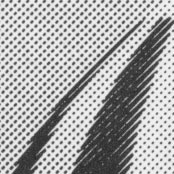
There is only one way to eliminate a moiré pattern from a scanned image completely. You must transform the halftone screen back into continuous-tone data (or at least the digital equivalent of a continuous-tone photograph). Take a close look at Figure 4, which is scanned from the same original artwork as Figure 3. In this case, however, instead of a disturbing moiré pattern, the image contains smooth gray shades.

You can use the descreening option built into your scanner or image-editing filters to convert halftone patterns into true gray shades, to eliminate moiré patters.
Without a doubt, the easiest way to accomplish this task is to have software do it for you automatically. In fact, moiré patterns are common enough in scans that scanner manufacturers often include a moiré removal algorithm — referred to as a descreening function — as part of its scanner drivers. This is typically a simple switch that you can toggle on and off. Keep in mind, though, that your desktop scanner driver may not provide a descreening option if the scanner is a few years old. And in our experience, automatic descreening functions work best with high-resolution printouts. Low-resolution linescreens (abbreviated as lpi), like the 85 lpi typically used for newspapers or the 100 lpi found in clip art collections often defeat automated descreening functions.
The Software Solution
Luckily, you can use standard functions built into just about image-editing program to remove a halftone screen from an image after you’ve scanned it. It would be wonderful if we could give you step-by-step instructions, complete with explicit values, to teach you how to remove moiré patterns. But we can’t, because there are too many variables beyond our control. For example, there is no way for us to predict the linescreen resolution of the original printed picture. We can’t determine if the original image was printed in grayscale (with only one screen) or in full CMYK color (with four screens). Nor do we know whether you intend to display the image on screen or print it to paper. You must also make a number of decisions that will influence the creation of a moiré pattern, such as the scaling factor and the final output resolution.
However, we can provide guidelines and encourage you to experiment until you find the right combination of techniques to eliminate or reduce the moiré pattern. Your goal is straightforward: You want to replace noise (the out-of-sync pixels that are forming the moiré pattern) with more appropriately colored pixels to create smooth color and tonal transitions.
The following tips and techniques can point you in the right direction.
- Use scaling to your advantage. If possible reduce the size of the image during scanning. This can blend halftone cells together.
- Oversample the artwork. Scan the artwork at a much higher resolution than you need, and then use an image-editing program to reduce the resolution. For example, if you would normally scan at 150 ppi, scan at 300 ppi and downsample prior to printing. As you can see in Figure 5, downsampling uses interpolation routines to blend the dot patterns found in halftone cells into true grayscale data.

By reducing the resolution of a scanned image you can blend the individual dots that make up a halftone screen into true grayscale data. - Remove noise. Apply image-editing filters, such as the Despeckle filter in Photoshop and other image editors, that are designed to find noise (the stray or oddly colored dots that typically form the moiré pattern) and replace them with appropriate tonal values. If possible use filters that give you more control over this process. For example, Photoshop also offers the Dust & Scratches filter, which allows you to specify both a threshold (a cut off point beyond which the filter will not be applied) and a radius (which determines how many surrounding pixels will be used in the calculation). These controls allow you to make adjustments for each image so that you can remove the patterning with the least amount of degradation or blurring to the overall image.
- Blur to blend. If nothing else works, you can use blurring filters to blend the halftone cells into smoother tones. Again, it’s best if you use a filter, like Gaussian Blur, that offers some level of control over the process. If you apply blurring filters too liberally you’ll not only soften an image, you’ll lose critical details.
- Work with individual color channels. All of the techniques discussed here will work with color images, but you can often preserve more detail in a full-color image if you first convert the RGB scan into CMYK mode. This allows you to work in the same color mode used to print the image originally. You can also split the channels into separate grayscale images. When all four grayscale files have been converted into smooth tonal values, recombine the channels as a single color image.
One word of warning: All of the techniques described here soften an image to some degree. Your first inclination might be to improve the final image by applying a sharpening filter. Sharpening can improve the appearance of scanned images, as discussed in a previous Scanning 101 column, but sharpening filters can also re-emphasize the moiré pattern, so use them sparingly.
An old apropos adage declares, “Once a pickle, never a cucumber again.” And the truth is that these techniques — though powerful — can never return an image to its original glory. But these techniques can help you transform an image that has been marred by an unintentional moiré pattern into an acceptable piece of art.
Read more by Luisa Simone.
This article was last modified on July 18, 2023
This article was first published on January 3, 2001
Commenting is easier and faster when you're logged in!

Recommended for you

Hands-On Review of the Microsoft Surface Studio
Recently Microsoft announced their latest pieces of hardware for the Surface pro...

Adjust Photoshop FX quickly and easily with tomaxxiFXcolor
If you like working with Photoshop FX, check out a free extension available on A...
ColoRotate, the mobile color companion to Photoshop
With Adobe’s Kuler on hiatus, it might be a good time to check out alterna...