


[Editor’s Note: This review was altered with additions and corrections on December 19, 2005.]
While today’s image-editing programs provide phenomenal tools for correcting and adjusting images, the digital image-editing workflow still confounds many photographers — especially those who shoot raw. Aperture 1.0, Apple’s entry into the professional digital image-editing marketplace, aims to solve the photographer’s workflow dilemma by providing a single application that performs sorting and cataloging, raw conversion, basic image editing, Web page generation, printing, and archiving. The program provides exceptional, unique tools for comparing and sorting images, but it’s hampered by a number of weaknesses. Ironically, you may find that trying to work around these issues requires a workflow more complicated than what you already have.
Before you worry too much about whether Aperture is right for you, you need to consider whether your computer is right for Aperture. Aperture is built around Apple’s Core Image technology, a term for image-processing routines that are built-in to OS X 10.4 (Tiger). Core Image makes heavy use of your computer’s video card to accelerate image processing operations. As such, Aperture will work only with certain video cards. And, because not all video cards are created equal, Aperture will perform better with some cards than with others. To ensure that your video card gets image data in a timely manner, you’ll also want a fast computer and a lot of RAM.
Because the program is so picky about its hardware requirements, Apple offers a free compatibility checker that examines your machine to determine if it’s Aperture-ready.
In the following review, I’ve broken down my findings into 11 sections:
- The Interface
- Importing
- Aperture 101
- Loupe de Loop
- Aperture Philosophy
- Metadata and Keywords
- Editing
- Moving Edits
- Organization and Output
- Workflow
- Quality and Performance
The Interface
Aperture’s interface consists of a single window broken into three main panes: Project, Browser, and Viewer (Figure 1). The Projects pane is roughly analogous to the Library pane in Apple’s iPhoto and iTunes. In it, you define Projects, which are high-level containers that can hold images, albums, Web pages, books, and folders.
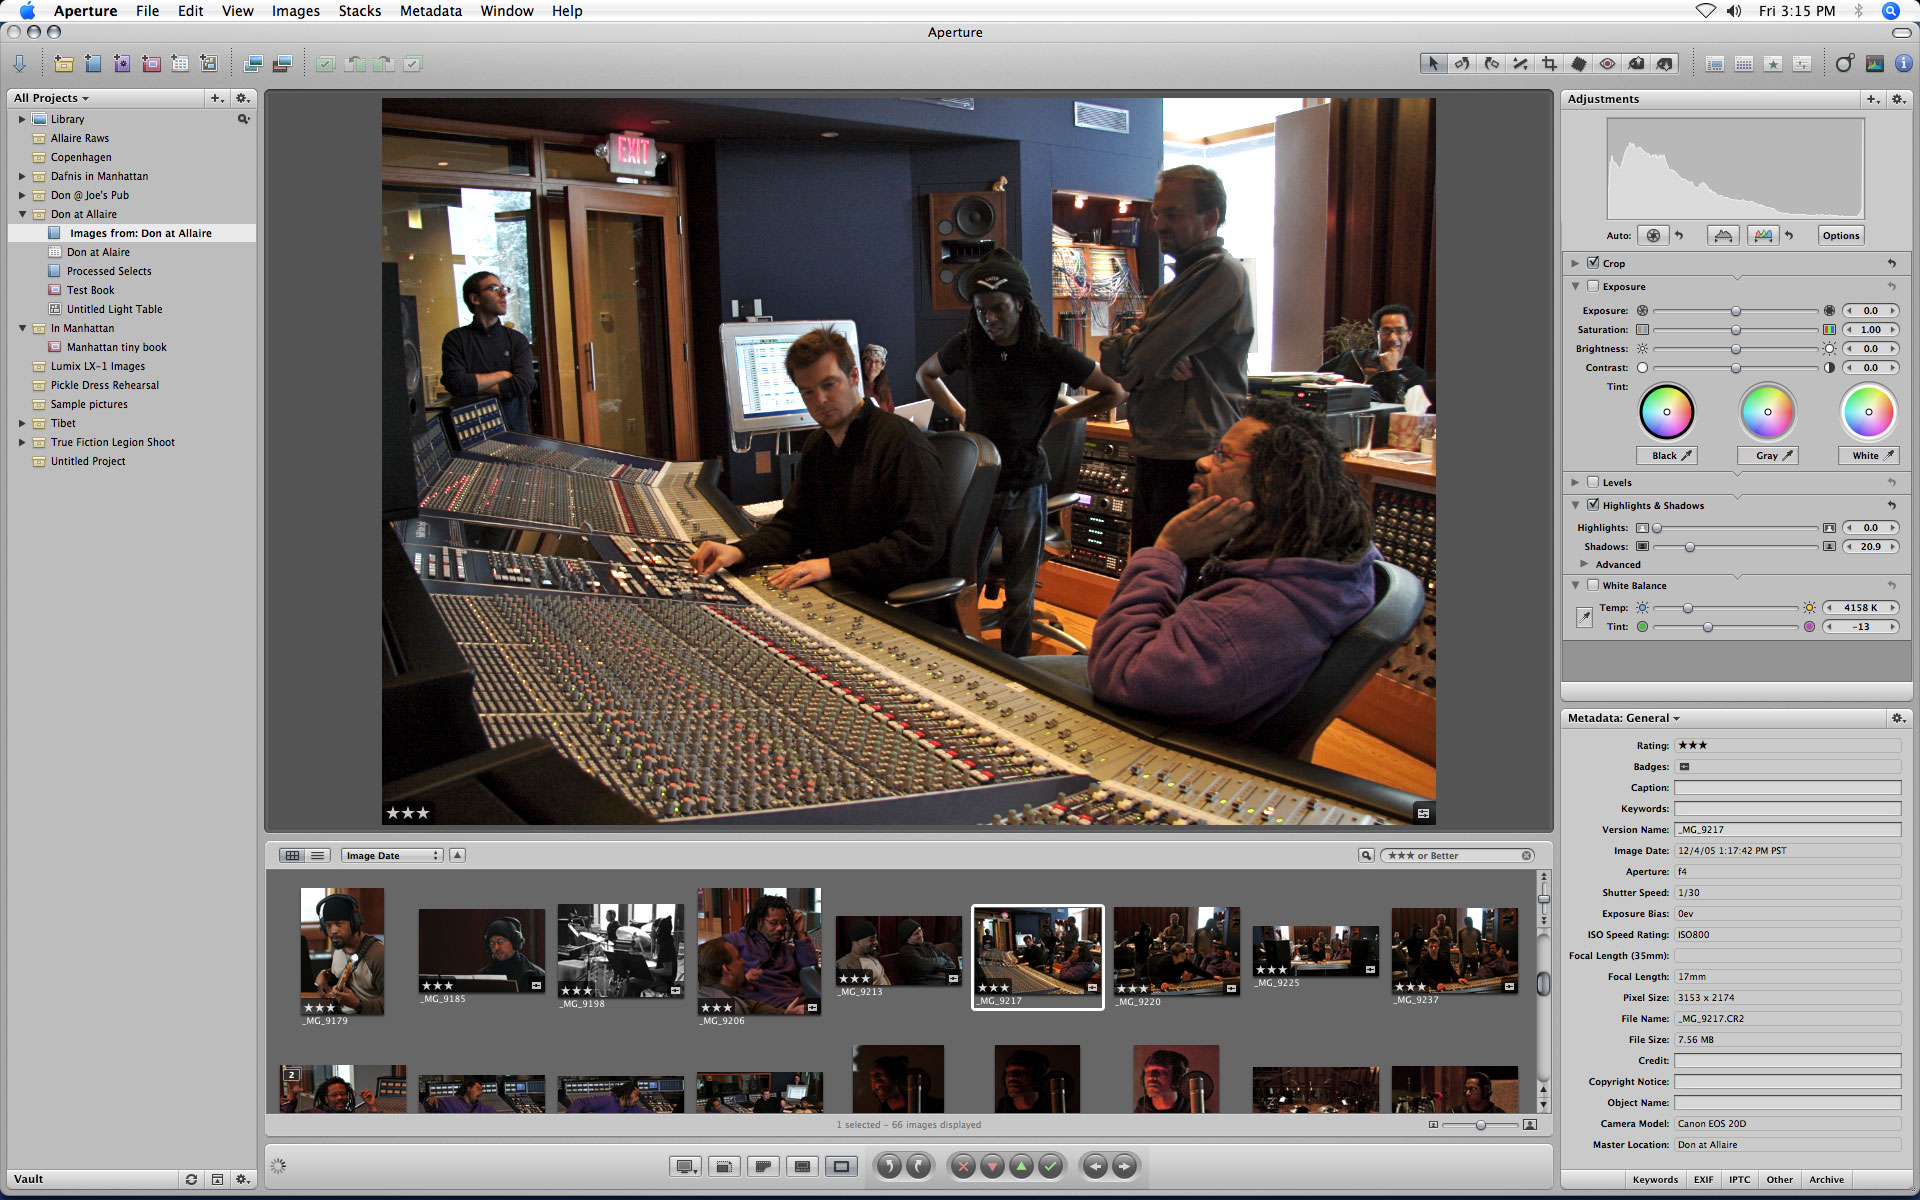
Figure 1. Aperture’s interface is a single window divided into Projects, Browser, and Viewer panes. Click on the image above for a larger view.
Like iPhoto, Aperture lets you quickly switch between images by clicking on them in the Browser. You don’t need to open and close separate windows, and you can freely move from one document to another, making edits here and there. This non-document-centered approach is a real strength of Aperture, particularly when it comes to comparing and sorting images.
Aperture’s interface includes a lot of eye candy. Palettes don’t just appear and disappear, they fade in and out, while image thumbnails animate about the screen as you change their ratings. As you work with multiple images, they automatically arrange themselves on screen in gracefully choreographed motions. All of this is designed to make Aperture feel like a real light table or desktop, with images you can slide around and shuffle, and it makes the program great fun to use.
Many controls and tools are housed in semi-transparent, floating palettes similar to the Dashboards in Apple’s Motion software. With the release of Tiger, the term “dashboard” has a new meaning in the Mac lexicon, so Apple has christened Aperture’s floating control palettes “heads-up displays,” or HUDs.
Apple has violated some of its core interface guidelines in creating Aperture. Some commands are in one location only, usually hidden away in a HUD, and many users have complained about the tiny type size used for the program’s interface elements. But in general, the Aperture interface is good. It presents a self-contained work environment that hides the rest of the OS, yet doesn’t upstage your images while you’re working.
Importing
In Apple’s ideal scenario, you never need to leave Aperture for any post-production. Aperture provides tools for every step of your workflow, from importing images from your camera to final output.
Like iPhoto or Image Capture, you can set Aperture to automatically activate when you plug in a camera or media reader. Also like iPhoto, Aperture insists on copying all of your media to its own internal library. The Aperture library is a package that, by default, sits in your Pictures folder, though you can easily define any location for the library through the program’s Preferences dialog box.
In the current atmosphere of fretting over proprietary raw formats, many users have expressed concern about having their images locked up in some Apple-owned construct. However, the Aperture library does not re-encode your images in any way. It’s a standard OS X Package — you can open it in the Finder by control-clicking on it and choosing Show Package Contents. Inside, you’ll find all of your images arranged into folders.
However, Aperture’s iPhoto-like library scheme does create many other workflow problems, as I’ll explain in a bit.
When you plug in a camera or card reader, or choose to import images stored on any other type of mounted volume, Aperture opens its Import dialog box, which provides thumbnails of all of the images contained in the source media. A large arrow indicates which project the images will be imported into (Figure 2).

Figure 2. When you plug in a camera or media reader, Aperture brings up the Import dialog, which lets you select images, add metadata, and select the project you want to import into. Click on the image above for a larger view.
The Import dialog includes metadata fields that let you assign metadata to images as you import. Unfortunately, the program doesn’t provide any form of savable metadata templates for quickly filling in metadata. However, it does have a nice auto-complete feature that streamlines repetitive metadata entry.
You can import some or all of the images displayed in the Import dialog. Importing itself is a little slower than in Adobe Bridge, but not significantly so. Aperture also lets you import an existing iPhoto library.
Aperture doesn’t support nearly as many raw formats as does Adobe Camera Raw. If iPhoto or Preview can’t open your camera’s raw files, then Aperture won’t be able to, either. Aperture does support DNG, and this could provide a workaround if your camera’s raw format isn’t directly supported by Aperture. You can convert your raw images to DNG using Adobe’s free DNG Converter However, I didn’t have much luck using DNG files with Aperture. DNGs converted from a Canon EOS 20D consistently crashed the program, while DNGs converted from a Panasonic Lumix LX-1 were labelled “incompatible” by Aperture.
If you’re like most photographers, you probably don’t re-set your camera’s clock every time you change time zones. As such, the time stamps on your images are probably off when shooting in other time zones. Aperture’s nifty Time Adjustment feature can correct for this. Enter the appropriate offset, and the time stamp of your images is adjusted accordingly. (The program doesn’t update the time stamp in your original file; rather, the corrected time is stored in Aperture’s internal database.)
Aperture 101
After importing, you can click on a project to view its contents. It’s easy to resize Aperture’s three different panes to allow for a larger thumbnail view or a larger Viewer pane. Preset pane configurations are designed for optimized thumbnail browsing, keyword assigning, and image editing. However, you can’t save your own custom configurations.
Like Adobe Bridge, iView MediaPro, or other image cataloging programs, you can drag thumbnails around to re-order them, or use Aperture’s toolbar to rotate images. If you’re using a window layout with a viewer pane, you’ll see a large preview of your image any time you click on a thumbnail.
But where Aperture really scores over other image catalogers, browsers, and editors is that you can click on multiple thumbnails and see multiple previews side-by-side, just as you would with physical transparencies or slides (Figure 3). This is probably the single most important improvement that Aperture brings to the digital photography workflow. There are plenty of tools out there that let you filter and sort and add keywords, but Aperture’s facilities for viewing multiple images simultaneously give it the edge when you’re trying to choose your selects from a day’s worth of shooting.

Figure 3. One of Aperture’s simplest, and best, features is its ability to view any number of image previews side-by-side. Click on the image above for a larger view.
To further aid you in picking and comparing, Aperture lets you group images into Stacks, which are collections of related images (Figure 4). Each stack can have a “pick” that is your favorite of that particular batch. When you close the stack, only the pick is visible. With the stack open, you see all of the images contained inside.

Figure 4. Stacks appear as groups of images and can be opened or closed. The stack on the left is closed — note the overlay showing how many images are in the stack — while the stack on the right is opened. Click on the image above for a larger view.
Stacks are handy for grouping any collection of images, but they’re particularly useful for bracketed shots and bursts of shots, where you want to pick out just the best from a series. Aperture can automatically group images into stacks based on the time interval that elapsed between exposures. When you choose to Auto-Stack, a simple slider lets you adjust the interval you want to use for stacking your images. As you slide the slider, your images automatically clump together into groups of related shots.
For sports, wildlife, event photographers, or anyone who auto-brackets, Auto-Stacking is a surprisingly valuable tool. With it, you can quickly get a sense of how many final images you might be working with.
There are several commands for editing stacks, allowing you to manually add images to an existing stack, to manually group images into a stack, or to split an existing stack into separate stacks. You can manually create stacks from scratch, or start with the Auto-Stack tool and then refine its results by hand.
Stacks are made more useful thanks to Stack Mode, which provides a simple, well-conceived process for selecting the best image in a stack. In Stack Mode, the current pick is displayed in the viewer, alongside the next image in the stack. As you use the arrow keys to cycle through the rest of the images in the stack, the Pick remains in the viewer, while the other images are placed alongside it. If you decide you like one of the compared images better, you can designate it as the pick, and continue comparing — but now you’ll be comparing against your new pick. Other tools let you promote and demote images up and down the stack.
By the time you’re done, your stack will have the best image as its pick. More than likely, the rest of your images will have been sorted by your descending order of preference.
Apple has done a great job thinking through the process of comparing and picking images. Unfortunately, Stacks have two major shortcomings. First, Auto-Stacking is incredibly slow, even on a speedy computer. Unfortunately, Stacks have a major shortcoming in Auto Stacking is incredibly slow, even on a speedy computer. During that time, Aperture was completely frozen with a spinning rainbow cursor. I tested Aperture on a range of machines, and even on a zippy quad G5, auto-stacking 600 images left me in spinning rainbow cursor land for more than fifteen minutes, and sometimes caused Aperture to crash.
Though Apple was surprised to hear that my Auto Stack performance issues were this extreme, they did say that they understand that Stack performance can be an issue, and they will be addressing the issue in an update.
Loupe de Loop
When comparing images, focus is often the deciding factor that prompts you to pick one over another. Aperture has two ways to get in close to check the focus of an image. The Loupe tool lets you examine a zoomed swatch of an image, without having to magnify the entire picture (Figure 5). Simply pick the Loupe tool from the main toolbar, or press the ~ key, and then drag over the area you want to examine.

Figure 5. Aperture’s Loupe provides a simple way to zoom in on any portion of an image. Click on the image above for a larger view.
You can change the size of the magnified area as well as the amount of magnification. The Loupe tool even works on thumbnails. Drag it over any thumbnail on the screen and you can examine a zoomed view of that image. Aperture can pull this off only by loading the entire image, so the Loupe tool isn’t as speedy and seamless as I’d like. If you quickly move the Loupe across several images, you’ll have to wait while each successive image loads.
However, Aperture is smart about caching the images you’re currently perusing, so the Loupe tool works fairly quickly when you’re comparing.
At any time, you can press the Z key to zoom the currently selected image to 100%. If you’ve selected multiple images, all of them will be zoomed to 100% and divided evenly across your viewer pane (Figure 6). Though the Loupe tool looks really cool, I found the Zoom command to be much more useful, both because it requires but a single key press, and because you can see a larger section of your images.

Figure 6. When you zoom multiple images, Aperture displays both at 100%, dividing the screen evenly among them. Note, too, the small navigator window that displays the current zoom position. Click on the image above for a larger view.
Aperture suffers from one glaring zoom omission: It lacks standard zoom-in and -out controls. You can view an image at 100% or fit to the current viewer window, but nothing in between. Apple seems to believe that photographers mostly want to view a 100% crop of a small part of an image — hence the Loupe tool. That’s not how I’m used to working, so I’m frustrated by the lack of standard magnification tools. If you’re like me, you’ll probably find yourself reflexively reaching for ctrl-plus/ctrl-minus to zoom the image in and out. This limitation is especially galling when you’re editing. The Loupe tool is the only way to get more than a 100% zoom, and it’s not particularly useful while using the program’s editing features.
For much more on Aperture, including my buying advice, go to page 2.
This article was last modified on January 18, 2023
This article was first published on December 20, 2005
Commenting is easier and faster when you're logged in!

Recommended for you
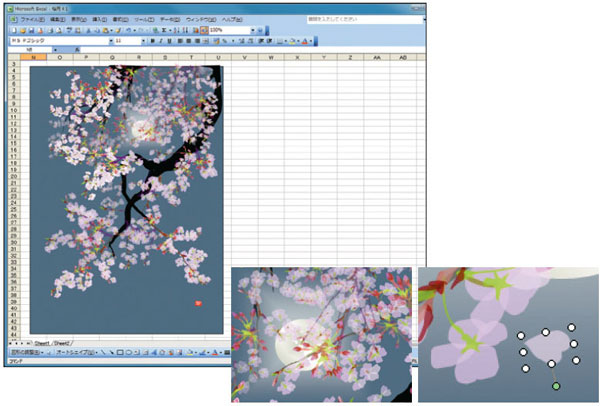
Painting with…Excel?
Probably not too many folks are familiar with the term “golden hammer,...

Damn You, Art School
It takes more than a good education to succeed in a any field. It takes real-wor...

Learn About Photoshop CC While You Use It With the New Features Panel
We are all creatures of habit and develop our favorite ways of getting work done...