
Reshaping Objects
You don't have to limit your designs to use just the few basic shapes you can draw in InDesign. Here's how to alter shapes to make just about anything you...

InDesign has a few basic shapes to choose from in the Toolbar presented on the left (if it’s not visible, choose View > Toolbar). The basic shapes available are an Ellipse, Rectangle, and Polygon. But what if you need something a little different? There are several ways to reshape the basic objects you can draw with InDesign. Let’s take a look at some of these options.
Applying Corner Effects
If you click on a rectangle to select it, the first thing you might notice is a yellow square on the side.
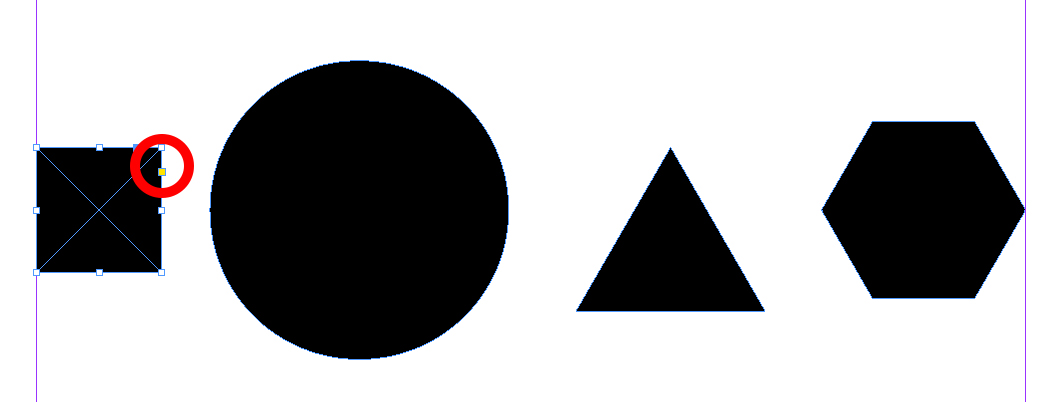
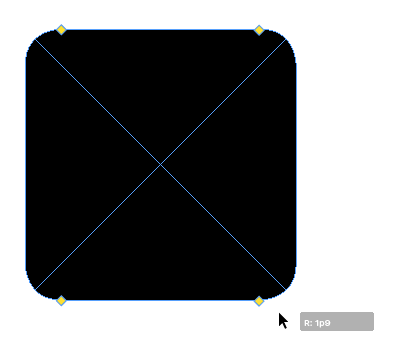
Clicking this square allows you to access InDesign’s Live Corners feature, where you can drag any corner to apply a corner effect. For example, you can drag to make rounded corners.
The other objects don’t have the Live Corners controls. But you can edit the corners of, say, a triangle by choosing Object > Corner Options, or use the controls in the Control panel at the top of the screen.
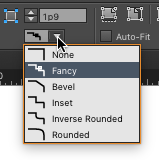
 Here I’ve used 7 mm corner effect, and for the corner style I’ve used a Fancy. You can also choose Rounded, Beveled, Inverse Rounded, or Inset.
Changing Shapes with a Script
InDesign comes pre-loaded with some nifty scripts, including one called Path Effects. You can access it in the Scripts panel by choosing Window > Utilities > Scripts

To run the script, double-click it. Then, in the dialog box play around the settings shown here.

Using the Pencil Tool
Despite the fact that you can get nice results by reshaping objects with the Pencil tool, not many folks have ever tried it. If you have, let me know in the comments!
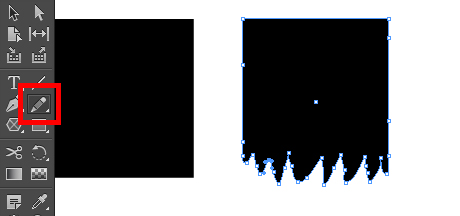
First, select your shape, then go to the Tools bar on the left and locate the Pencil tool (or press the shortcut N).
With the shape active, drawing near the it with the Pencil tool will alter the shape of the object. Of course, you can also draw freehand with the Pencil to create your own unique shapes from scratch.
Using the Pathfinder
The Pathfinder lets you create new shapes by adding or subtracting one shape to or from another. Choose Window > Object and Layout > Pathfinder to open the panel.
 There are plenty of options in the panel, so the best way to get to know them is to overlay two or more objects and just start experimenting! Fearless clicking is a tried and trusted scientific method for finding out what a button does.
Also highlighted in the figure above are the Convert Shape options (also found in Object > Convert Shape). With these features you can convert a rectangle to another shape, like a circle or other shape.
Changing Multiple Shapes at Once
Did you ever work hard to create a lovely design, like the one shown below composed of hexagons, only to have someone else decide that instead of hexagons they wanted a heptagons (or vice versa)!? Before I knew the trick I’m about to describe, I’d redraw all the hexagons and then re-place all the images into the new image frames—an awful job. So I’m happy to share this trick with you guys!
Here’s our example: How can you change all the shapes so they have more or less points?
First, select all the objects you wish to change (it doesn’t matter if they are squares, circles, triangles, etc.) If you want to convert them all to a polygon shape, you can do so with the Convert Shape option I mentioned earlier, or by using the Pathfinder panel. But the caveat here is that InDesign will only convert your shape(s) to the last-used setting. So if the last time you used the Polygon tool, you created a 6-sided polygon with a 50% Star Inset, then that’s what you’re going to get if you use the Convert Shape option.
An even easier method is to select all the objects you want to change and double-click the Polygon tool. This opens the Polygon Settings dialog box where you get the option to change the number of sides and Star Inset of whatever objects you have selected.

Controlling Individual Points
There are other ways to alter the shape of objects that allow you to precisely target specific points along the path that makes up the object. For example, you can use the Pen Tool to add or remove points on a shape. And using the Direct Selection tool (or the White Arrow tool as I like to call it), you can drag the points around to change the shape of an object.
This article was last modified on May 12, 2021
This article was first published on March 2, 2016
Commenting is easier and faster when you're logged in!

Recommended for you

Data Merging – Part 2
Last week I began a series on using InDesign’s powerful Data Merge feature...
Don’t trust the display of IDML files in Bridge
Have you ever noticed that IDML files don't always display correctly in Bridge?...
Viewing Transparencide
When Tim Cole and Rufus Deuchler posted their “Stop Stupid PDF Syndrome No...