

Sticky Tools
QuarkXPress switches back to the Item or Content tool — whichever one you last used — straight after you have used any of the tools in the Tools palette. To disable this temporarily, and keep a tool selected so you can keep re-using it, hold down the Option (Mac) or Alt (PC) key the first time you click on it.
Flyout Tools
To add a Flyout tool to the bottom of the Tools palette, Ctrl-click (Mac) or right-click (PC) on that tool when selecting it for use. Send the tool back to its original flyout by Ctrl-clicking (Mac) or right-clicking (PC) on it.
Deselect All
When the Item tool is active, press the Tab key to deselect everything. This also works while using the Content tool if you have selected two or more items on the page, whether by Shift-clicking them or dragging a selection marquee over them.
Tool Preferences
Double-click on a tool in the Tools palette to open the Preferences window for that tool. You can then click the Modify button and customise its defaults. For example, you could set all new picture boxes to have a coloured frame of a specific thickness. There are no customisable options for the Item, Content or Rotation tools.
Easy Zoom
When you are not editing text, you can zoom in and out of your layout by holding down the Command (Mac) or Ctrl (PC) key and tapping + or –. You can set the zoom increments in the Zoom tool’s Preferences window.
Precise Zoom
You can zoom to a precise magnification level without using the Zoom tool by pressing Ctrl+V (Mac) or Ctrl+Alt+V (PC) and typing the View percentage you want. To finish, hit the Return or Enter key.
Hand Scrolling
It’s really easy to move around a spread, or even around an entire layout, without using the scroll bars. So why not try this instead? First hold down the Option (Mac) or Alt (PC) key and then click-and-drag across the layout window.
Live Scrolling
‘Live’ scrolling is enabled by default in QuarkXPress 7, but you can easily disable it in the Application> Input Settings section of the program Preferences to accelerate onscreen performance. When ‘live’ scrolling is disabled in this way, you can temporarily re-enable it by holding down the Option (Mac) or Ctrl (PC) key while dragging on the scroll bars.
Program Defaults
Adjusting QuarkXPress> Preferences (Mac) or Edit> Preferences (PC) while a project file is open will affect that file only. To change the defaults for the entire program, and all subsequent project files you create, simply adjust the Preferences while no files are open.
Contextual Menus
Ctrl-click (Mac) or right-click (PC) on items in your layout to open a pop-up contextual menu of commands relevant to the currently selected item. Contextual menus are also available inside most palettes — they are often context-sensitive according to the areas in which you click in each palette.
No Layouts
QuarkXPress 6.x and 7 project files can contain multiple ‘layout spaces’, which let you switch between them using tabs at the bottom of the project window. If you always work in just one layout space and want to hide the tab row when creating new files, just tick the Single Layout Mode option in the New Project window.
Save As 6.0
To save a QuarkXPress 7 project to QuarkXPress 6.0 format, go to File> Export> Layouts As Project and choose 6.0 from the Version pop-up menu that appears. The Export Layouts As Project dialog window also lets you specify which layout spaces to include if you don’t want to export the entire project.
Duplicate Layout
It is possible to use layout spaces to work conveniently on alternative versions of the same design job. After laying out the initial design, use the Layout> Duplicate command to create instant copies that can then be worked on independently within the same project. Alternatively, you can use the Shared Content palette to work with the same text and pictures across the different layouts.
Alternative Content
To experiment with different localised content within the same design, such as alternative headlines for a magazine cover or alternative pictures for a feature layout, simply place the different versions of the content into separate layers. You can then work with just one layout, showing and hiding the various layers as required with just a couple of clicks.
Layer Runarounds
When using the previous tip to experiment with alternative versions of a layout, you may encounter problems with hidden runaround pictures affecting visible layers. To disable this for a layer, double-click on the layer in the Layers palette to open its Attributes window and untick the Keep Runaround option.
Hide/Lock Other Layers
In the Layers palette, Ctrl-click on the Show/Hide eye icon next to a layer. This will instantly hide all other layers except for the one you clicked. In the same way, Ctrl-clicking on the Lock icon next to a layer causes all layers except that one to be locked immediately.
Move Layer Items
To move a selected item from one layer to another without using the Move Item to Layer button, just click on the tiny dotted square to the right of the current layer’s name in the Layers palette and drag-and drop it to a new layer name.
Merge Layers
To merge two or more layers into a single layer, Command-click (Mac) or Ctrl-click (PC) on each of the layer names in the Layers palette, then click on the Merge Layers button. Choose which of those layers you want the other selected layers to merge into (the Destination Layer) and hit OK.
Colour-Coded Layers
The bounding box around items is colour coordinated with the layer each item is in. If you don’t like the default colours — if you find yellow or grey too pale to be viewed easily on-screen, for example — you can customise them easily by double-clicking on the appropriate layer’s name in the Layers palette and choosing a new Layer Colour.
Quick X
When an item is selected on the page, type Command+ Option+M (Mac) or Ctrl+Alt +M (PC) to highlight the X co-ordinate field at the top left of the Measurements palette, automatically switching to the Classic tab if necessary. You can then progressively press the Tab key to jump to other fields or Shift+Tab to move backwards.
Tab Bar
If you’re not a fan of the automatic mouse-rollover pop-up action of the Measurements palette’s tab bar, it’s easy to change it. Ctrl-click (Mac) or right-click (PC) on the left-hand title bar of the palette to call up a contextual menu. The top three menu items here let you set the tab bar to Always Show, Always Hide, or Show When Rolled Over.
Calculate Fields
Most of QuarkXPress 7’s numeric fields — including those in the Measurements palette and most dialog windows — accept simple additions, subtractions, multiplications and divisions, as well as complete numbers. For example, if you’d like to double the width of a selected item, simply type ‘*2’ after the existing value in the W field of the Measurements palette.
Mixed Fields
In addition to the previous tip, numeric fields can accept mixed units of measurement. For example, you could enter ’14pt + 2mm’ in the leading field for selected text.
Drag Colours
When something on your page is selected, you can drag-and-drop colours from the Colours palette onto any item’s background or frame, whether it is selected or not. This can be handy for quickly colouring multiple box frames or single cells in a table. You can even drag-and-drop colours into any open project, even if it is not the currently active window.
Quick Colour
You don’t need the Colours palette to choose, apply or create colours. A convenient pop-up swatch menu of all the available colours in your project can be found within the Classic tab of the Measurements palette. Scroll to the top of this menu and you’ll find the New… command for creating additional colours.
Locked Masters
All items on a Master Page sit in the Default layer. So locking the Default layer effectively locks all the Master Page items in your layout, leaving you free to work in other layers. This can be pretty useful if you don’t want Master Page items to be edited by mistake, saving you the trouble of having to lock each item individually.
Back-up Masters
Instead of preserving Master Page items by locking the Default layer, duplicate the Default layer (use the contextual menu in the Layers palette) and click on this new layer’s Show/Hide eye button to hide it. You can use this hidden duplicate layer as a back-up repository for your Master Page items.
Copy Pages
To quickly copy pages from one project to another, open both project windows side-by-side and view pages as thumbnails (Shift+F6). Command-click (Mac) or Ctrl-click (PC) on each page you want to copy from one window, then drag-and-drop them into the other window you’re using.
Copy Master Pages
You cannot drag-and-drop Master Pages between projects because Master Pages cannot be viewed as thumbnails in QuarkXPress 7. However, if you drag an ordinary layout page thumbnail to another project, it will automatically copy over the Master Page it is based on and add it to the destination project’s list of Master Pages.
Page Numbering
Here’s a quick and easy way to add a page number to any page in a document layout. Simply draw a text box and type Command+3 (Mac) or Ctrl+3 (PC). If you do this within a Master Page, all the layout pages based on that Master will be numbered automatically for you.
More Page Numbering
If the text within your document flows on from one page to another, it is possible to automate page number lead-ins and lead-outs, such as “continued from…” and “continued on…”. To move to the previous page number, simply select Command+2 (Mac) or Ctrl+2 (PC). To move to the next page number, enter Command+4 (Mac) or Ctrl+4 (PC).
Ruler Guides
In addition to the page border and column guides in a layout, you can add more guides by dragging them out of the horizontal and vertical rulers at the top and left-hand edge of your project window. To get rid of these ruler guides, just drag them back into the rulers.
Ruler Units
To quickly switch between different measurement units (inches, centimetres, etc) in the program, try Ctrl-clicking (Mac) or right-clicking (PC) in the horizontal or vertical ruler to call up the contextual menu. Now simply choose the type you want from the Measure submenu.
Guide Display
Holding down the Shift key while dragging a guide from the ruler will cause that guide to only display at or above the current zoom level. For example, a guide added in this way at 200 per cent zoom will be automatically hidden when previewing the page at 100 per cent.
Delete All Guides
When a layout becomes cluttered with unnecessary ruler guides, delete them all in one go by selecting Utilities > Guide Manager. Next, click the Remove Guides button. You also have the option of deleting just the horizontal or vertical guides, and to delete locked guides as well.
Edit Column Guides
Once you create a new layout, its page margins and column guides cannot be edited under Layout> Layout Properties. Instead, switch to a Master Page within the Page Layout palette and choose Page> Master Guides. Note that changing these settings will affect all layout pages based on that particular Master Page.
Centre Paste
To centre an item on a page, first cut the item to the clipboard, go to View> Fit In Window — or press Command +0 (Mac) or Ctrl+0 (PC) to do the same thing from the keyboard — before pasting the item back onto the page.
Paste In Place
To duplicate one or more selected items and put them on another page in precisely the same position, copy them to the clipboard, go to the destination page and use the Edit> Paste In Place command. You can also use this command to duplicate items on the same page but in different layers.
Change Shape
Boxes, lines and shapes are interchangeable items: you can convert one into another instantly by using the Item> Shape commands. Enabling Item> Edit> Shape lets you customise the shape of irregular boxes and lines.
Rounded Corners
You can turn any rectangular box into a box with rounded corners by entering a value in the Corner Radius field in the Space/Align tab of the Measurements palette, which can be found below the Rotation field. Enter a value of zero to return the box to its original rectangular shape.
Closing Paths
There is no explicit ‘join’ command for closing open Bézier paths created in QuarkXPress, but it can be done. Choose Item> Shape and hold down the Option (Mac) or Alt (PC) key as you select the Freehand Box thumbnail in the submenu.
Edit Shape
To edit the shape of a rectangular text or picture box, choose Item> Shape and click on the Freehand Box thumbnail. Nothing will appear to have changed, but now you can use the keyboard toggle Shift+F4 to enable and disable the Edit Shape attribute on the fly.
Merge Union
A complex box shape can be created easily by combining several simple boxes. Draw any number of overlapping rectangle, ellipse, Bézier and Freehand boxes within the same layer, select them all and use the Item> Merge> Union command. To edit the shape further, hit Shift+F4.
More Merge Union
The Item> Merge> Union command also works on boxes that do not overlap each other. This means you can easily select several independent boxes, merge them with the Union command, and then flow a single text story across them or place a single picture inside them all.
Temp Node Edit
While drawing a path or shape outline using one of the Bézier drawing tools (Line, Text Path, Text Box, Picture Box), hold down the Command (Mac) or Ctrl (PC) key after plotting a new point. This will allow you to temporarily move the last point you created and edit its Bézier handles.
Path Corrections
There’s no need to panic if you make a mistake while drawing either a Bézier path or shape outline. Just press the Backspace key. This will delete the last point you plotted, effectively jumping back one step, and then let you continue the path from that previous point.
Gradient Lines
Apply colour blends to lines and Bézier paths with the following cheat. Increase the stroke weight as required, then select Item> Shape and choose the Freehand Box thumbnail. The line will turn into a hollow shape, to which you can immediately apply a colour blend of your choice as a background colour.
Compare Styles
When editing Colours, Dashes & Stripes or Print Styles in their dialog windows under the Edit menu, Command-click (Mac) or Ctrl-click (PC) on two styles. Press Option (Mac) or Alt (PC) and click on the Compare button. You can now compare the two styles side by side.
Export HTML
Normally you can only export a page to an HTML file from within a web layout. You can, however, export any Print layout to HTML using a secret keyboard trick. To do this, simply hold down the Ctrl and Shift keys and go to File> Export> HTML.
Speed Tips
QuarkXPress will launch faster if you have fewer active fonts and use Utilities> XTensions Manager to reduce the number of active XTensions. The Print dialog will open more quickly if you use Utilities> PPD Manager to switch off all unnecessary Printer Descriptions.
This article was last modified on January 10, 2022
This article was first published on February 19, 2007
Commenting is easier and faster when you're logged in!

Recommended for you

Quark Eases the Transition to QuarkXPress 7
Quark Inc. announced today a promotion that enables customers to purchase new Qu...

Scanning Around With Gene: Stuff Magazine
A look back at a magazine that featured punkish designs and cutting edge type in...
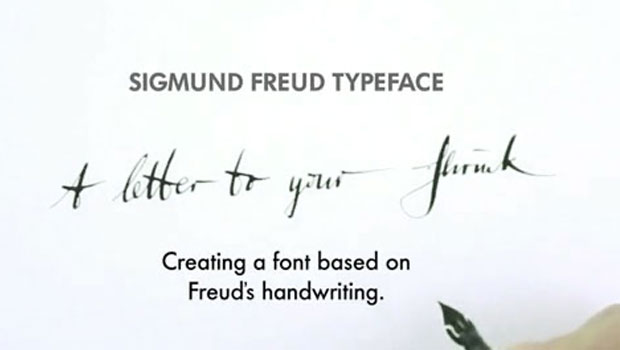
Freudian Glyphs: The Sigmund Freud Typeface
Let’s “kick” off the week with a cool new font-related Kickstarter project. This...