


Adding Grids to your Design
Like scan lines, grids are essentially just square patterns. Before making a grid, the first thing you need to consider is the size you want. For our example, create a new transparent document that’s 20 pixels wide by 20 pixels high. Next, use the Rectangular Marquee tool to draw a selection that’s a few pixels wide across the top and side of the document. Then fill the se-lection with black, as shown in Figure D. Deselect the black area. Then, choose Edit > Define Pattern as you did before for the scan lines tech-nique and name the pattern Grid. You can work with them in just the same way as with the scan lines. You can see our resulting grid in Figure D. Keep in mind that you can use the Free Transform tool to create perspective with the grid as we did in our cover image.


Figure D: Layering grids can help unify an image.
Halftone Graphics
When viewed under slight magnification, a print that has been produced using a halftone screen will show a dot pattern that’s sometimes called Benday dots. Lichtenstein has also popu-larized Benday dots in his comic book paintings. The dots are what create the shades of tone and density in a printed image, but you can utilize the technique for graphic elements as well. In Figure E, you can see how we used the Benday pattern to create edge effects surrounding simple graphic shapes. We also used this same technique to create the dot pattern on the cover.
To try out this technique, create a new docu-ment that’s 3 inches by 3 inches at 200 ppi and then create a new channel. Paste in the graphic you want to work with. We dropped in a simple teacup graphic, as you can see in Figure F. Next, choose Filter > Blur > Gaussian Blur. In the re-sulting dialog box, set a Radius of 3 and then click OK. The more blur you add, the more dots you’ll have around your graphic. Now, choose Filter > Pixelate > Color Halftone. In the result-ing dialog box, set the Max. Radius to 4 and then click OK. You can leave the other settings alone unless you want to change the angle of the dots. Click OK and your graphic should be similar to the bottom images in Figure F, depending on whether you’re working with a black or white background.
Since you’re working in an alpha channel, your final graphic is really just a selection. To apply it to a layer, choose Select > Load Selection and load your alpha channel. Then, click on the Layers palette; you’ll see your active selection on Layer 1. You can then fill it with any color that you want. Just select a color and then choose Edit > Fill and use the Foreground Color. Click OK to apply the color. Once you’ve filled the selection with color, you can lock the transparent pixels on the layer and paint in different colors over the image.

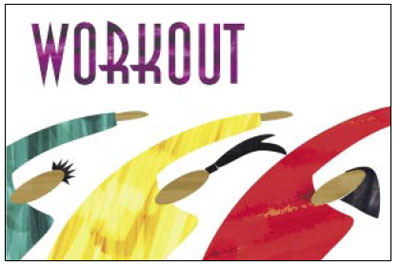
Figure E: Though half-toning is an old process, it can give graphics a more modern pop-art look.

Figure F: You can create a single color halftone in a channel in three steps.
This article was last modified on January 3, 2023
This article was first published on July 19, 2002
Commenting is easier and faster when you're logged in!

Recommended for you
Photoshop How-To: Making Painted-Paper Illustrations
This story is taken from “Adobe CS Creative Studio.” Peachpit Press...

CreativePro Tip of the Week: Photoshop Blend Mode Shortcuts
This CreativePro Tip of the Week for Photoshop blend mode shortcuts was sent to...
Free Lightroom 5 QuickStart Guide
For anyone looking to get a solid grasp on how to use Adobe Photoshop Lightroom,...