


Here’s a little twist on one of my favorite FX techniques from the Graphic Effects ebook: how to take any image and make it into a peeling sticker.
Peeling Stickers in InDesign
1. Start by drawing your sticker shape. For an easy example, let’s try a circle. Fill it with a color.

I also placed a photo of some wood to make a nice surface for the sticker to, well, stick to.
2. Duplicate the circle and set the copy aside for now.
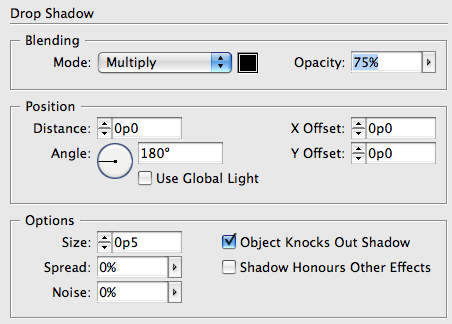
3. Give it a teeny tiny drop shadow, directly behind the circle (note the X and Y Offset values are both zero).


4. Decide where you want the peel to be. Let’s say, the bottom right. With the Direct Selection tool, click on a point so you can see the control handles.
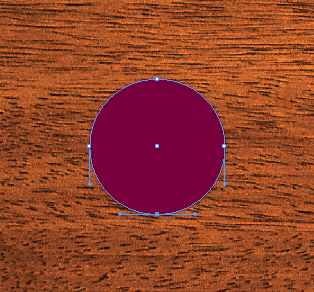
5. Click on ends of the handles with the Convert Direction point tool to snip off the handles.

6. Option/Alt drag the circle so you make a copy that overlaps the peeled area. You may want to lower its opacity or set the fill to None so you can see what you’re doing. You need to place it precisely for the illusion to work.

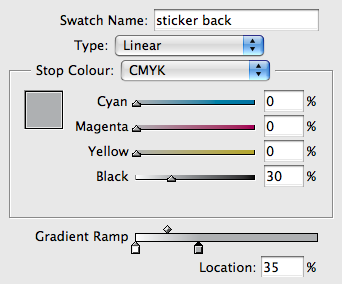
7. Cut the new copy and paste it into the sticker shape.
8. Fill the pasted into shape with a subtle white to gray gradient.

9. Drag with the Gradient tool make the gradient parallel to axis of the peel.

10. Give it a slightly larger drop shadow.

11. Then, for the peel de resistance: make some sticky glue residue where the sticker peeled off. Retrieve the extra circle you made in step 2. Fill it with white and lower its opacity to somewhere in the neighborhood of 20% (depending on the color of background). Place it between the sticker and the background image.

By grouping other items with the peel, you can also paste them into the sticker in step 7.

Tricks like this can really make your designs stick out ;)
This article was last modified on January 26, 2022
This article was first published on February 22, 2011
Commenting is easier and faster when you're logged in!

Recommended for you

InDesign Tip: Copying File Paths from the Links Panel
Ever need to record the location of placed files, either for your own records or...

Free InDesign and InCopy CS3 Trials Available
Adobe just made free trials available for all their web and design Creative Suit...

Work Week Projects: File-Handling Features in Adobe Bridge
Five quick exercises to do while you're at work to learn important skills in Ill...