
Working with Parent Pages in InDesign
The more you know about InDesign parent pages, the more you can streamline your workflow and boost productivity.

This article appears in Issue 54 of CreativePro Magazine.
Parent pages are fundamental to efficient document creation in InDesign. They expedite the creation of multipage documents with common elements such as page numbers, headers, footers, and backgrounds.
You can place common frames, images, strokes, or other objects on a parent page, then apply that parent to any number of document pages. Need to make a change in your document? Modify the element once on the parent page, and InDesign will automatically update all the associated document pages.
Yet, that’s just a glimpse of parent pages’ full potential. Let’s explore some of their powerful features and lesser-known capabilities, and get ready to transform your workflow.
Understanding Override Controls
Parent pages (renamed from “master pages” in the 2022 release) simplify creating pages with common elements and streamline changing those elements over multiple pages. And unlike QuarkXPress, InDesign locks parent page items to prevent accidental modifications.
That’s great, but what if only a single document page requires a variation or if a parent page item needs to be altered in one instance only?
Although you cannot directly select a parent page item on a document page, you can still override it. Command+Shift-click (macOS) or Ctrl+Shift-click (Windows) releases the item, setting it to act like a document page item that you can modify.
At the same time, overriding generally maintains a partial connection with the original parent item: The object will continue to update with the parent item except for your specific overrides. For example, if you override a graphic frame and add a stroke to it on the document page, then later add a fill to the parent page version, the fill will also apply to the document page item while maintaining your custom stroke.
Tip: To better understand parent items in InDesign, think about paragraph styles. Suppose you define a paragraph style as Times New Roman. Now imagine manually italicizing one word (creating a paragraph style override); that word is set in Times New Roman Italic. When you later change the paragraph style font family to Adobe Caslon, the single italicized word adopts the new font family to become Adobe Caslon Italic.
There are exceptions. When you override a text frame on a page in your document, you break the content link; new text added to the parent page text frame then won’t appear on that page. And when you move an object on the document page, rotating it on the parent page, for example, won’t also rotate the document page version. That version will be where and how you left it on the document page.
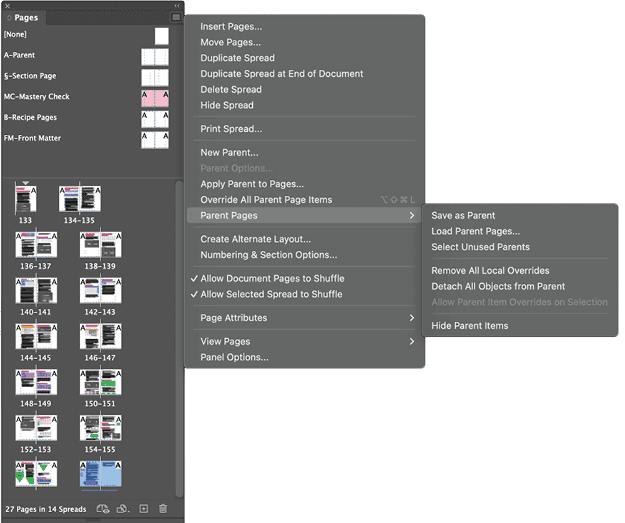
To override all page items for the current page or spread from its parent page, highlight the page in the Pages panel and from the panel menu choose Parent Pages > Override All Parent Page Items (Figure 1). Once you’ve done so, nothing you do to the parent page will affect anything on that document page.
Alternatively, you can Command+Shift-drag (macOS) or Ctrl+Shift-drag (Windows) over an area to override all objects within the marquee selection.
Detaching and Restoring
To make it so the object will no longer inherit attributes from or change with the original parent page item, you must detach it. First, override the item; then, with the object (or objects) selected, choose Parent Pages > Detach Selection From Parent from the Pages panel menu to completely disconnect an overridden parent item from its original.
You can reverse override and detach operations using Command+Z/Ctrl+Z immediately after performing them, of course, but you can also restore the connection later. To do that, manually delete overridden objects and reapply the parent.
Or, you can use the more efficient method through the Pages panel menu: Select a previously overridden object, then choose Parent Pages > Remove Selected Overrides. Doing so returns selected objects to their original, locked, parent-inherited states without affecting other page elements. Obviously, any changes you’ve made to this content on the document page will be lost.
To restore all overridden parent page items, deselect all objects and from the Pages panel menu choose Parent Pages > Remove All Local Overrides.
Applying Parent Pages Efficiently
Although you can apply a parent page by dragging parent page icons from the top of the Pages panel to document page icons below, this method becomes inefficient for multiple pages.
Instead, access this powerful tool through the Pages panel menu by choosing Apply Parent To Pages. Though simple in appearance, this two-field dialog box offers significant functionality (Figure 2).
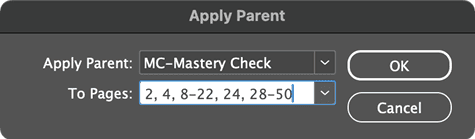
The Apply Parent menu lets you select which parent page to apply, while you use the To Pages field to specify your document pages as:
- Single page numbers
- Ranges using hyphens (2–50)
- Nonsequential pages with commas (2, 4, 6, 8, 10)
- Combinations of both (2, 4, 5, 8–22, 24, 28–50)
If you prefer, you can apply a parent to multiple pages directly within the Pages panel. Select the desired pages (use Shift-click for ranges or Command-click/Ctrl-click for nonsequential pages), then Option-click/Alt-click the parent page’s icon to apply it to all selected document pages.
Converting Document Pages to Parent Pages
When designing, you might realize that elements on your current page will be needed across multiple pages in your document. Or, if you’re like me, and sometimes stay up way too late into the post-midnight hours working in InDesign, you may think you’re working on a parent page, when, in fact, you’re designing on a document page.
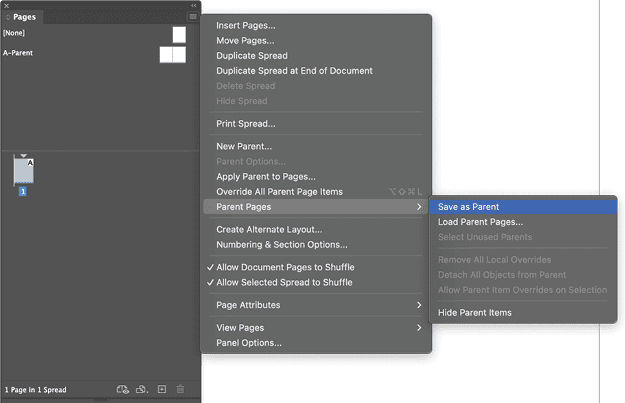
Rather than forcing you to copy and paste these elements or to re-create them manually on a parent page, InDesign offers a direct conversion option: While still on the document page (or spread), go to the Pages panel menu and choose Parent Pages > Save As Parent (Figure 3). InDesign will create a new parent page.
Creating Parent Page Hierarchies
Just as document pages can be based on parent pages, parent pages themselves can be based on other parent pages, creating a hierarchy of parent inheriting from grandparent. You’ll find that capability perfect for creating complex documents like catalogs, technical manuals, textbooks, or other long documents, all of which often require different combinations of common elements.
For example, you might need:
- A folio, header, and footer information on most pages
- Background elements on some pages
- Modified layouts for section opening pages with folios and backgrounds but without headers
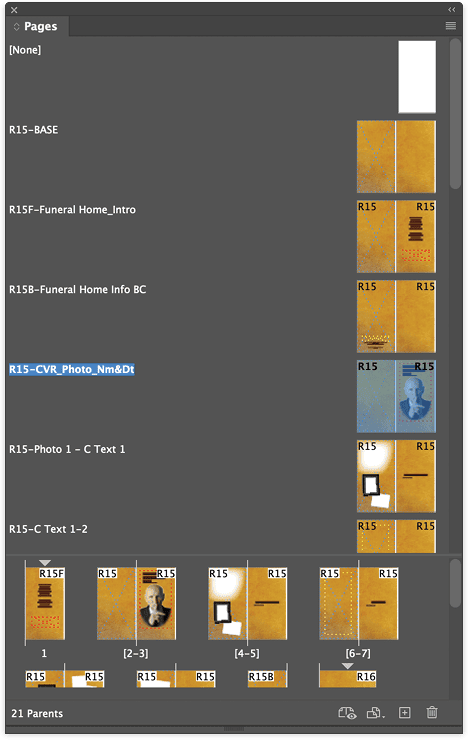
Instead of creating separate parent pages with duplicated elements, establish a parent page hierarchy (Figure 4).
This hierarchical relationship follows the same principles:
- Objects on the primary parent appear as locked items on the secondary parent.
- Changes to the primary parent automatically update the secondary parent.
- Elements from the primary parent can be overridden or detached on the secondary parent.
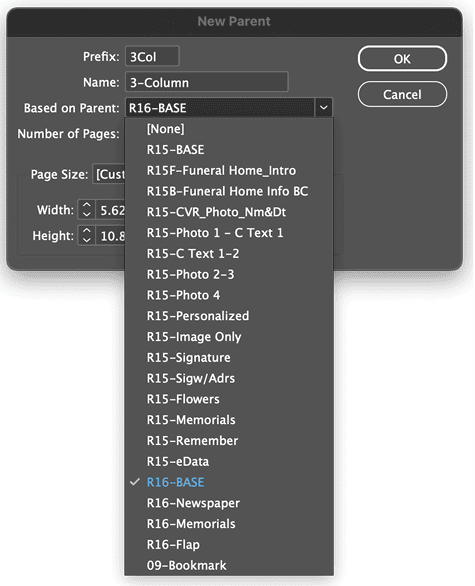
To create a parent hierarchy, choose New Parent from the Pages panel menu. In the dialog box, the Based On Parent menu lists your existing parent pages (but defaults to [None]). Selecting a parent establishes the hierarchy (Figure 5), allowing you to maintain common elements in a single location while creating variations as needed.
Sharing Parent Pages Between Documents
Via a super cool but also mostly unknown feature, InDesign enables you to load parent pages from one document into another. Similar to importing paragraph and character styles from another document, select Load Parent Pages from the Pages panel menu, navigate to an existing InDesign document or template, and import selected parent pages into your current document.
Synchronizing Parent Pages in a Book
If you’re using an InDesign book file (INDB) to assemble your INDD documents into a cohesive publication, you have an even more efficient way of loading parent pages into your documents.
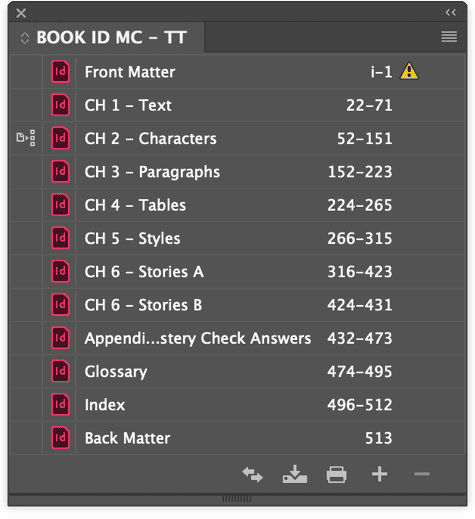
- In the Book panel, find the filename of the document that has the parent pages you want to import to the other documents in the book.
- Click in the left column beside that document to make it the style source— the donor, if you will—of styles, swatches, and other document settings to be synced (Figure 6).
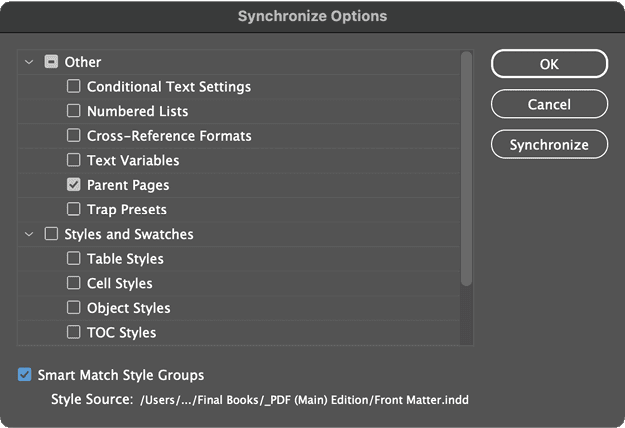
- From the Book panel menu, select Synchronization Options.
- In the list of elements to synchronize across book documents, under Other, turn on the Parent Pages option (Figure 7).
- Click the Synchronize button.
All your parent pages from the style source document will now appear in all the other book documents.
Warning: Synchronize Book, also in the Book panel menu, will let you apply the Synchronize Options command without a dialog box. It is far safer to see what you’re doing.
Organize Your Parent Pages Effectively
Clear organization of parent pages significantly improves workflow efficiency—now, and when you need to revise or duplicate your work months (or years) later. It helps future-you to understand how now-you has organized the parent pages, without wasting hours flipping through the document trying to remember what you did.
First, instead of using meaningless default names like A-Parent or B-Parent, customize both the prefix and name of each parent page through the New Parent dialog box.
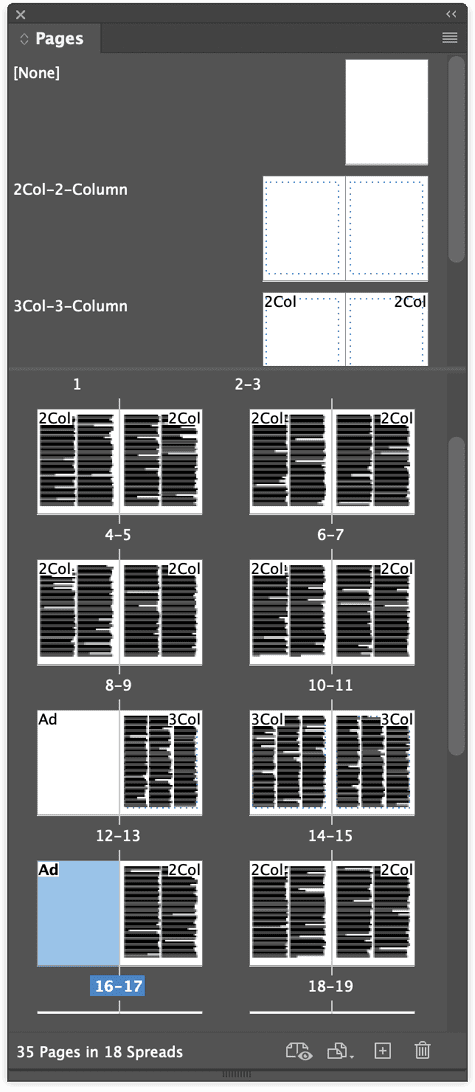
The prefix appears in page corners within the Pages panel, providing instant visual identification of which parent page is applied (Figure 8). For example, using prefixes like 2col, 3col, and 4col for different column grid layouts makes it immediately clear which grid structure each page uses. Other useful prefixes I use include CH for chapter openers, BODY for standard content pages, or AD for advertisement pages.
The Name field allows for longer, more descriptive titles that help team members understand each parent page’s purpose, although these don’t appear in page corner indicators. They do appear in the list of parents in your Pages panel.
This improved organization system reduces confusion (especially for future-you), speeds up page creation, and facilitates collaboration among team members.
Rely On Your Parents
Understanding and effectively using parent pages in InDesign is essential for efficient document creation and management. From basic overrides to complex hierarchies, these powerful tools help you maintain consistency flexibly throughout your documents.
By implementing these techniques and organizational strategies, you can significantly streamline your workflow and reduce the time spent on repetitive tasks.
Commenting is easier and faster when you're logged in!

Recommended for you

Editor’s Picks for The InDesign Conference 2025
Our Editor in Chief lists his must-see sessions for the InDesign Conference 2025...
Using InDesign’s Parent Pages
Learn how to update your long documents instantly with parent pages!

Book Design Basics in InDesign
For book designers, let this article be your guide to getting the most from InDe...