Object Styles for Marking Content in InDesign
How to use objects styles that make it easy to spot images that need work

Did you ever wish for a way to visually mark images in an InDesign layout to remind yourself to do something with them? Maybe you need to replace them or perform some fix in Photoshop or Illustrator but don’t have the time to do it now. The list of potential reasons is endless. When you want to flag something in a way that’s obvious at a glance, you can use an object style. There’s nothing automatic about this method. It’s kind of like using a sticky note. You need to apply the object style manually, and then remove it once the task it’s reminding you to do is done. But the upside is that you can mark any content in need of attention in an unmistakable and easily reversible way. Here’s how. Create a new object style and set it to ignore all Basic Attributes and Export Options. You don’t want it changing anything about the frame or the content, except what you’re going to use as a visual marker.  Under Effects for Object, turn on Inner Shadow. If your document is using RGB images, set the Blending Mode to Color and choose a bright color that will easily catch your eye, like pure RGB Magenta. Set the Opacity to 100%. If you’re using CMYK images in a document for print, a different blending mode like Screen might work better. It helps to pick a color you actively dislike so you’ll be triggered and always notice it.
  Under Position, set the Distance to 0. Under Options, make the Size huge so the shadow fills the largest frame you could ever have. I set the Size to
1000 px. Also, set the Choke to 100% so the shadow doesn’t fade out anywhere.  In effect, this applies a bright pink color overlay that fills any frame it’s applied to—and this is the important bit—over the contents of the frame. If the style only set the frame’s Fill, it would be covered up by the image in the frame. And there’s no way to change the blending mode of the image (so it blends with the Fill) with an object style. But an Inner Shadow applied at the Object level is always on top of everything else, even strokes. So it’s always visible. You can zoom way out and the images with the effect are easy to find on each spread.
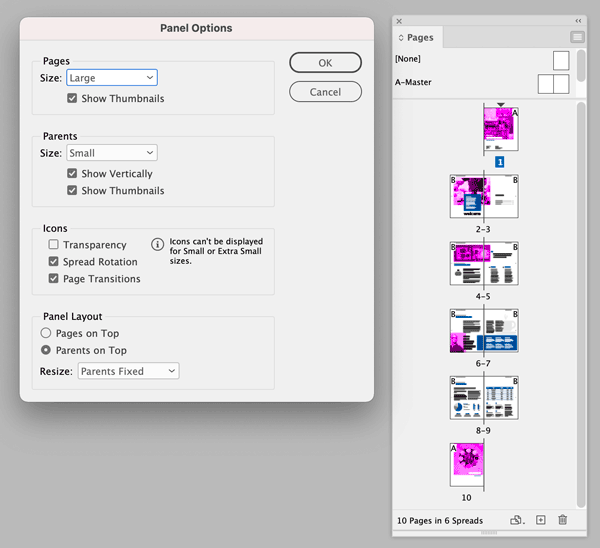
 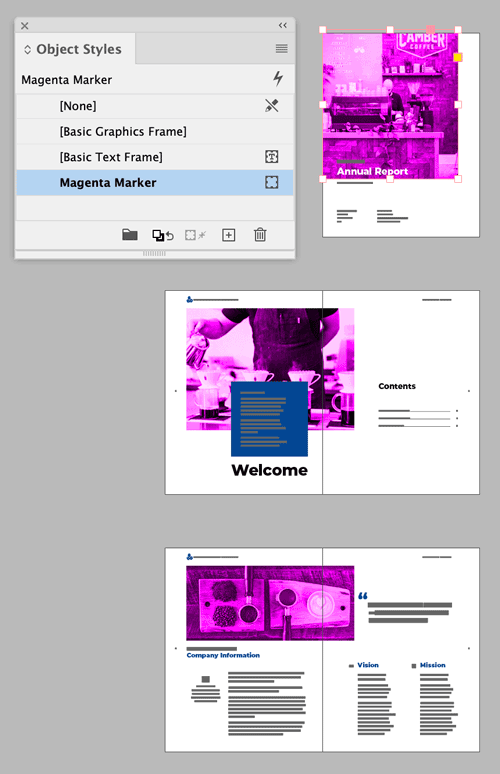 With this kind of object style it’s even easy to spot flagged images in the Pages panel, especially if you use the Panel Options to increase the Pages Thumbnail size.
  Note that if you apply the object style to an empty frame it looks like nothing has happened. That’s because the Inner Shadow won’t be visible until it has something in the frame to blend with. But when you place an image into the frame it will appear with the color overlay effect.
Bonus Round: Finding Flagged Images with a Preflight Profile
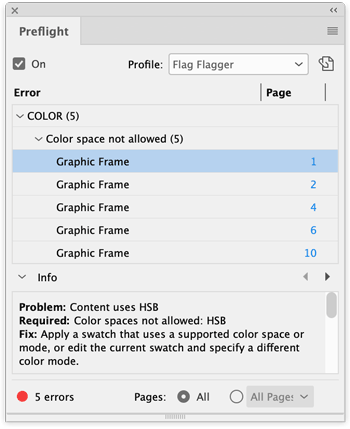
Remember when I said there was nothing automatic about this process? Well, that’s mostly true. But there is one extra thing you can do to bring some automation into this process. Instead of using an RGB or CMYK color for the Inner Shadow, pick a Color Mode that isn’t used anywhere else in your document, like LAB or HSB. 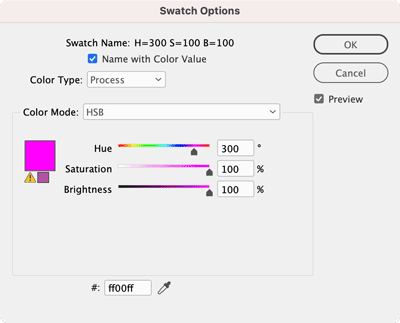 Then make a preflight profile that catches anything using that Color Mode.
 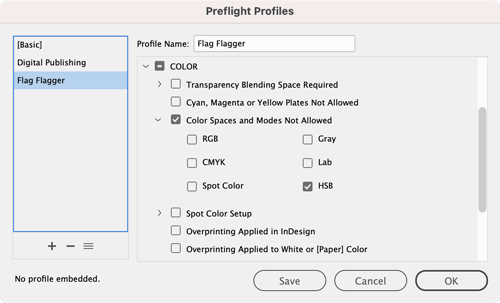 In the Preflight panel you’ll have a tidy list of frames that are marked with your object style, and you can click on the page numbers to jump to each one and deal with it accordingly.
  This article from CreativePro Magazine is for members only. To continue reading, please log in above, or sign up for a membership today! Thanks for supporting CreativePro!
Commenting is easier and faster when you're logged in!
Recommended for you

New Contest! The Mystery of the Fickle Folio
Solve this InDesign mystery for a chance at winning a great prize.

InDesign Magazine Issue 66: Workarounds
We’re happy to announce that InDesign Magazine Issue 66 (October, 2014) is...

Tip of the Week: Reveal Silhouetted Images with the Document Grid
There are three new Links panel icons in InDesign CC that you'll see when workin...


