

If you’re like me, your normal photographic process goes something like this: Buy a roll of film; shoot roll of film at a particular event or occasion; bring camera and roll of film home; throw finished roll into a drawer; wait several years; decide you want to see pictures from that event; gaze at dozen or so unlabeled, undeveloped rolls in drawer; close drawer; wait several more years; decide to clean out desk; find many, many rolls of undeveloped film…
Well, there’s good news for you if you’ve recently decided to make the switch to digital photography. Thanks to the immediacy of the digital camera, you can now look forward to a photographic process that might go something like this: Transfer your images to a folder on your computer; open folder; see that folder contains 75 files with names like PSC63383.JPG; make decision to go back and label them later; take digital camera out to shoot more pictures; continue process until your 30GB hard drive is full of thousands of unnamed images; burn images to CD to clear off space on your hard drive for more images; put CDs in a drawer…
However, it doesn’t have to be this way! With a little planning, some cool technology, and a thorough understanding of how your camera saves files, you can easily create a digital camera workflow that will make it simple to maintain a well-organized, easy-to-manage digital-photo archive.
Transferring Your Images
Before you do any real work or play with your captured images, of course, you must transfer them to your computer. Some cameras come with image-transfer utilities that automate the process of moving images to your system, while others come with software that makes the camera’s memory card appear to your system like any other storage device: You move files to your system by dragging and dropping or cutting and pasting, just as you would from any drive. If you have a strong preference one way or another between these two approaches, make sure you factor in each camera’s approach before you buy.
The more important issue for most of us will be what interface we use to transfer images to the system. If you’ve grown accustomed to running out for coffee, catching up on your phone calls, and reading the daily paper while you wait for images to transfer from your camera to your system, it may be time to invest just a little money in hardware that can help speed the process.
If your camera connects to a serial port rather than a USB port, your file transfers are undoubtedly quite slow. One remedy would begin with the purchase of Lexar-brand USB-enabled CompactFlash media. Lexar cards labeled as “USB-enabled” have an integrated USB controller, to manage the transfer of information across a USB interface, and are compatible with the Lexar JumpShot USB cable. You attach one end of the JumpShot cable directly to your Lexar media card and the other to your computer to facilitate USB transfers. And the JumpShot cable costs all of $19.95 (suggested retail).
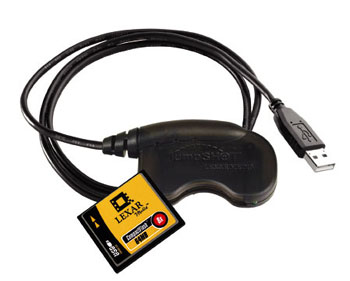
Lexar Media’s JumpShot USB cable lets you transfer files to your system from Lexar USB-enabled CompactFlash cards, whether or not your digital camera supports USB.
You may want to consider another option even if your camera supports USB transfers out of the box — purchasing an inexpensive card reader or adapter. Card readers provide faster USB transfers than many cameras, plus you won’t run down your camera’s batteries as you’re transferring images.
A number of vendors make small, inexpensive media drives that attach to your computer’s USB port, and that accept SmartMedia or CompactFlash cards. Simply insert the media from your camera into a media drive, and it will show up on your desktop just as if it were a Zip or floppy disk. You can then drag and drop files from it to your hard drive.
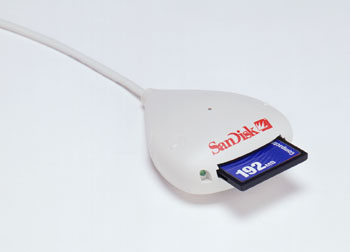
SanDisk is one of several vendors that make both CompactFlash and SmartMedia readers. If you’re using Sony MemorySticks, then you’ll want to buy a memory stick reader. PC Card adapters and floppy adapters are also available from Sony.

SanDisk’s ImageMate, shown here in its $29.95 CompactFlash version, is one of numerous USB card readers available.
An even faster, cheaper option exists if your computer has a PC Card slot, though the great majority of desktop systems don’t. PC Card adapters exist for most types of digital-camera media including CompactFlash, SmartMedia, and Sony MemorySticks. These adapters, which sell for as little as $10, let you insert your camera’s media card directly into your computer’s PC Card slot, where it will appear as a volume on your desktop. CompactFlash adapters can be found for as little as $20, though SmartMedia adapters are somewhat more expensive.
Finally, if your camera uses SmartMedia cards and your computer still has a floppy drive, you can use the $69 SmartDisk FlashPath floppy adapter, also available from SanDisk or Olympus. FlashPath lets you insert your media into your computer’s floppy drive. Unfortunately, FlashPath does not simply appear on your desktop, but requires the use of special software. In addition, the adapter is a bit slow and requires batteries.
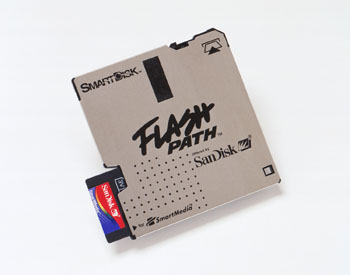
With a FlashPath adapter, you can use your 3.5-inch floppy drive to reach files from a SmartMedia card.
This article was last modified on December 14, 2022
This article was first published on July 3, 2001
Commenting is easier and faster when you're logged in!

Recommended for you
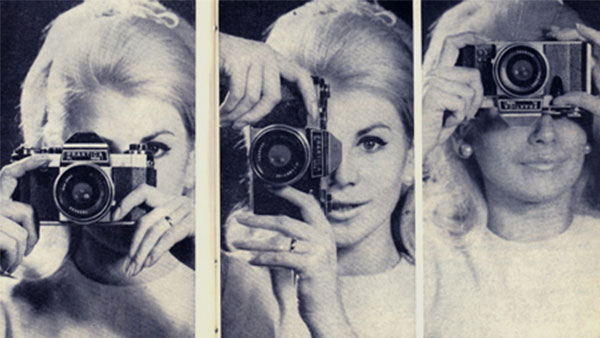
Scanning Around With Gene: How to Look Like a Real Photographer
Originally published August 6, 2008 When I was in high school I spent a great de...

Sony RX100 V Review: The Ultimate Travel Camera
The new Sony RX100 V is the latest release in the Sony RX100 point-and-shoot ser...

Pixelstick Takes Light Painting to a New Level
Have you ever tried light painting by moving a light source around while you tak...