


Still images can look great on websites – but moving images are more attention-grabbing. The trouble is that animated GIFs can run to huge file sizes. Here’s a way to create a spectacular animation that weighs in at under 2 megabytes.
Step 1: The original movie
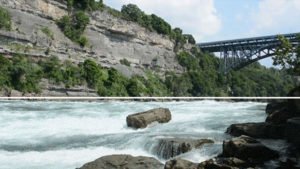
This film of rushing water comes courtesy of Luis Ruiz at Pexels, and you can see (and download) the original film here. Open it in Photoshop, and use Window > Timeline to open the timeline view. You’ll see that this video comes in at 20 seconds long. You don’t need the whole thing; you can get the flavor of the water movement in just four seconds.
Step 2: Trim the movie
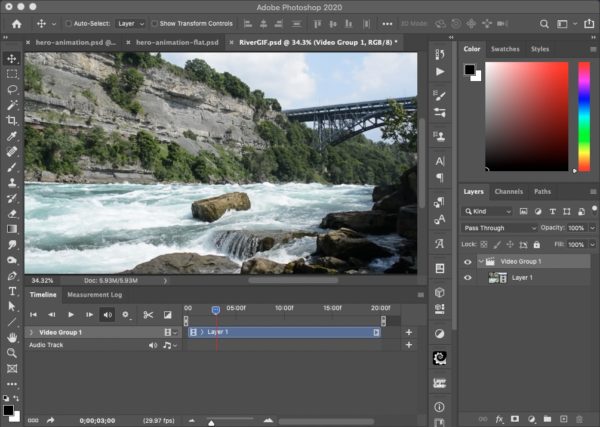
You can set the in and out points of the film directly in Photoshop. Drag the left Work Area marker to 1 second, and the right one to 5 seconds. When you press the Play button or hit the Spacebar, only that segment will play. Click on the Gear icon in the Timeline window to set the movie to Loop and it will run endlessly.
Step 3: Duplicate the movie
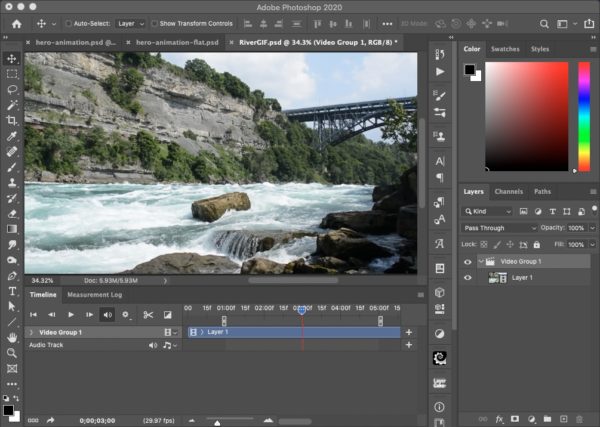
You need to make sure there’s no jump when the movie restarts. To do this, first duplicate the movie and move it so that it starts at exactly 4 seconds. You can do this by dragging it in the Timeline window.
Step 4: Fade the transition
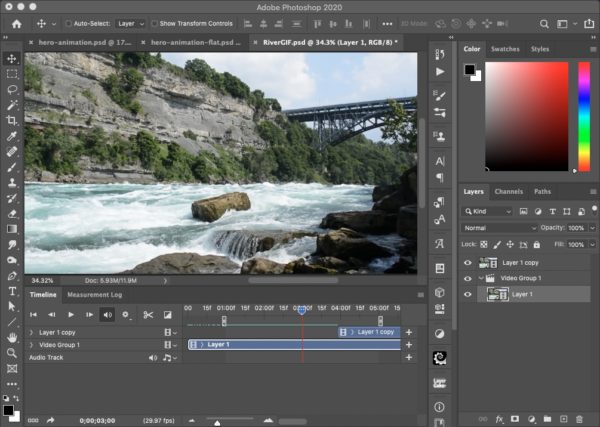
Pop open the arrow next to the duplicated video’s name in the Timeline window. Click the clock icon next to Opacity, and this will allow the opacity to vary over time. Drag the cursor to 4 seconds and set the layer opacity here to 0; then move the cursor to 5 seconds, and set the opacity to 100%. When you press play, the second movie will fade in over the course of one second, and the movie will restart from there. You may notice a small jump as it restarts; that’s because the final frame repeats at the beginning. To fix this, move the Work Area end marker back one frame.

Step 5: Save for Web, part 1
Choose File > Export > Save for Web and set the movie to export as a GIF file. Reduce the size to the width you want – I’ve chosen 600 pixels. With typical GIF settings, the sky looks badly posterized – and it still comes in at 3.5Mb.

Step 6: Save for Web, part 2
To make the movie look better, you need much higher quality settings. But while changing the number of colors to 256, and adding a Diffusion dither, may make the movie look more realistic, it comes at a huge cost: the resulting file will now be over 11Mb – far too big for web delivery.

Step 7: Saved by the crop
Cancel the Save for Web dialog, and use the Crop tool to crop the image area to just fractionally above the waterline. This is the area that will contain the moving image.

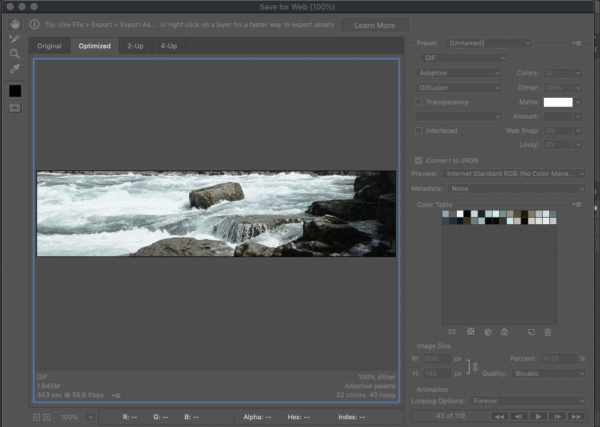
Step 8: Save for Web, part 3
When you now open the Save for Web dialog again, you’ll find that you can reduce the quality of the GIF significantly. Here, I’ve taken the number of colors down to just 32, and increased the Lossy amount to 40%. You won’t notice the loss of quality in the finished result, as the moving water will hide it; and this gets the file down to well under 2Mb. Go ahead and export the file.
Step 9: Invert the crop
Back in your document, use the Crop tool again. Grab the bottom handle, and move it up to the top of the image. This will ensure a perfect join between the top and bottom of the two halves.

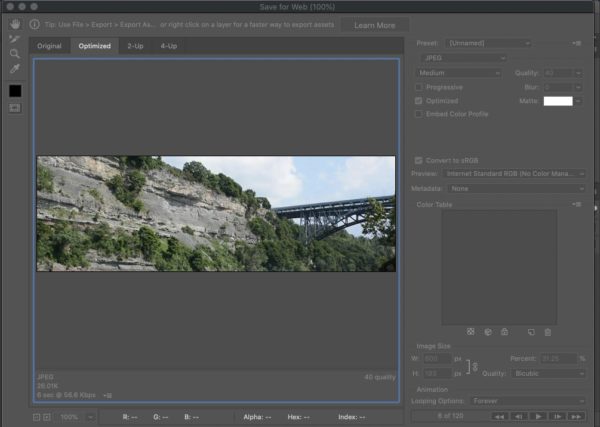
Step 10: Save for Web, part 4
Open the Save for Web dialog once more, and this time save the new image – the top part of the scene – as a static JPEG file. Even at a quality of 40, you get a reasonable image at just 26k in size.
Step 11: Stack the images
In whatever web authoring package you use, stack the two images directly on top of each other with no gap between them. If you’re using WordPress, you’ll need to write a line of CSS that reads “margin-bottom=-20px!important” (or some other value, depending on your WordPress theme’s default spacing) in order to close up the gap. Now, when you view the page, you’ll get the sense of endless water motion, with a total file size of under 2Mb.
This article was last modified on September 30, 2025
This article was first published on June 1, 2020
Commenting is easier and faster when you're logged in!

Recommended for you
Photoshop Week 2014
Any time is a great time to expand your Photoshop knowledge, but you might want...

Key Tips for InDesign, Illustrator, and Photoshop
50 great tips and tricks that unlock the power of InDesign, Photoshop, and Illus...

The Non-Designer’s Illustrator Book
Excerpted from The Non-Designer’s Illustrator Book by Robin Williams and J...