
Making a Paperback Version of a Hardcover Book
A pair of publishing pros share their process for changing the format of a printed book.


This article appears in Issue 21 of CreativePro Magazine.
You might think that when publishers make a paperback version of a hardcover book that it’s simply a matter of printing the same files on something else that’s maybe a little cheaper. But there’s a lot more to the process, as these two types of books are manufactured in different ways, particularly the cover. And those differences demand careful planning and effort from the designer. In this article, we’ll lay out our process for creating production files for a paperback book cover from the files used to make the hardcover version, as well as offer thoughts and resources for handling the interior pages.
For our example, we’ll use Malala Yousafzai, Warrior with Words (Figure 1).
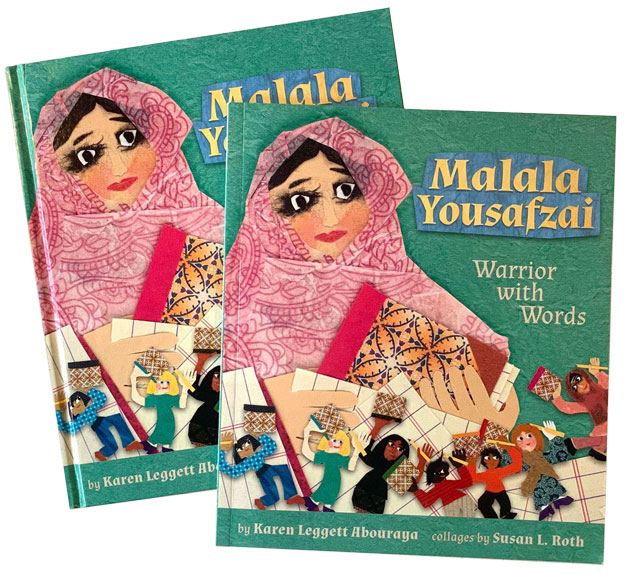
FIGURE 1. Hardcover and paperback versions of Malala Yousafzai, Warrior with Words from Lee & Low Books Inc. Used with permission.
Judging by the Covers
First, let’s consider the construction of hardcover and paperback books, and some of the associated jargon.
Consider a hardcover book: The outside of the book consists of printed paper that is glued onto stiff cardboard, wrapping over the edges. That’s known as the casewrap. Sometimes, a separate piece of printed paper wraps loosely around the outside of the book, with flaps that fold just inside the front and back. That’s the book jacket. The pages inside a hardcover are slightly smaller than the cover.
A paperback, on the other hand, has one sheet of thick paper folded to create the front, spine, and back of the book. The pages in a paperback are the same size as the front and back covers.
Our task is to convert the production files (known as mechanicals) that were created for manufacturing a hardcover book into files that meet the specifications that the printer will need to manufacture a paperback edition.
Tools, Materials, and Info
Before you can start the job, you need to gather all your necessary resources.
Information
You’ll need the following information for the paperback edition:
- Trim size
- Exact size of the covers and spine (The printer usually sends a template with the dimensions labeled.)
- Price
- Editorial changes
- ISBN
- A barcode (usually a JPG or TIFF image)
- Any job-specific information from your print service provider
Assets
You’ll start with:
- The casewrap and/or book jacket mechanical for the hardcover edition, packaged with all links. When we make book jackets, we use InDesign along with the Make Book Jacket script ($20) by Dan Rodney. It is simple to use and helps you avoid many common errors. It’s not free, but it saves so much time and effort, that it will pay for itself the first time you use it. If you need a free solution, check out the CoverBuilder script, which you can download from GitHub.
- The fonts
- The interior book layout file(s), including all linked image, fonts, etc.
The Anatomy of a Book Cover
To set the stage for the conversion job, let’s look at the differences between a hardcover and paperback cover. Note that the examples we are using will be read left to right. So, for both hardcover and paperback, when the whole cover is flattened, the front is on the right, the back is on the left, and the spine is in the middle (Figure 2). If you are working with a book that reads right to left (e.g., Japanese Manga), the front and back covers will be swapped.

FIGURE 2. The main parts of a casewrap
For a hardcover book, the casewrap is printed and trimmed larger than the size of interior pages. The casewrap mechanical includes extra artwork on the edges for the wraparound. This is the part of the printed sheet of paper that wraps around the cardboard to the inside of the book.
A jacket mechanical is trimmed to the same height as the book’s cover but has extra flaps that fold around to the inside of the book (Figure 3). There is also a little bit of extra space between the covers and the flaps for the turnaround. The turnaround accounts for the width of the cardboard that the flap must fold around.

FIGURE 3. The main parts of a book jacket
Now, let’s consider a paperback cover mechanical. Paperback covers are much simpler than hardcovers (Figure 4). They don’t need wraparounds, turnarounds, or flaps. The spine width will be narrower, because you don’t need to account for cardboard. Another difference is that there is often printing on both sides of the sheet of paper. When the book is assembled, the content printed on the second side will be on the inside of the front cover and back covers. Many publishers take advantage of this space to add promotions, book reviews, awards, and author bios.

FIGURE 4. The main parts of a paperback cover
Converting the Cover Mechanical
Begin the conversion job by copying the fonts and links folders from the hardcover mechanical into a new folder.
Then, open the book jacket or casewrap mechanical. Our hardcover title had no jacket, so we will start by opening the casewrap mechanical in InDesign, making sure we have the dimensions of the paperback cover handy.
Using the Make Book Jacket script
With Make Book Jacket installed, choose it from the Extensions menu to open its dialog box. Enter the paperback dimensions in the corresponding fields. For Flaps and for Turnaround, enter 0. Bleed is typically .125 inches unless your printer specifies otherwise (Figure 5). Some designers like to add a 1-inch slug, so they can label the front and back covers. Click OK.

FIGURE 5. Enter cover dimensions in the Make Book Jacket panel.
The script will create a new InDesign file based on your input with indications of trim, spine, and bleed (Figure 6). (If you’re not using Make Book Jacket or another script, you’ll need to create the new InDesign file manually.)

FIGURE 6. A new InDesign file with guides for spine, trim and bleed
The dimensions of the book are shown in a slug on the pasteboard just above the bleed guide. If these aren’t what you intended, you can adjust them by opening the Make Book Jacket dialog box again. If you find that the dimensions information is too distracting and easy to select by accident, make it as small as possible by selecting it, and choosing Object > Fitting > Fit Frame to Content and lock it (Command/Ctrl+L).
In the Layers panel, you’ll see five layers: Preview Front Cover, Preview Back Cover, Preview Spine, Marks & Guides, and Graphics (Figure 7). The three Preview layers are locked initially because they’re used only for assessing the look of the cover. You’ll place most of the cover content on the Graphics layer (although you can, of course, use your own layers to organize text and images).

FIGURE 7. Make Book Jacket makes it painless to organize your cover content into the proper layers.
In the Pages panel, select the document page, and choose Duplicate. You now have one page for the outside of the cover and one for the inside.
Save the mechanical into the folder you made. (Note: If you are using local fonts, you might have to close and reopen the InDesign file to activate them.)
Moving the Cover Graphics
Now, let’s put some graphics on the paperback cover.
In the casewrap mechanical, select all art and text on both the front and back covers that you will need on the paperback cover. Group all of the objects to keep them together and in the correct positions. Copy the group, and switch to the paperback mechanical.
Choose Paste in Place from the Edit menu. The group should be centered on the page (Figure 8). Then, ungroup the objects.

FIGURE 8. The content of the hardcover mechanical pasted into the new paperback mechanical
Separate the Spine and Barcode
In the Layers panel, create a new layer and name it Spine. Then, move all the spine text and the publisher’s name and/or mark—but not the background—to this layer (Figure 9). Hide and lock it for now.
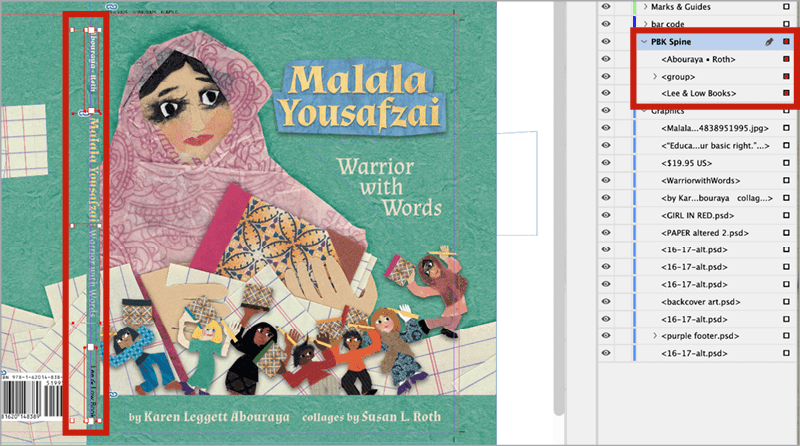
Figure 9. Be sure all the spine text is on the correct layer.
Do the same for the barcode, making a new layer and moving the barcode and background box to that layer. Delete the hardcover barcode file, but leave the white box in place. Lock this layer for now.
In the Graphics layer, change the size of the image frame that holds the spine art. With the Selection tool, click the center handle and drag the top of the box to the top of the bleed, then drag the bottom of the box to the bottom bleed. Move the left and right sides to the green fold lines (Figure 10). The spine art should fit inside the spine area of your mechanical. If you’re not sure, unhide the Preview Spine layer to check.

Figure 10. Adjust the spine background image frame to the new spine width.
Move the Cover Graphics to Butt the Spine Edge
The front and back covers must move into the center a bit because the spine is narrower. Make this easier by adjusting the origin point of the horizontal ruler.
Choose Show Rulers from the View menu. From the intersection of the rulers at the top left of the document window, drag the crossed lines to set the origin (the 0, 0 point) at the right edge of the spine (Figure 11).
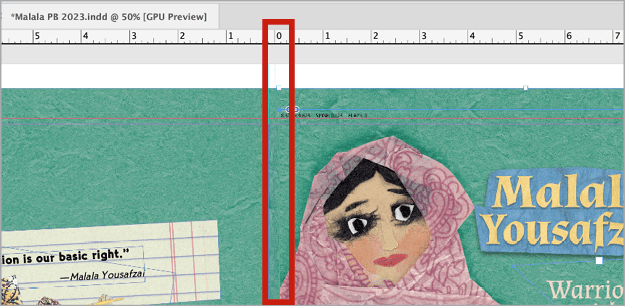
Figure 11. Set the ruler origin so it aligns with the right side of the spine.
With the Selection tool, select all the objects on the front cover and group them. In the Control panel, make sure the top-left reference point is active, and then type 0 in the X field (Figure 12). The front cover objects will now align with the right edge of the spine. Ungroup them.
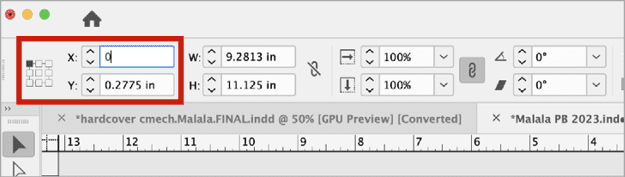
Figure 12. Use the Control panel to make front cover objects align with the right edge of the spine.
Drag from the intersection of the rulers to move the origin again; this time, setting it on the left side of the spine. Select all the objects on the back cover and group them. In the Control panel, make sure the top-right reference point is active. Type 0 into the X field. The back cover objects will now align with the left edge of the spine (Figure 13). Ungroup them.

Figure 13. Back cover objects align with the left edge of the spine.
Crop the image frames for the background of the front and back covers, the same way you did for the spine background.
The top, bottom, and right of the front cover will end at the bleed line, the left side will butt the spine. The top, bottom, and left of the back cover will end at the bleed line, the right side will butt the spine.
Separating Wraparound Art
Sometimes a single piece of art wraps around the front cover, spine, and back cover. When this happens, you may need to break it into separate frames to ensure everything still crops nicely.
Start by copying the image frame at its full size from the hardcover mechanical and pasting it into the paperback one. Close up the image frame so it is the size of the back cover and the image is properly cropped. Then choose Edit > Paste in Place. Crop this frame to fit the spine and front cover. Unhide the Preview layers to check the art and adjust the images until you’re satisfied.
Adjusting Cover Elements
There’s always a certain amount of moving and resizing elements that you’ll need to perform when you go from hardcover to paperback. Here’s a quick look at the typical process.
In the Layers panel, make the Preview Back Cover and Preview Front Cover layers visible to check that all text and art is correctly centered and at least .25 to .375 inches from the trim.
Check the cropping of the background art. Use the Direct Selection tool to move the art within its image frame. Reduce the size of the art if necessary.
Make sure the paperback price and barcode are in place and positioned correctly. In our example, the price was too close to the trim. When this happens, drag the 0 point to the top-left corner of the back cover trim. Select the text frame containing the price. In the Control panel with the top-left corner reference point selected, enter .375 in. for the X and Y dimensions. While you’re there, don’t forget to change the price to the paperback price!
Now, for the barcode. First, unlock the Barcode layer. Place the paperback barcode in the white frame. Move the frame if it is too close to something or covering an important part of the illustration. You can adjust the size of the frame if you need to, but don’t change the size of the barcode image within it.
Fitting the Spine Text
Here’s how to arrange the elements on the paperback spine. First, unhide and unlock the spine layer.
Spine text should be at least .25 inches from the bottom and top trim. The height of the text should be slightly less than the width of the spine. This is easiest to do if the text on the spine is all caps because you don’t have to account for ascenders and descenders. If the spine is really narrow (forcing you to set the spine text in a small point size), setting the text in a simple, sans serif font with a color that strongly contrasts with the background can improve readability.
Start by resizing the title text frame and its contents. When you are satisfied with the size of the text, make the bylines and the publisher name the same size. It’s common to center the title between the credits and the imprint name.
Tip: If you need to make edits to the spine text and find it hard to do with the frame rotated –90 degrees, choose Edit > Edit in Story Editor. There, you can see the text unrotated and unformatted. Make your edits, and they will immediately appear in the layout. Close the Story Editor when you’re done.
At this point, it’s a good idea to unhide the Preview Spine layer and check your work. All the spine text should be visible (Figure 14).

Figure 14. Preview the spine by making its layer visible.
Setting Up the Inside Covers
Publishers can save money by printing only black ink on the interior side of the press sheet. Sometimes this is described as “4 over 1,” because one side of the paper will have four ink colors, and the other side only black.
For the Malala book, the publisher wanted to put sell copy and author/illustrator information on the inside front cover. They wanted an ad for similar titles on the inside back cover (Figure 15).
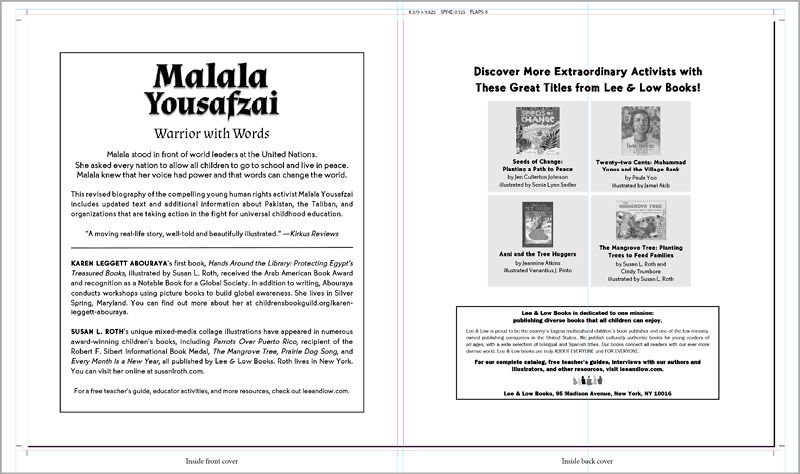
Figure 15. A common paperback inside cover layout. The inside front cover text is on the left side of the spine, the inside back cover art and text are on the right.
Change the fill and/or stroke of the title text to black and convert all art to grayscale in Photoshop. Set the book and author information with generous margins, at least .75 inches. This is important because printers sometimes need as much as .25 inches on either side of the spine to glue the cover to the interior.
Just remember that on the second page of your document the inside front cover is on the left side of the spine, and the inside back cover is on the right. This can look wrong in InDesign when you are scrolling between pages because the outside cover is reversed. If you want to be absolutely sure your pages are set up correctly, print them out and put them back to back.
Converting the Book Interior
In most cases, the paperback book will have the same trim size as the hardcover version. But don’t take this for granted! It’s vital to confirm the trim size with your printer.
Regardless of the trim size, you will need to update the copyright page with the paperback ISBN number, as well as information about the printer and paper if that has changed. Sometimes there are also editorial changes, like fixing errors or updating information.
That’s all easy enough, but what if the interior trim size of the book changes? In that case, the paperback conversion becomes a much bigger project.
Sometimes, pages are resized at the printer by making each page a bit smaller or larger. This affects the font size of the text and the widths of the margins. It is not ideal. If the size changes, it’s very rare that the paperback trim size will be proportionate to the shape of the hardcover trim size. It’s usually slightly thinner or wider, and that will cause the text to reflow, affecting page numbers, TOCs, running heads, and so on.
Using InDesign’s Adjust Layout feature (found in the File menu) to change a book’s trim size is a good starting point in some cases. But it won’t do the whole job. You still have to carefully review the whole interior. How easy or hard this is depends on how the hardcover book interior was set up in InDesign. If the text was properly styled with paragraph styles and flowed into parent pages with primary text frames, the book will be easier to resize. For a full rundown of resizing layouts in InDesign, check out Erica Gamet’s article in Issue 120 of InDesign Magazine.
Picture book illustrations are often specifically created to the hardcover spread trim size. In that case, page-by-page adjustments may be necessary if the trim size changes. Otherwise, important parts of the illustration can fall off the edges of the paperback page. Additionally, you should look at which parts of the illustration are now in the center of the spread. You’ll want to be sure important things like character faces won’t be lost in the fold when the book is bound. If you need to break spread art into two picture frames, you can follow the process we described above in the “Separating Wraparound Art” section.
More Resources
For deep dives into designing and building books and other long documents, see CreativePro Magazine Issue 12, and InDesign Magazine Issue 65 and Issue 105.
Also, check out these YouTube videos to see how to use primary text frames and how to set up a softcover file from scratch.
Wishing You a Speedy Recover-y
By now you know that turning a hardcover book into a paperback isn’t quite as straightforward as changing the dimensions and saving a new file. But, if you begin with the hardcover production files and follow the steps we described, you’ll be well on your way to producing a perfect paperback edition.
Commenting is easier and faster when you're logged in!

Recommended for you

Use Find/Change to Add Text to Many Table Cells
Will asked: Is it possible to ‘Add/insert’ at the end of a sentence...

GoProof: The Modern Alternative to PDF Proofing
Every publishing workflow is only as strong as its weakest link. You can start w...
Tip of the Week: Targeting Table Borders and Strokes
How to target table strokes to change their formatting using the table stroke pr...