
Making a 3D Rainbow in Illustrator
Explore the amazing things you can do with Illustrator’s 3D and Materials panel


This article appears in Issue 17 of CreativePro Magazine.
3D can add depth to designs, but to many the learning curve has seemed too daunting to try. Not any more. Because Illustrator now includes 3D capabilities, you no longer have to be a model-making master to incorporate 3D into your designs and workflow. This 3D rainbow tutorial will have you on your way in no time!
Rainbows aren’t your thing? No problem. You can use any basic shapes to create your own 3D masterpiece by following the steps. Time to create!
Here’s what we’re going to make.

Start in 2D
Illustrator’s 3D effects don’t generate new objects; they merely format existing ones. So, before you can have any 3D fun you first have to set up your document and add some vector objects to it.
Create the document
In Illustrator, create a new file and in the dialog box, click Art & Illustration. Under Preset Details, set your artboard to 6 × 6 inches with 4 artboards: one for your original illustration, one for your basic 3D, and two additional artboards for having fun with Adobe Substance Materials. Under Advanced Options, make sure Color Mode is set to RGB and Raster Effects is set to High (300 ppi), as shown in Figure 1.

Figure 1. The magic begins with a fresh Illustrator file.
Click Create, and then save your file to Creative Cloud or your computer (Figure 2). If your workflow permits, consider saving the file as a Cloud Document, which autosaves every change you make, allows you to view your files from any of your devices, and lets you roll back to a previous version if needed. For more about working with cloud documents, see Bart Van de Wiele’s article in this issue.
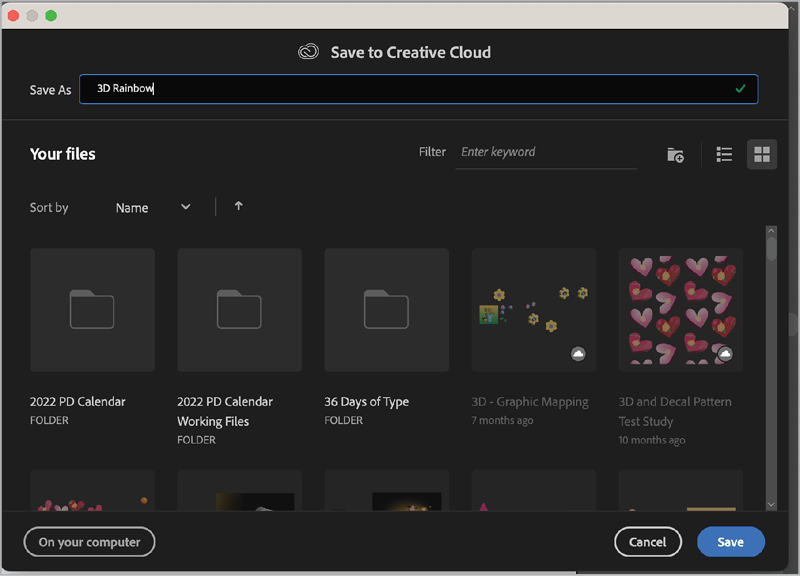
Figure 2. Rename your file in the Save As window to save it to Creative Cloud (or your computer).
Tip: It’s easy to tell when you’re working on a Cloud Document. Just peek at the document tab, where you’ll see a cloud icon and the file extension AIC.
Draw the 2D objects
With the tools ready, we can begin drawing!
Note: While it’s often a good idea to organize the components of your artwork in separate layers, in this tutorial all objects will be created on a single layer.
First, let’s shape out some clouds.
With the Ellipse tool (L), drag on the first artboard a few times to make some overlapping ovals that resemble a cloud shape (Figure 3).

Figure 3. Ellipses provide the basic shapes for the clouds.
Tip: Hold the spacebar while you’re drawing an ellipse to reposition it on the fly.
Press Command/Ctrl+A to select all the ovals. Double-click the Fill control in the Toolbar to bring up the Color Picker and apply your desired fill color (Figure 4). Click the Stroke control and set the stroke to None (/).

Figure 4. Apply color to the shapes.
In the Pathfinder panel, click Unite () to merge your ovals into one shape. Then, adjust the width and height of your cloud as desired by dragging the bounding box handles (Figure 5).

Figure 5. Merge the ellipses to create a united cloud shape.
Now, it’s time to create the sky, sun, and rainbow!
To make the sky, drag with the Rectangle tool (M) to create a rectangular shape that fills your artboard. Fill it with a different shade of blue. Then, choose Object > Arrange > Send to Back.
To make the sun, switch back to the Ellipse tool. Shift-drag to create a circle, fill it with a sunny yellow color, and remove any stroke. If you want to create something a little “extra,” add a second circle and fill it with a different color. This way you can represent both the sun and its rays.
On to the rainbow! Draw another circle with the Ellipse tool. Set the fill to None, and set your stroke to 50 px and your preferred color. I prefer to use the traditional ROY-G-BIV colors when I create a rainbow, so I started with pure red. You can choose whatever color palette brings a smile to your face (life is much too short to work with colors you don’t love)!
Switch to the Direct Selection tool (A), and click your circle. Then, click the bottom anchor point to select it. Delete this anchor point to create a semi-circle (Figure 6).

Figure 6. Use the Direct Selection tool to select the bottom anchor point and delete it to create a semi-circle.
Tip: At times, objects with thick strokes can be a bit difficult to select: You click the stroke, but another object underneath gets selected. To avoid this problem, turn on Smart Guides in the View menu. Then, hover your pointer over the object to reveal the path—and the best place to click to select it!
Now we have our first semi-circle. You’ll reuse it to create the remaining rainbow segments.
With the Selection tool (V), click the semi-circle. Copy and paste it to make a second semi-circle, and change the stroke color. Repeat these steps until you have your desired number of semi-circles to make up your rainbow (Figure 7).

Figure 7. Copy and paste, then apply additional colors to each new semicircle.
Tip: Make sure to save the colors you apply to all your objects as swatches. This will come in handy later if you want to change the colors of your 3D Materials.
Using your Selection tool and/or Direct Selection tool, select the individual nodes of your semi-circle “rainbow segments” and arrange them to your liking. Feel free to experiment and try some unusual things—a rainbow can still be a rainbow even if it’s an abstract rainbow inspired by Picasso! At this point, you’re never more than a few undos from getting back to your original semi-circles.
For my rainbow, I used the Direct Selection tool, selected all three anchor points one by one in each semi-circle, and dragged them until I was happy with all their positions (Figure 8).

Figure 8. The completed 2D illustration
If you want all your objects to fit on your artboard, select everything but the sky background with Selection tool, then Shift-drag to resize them as desired (Figure 9). Keep in mind that additional layout adjustments might be needed once each object is modified with 3D effects.
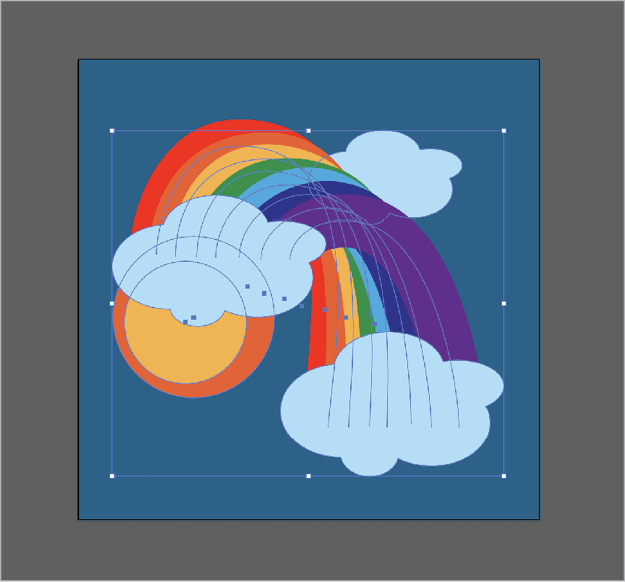
Figure 9. Select all items except for background and resize as desired.
Tip: If you don’t see a bounding box, press Command+Shift+B/Ctrl+Shift+B to toggle the bounding box on and off. You can also choose View > Show/Hide Bounding Box.
Tip: If you find that objects, like your blue background square, are getting in the way when you want to select other objects, lock them by choosing Object > Lock > Selection or by pressing Command/Ctrl+2. To unlock previously locked objects, choose Object > Unlock All (Command+Option+2/Ctrl+Alt+2). Or, to unlock one object while keeping others locked, locate the object in the Layers panel and click its lock icon.
From 2D to 3D
Now that we have our rainbow elements ready, let’s have some fun by making
them 3D!
Choose Window > 3D and Materials to open the 3D panel.
With the Selection tool, click the top cloud to select it. Then in the Object area of the 3D and Materials panel, click Inflate. Turn on the Inflate Both Sides option.
You can leave your cloud as is, or you can customize it. For example, you can adjust the rotation. Rotating an object will affect the lighting and the color at this stage. So, to keep your cloud looking, well, cloudy, just apply a small amount of rotation by either clicking and dragging the 3D widget or by changing the Rotation settings in the 3D and Materials panel (Figure 10).

Figure 10. Change the rotation settings in the 3D panel.
Turning on Ray Tracing for each selected 3D object will increase the wow factor in your final 3D rendering results. However, it’s not essential, and if you find that it causes Illustrator’s performance to dip, you can turn it off.
To activate Ray Tracing, select your object and in the in the upper-right corner of the 3D and Materials panel, click the button for Render with Ray Tracing.
To turn on Ray Tracing for all objects, click the arrow next to the Ray Tracing button and toggle on Ray Tracing. Set Quality to High. This is based on your Document Raster Effects settings, which you can change by clicking the words Raster Settings. To ensure you’re using the same settings for all objects, select Remember and Apply to All (Figure 11).
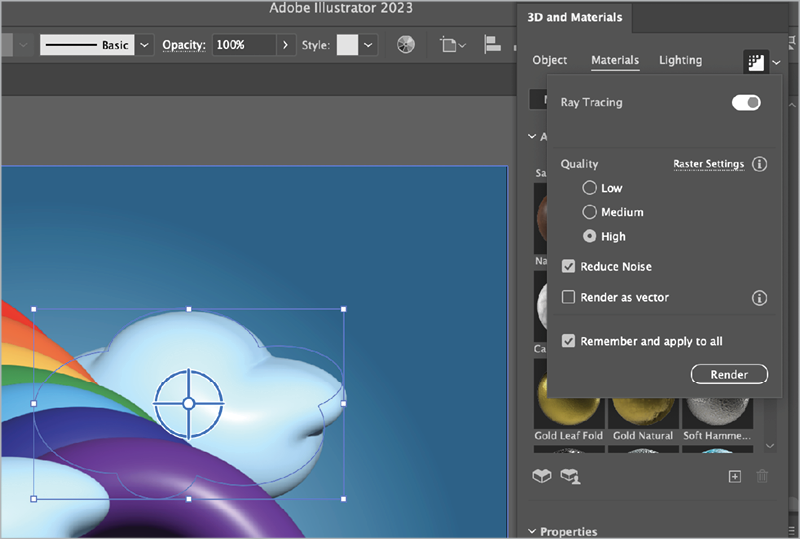
Figure 11. Turn on Ray Tracing.
The Lighting settings in the panel can really help you create convincing 3D effects. You have lots of options to play with, including four presets, and settings such as Intensity, Rotation, Height, and Softness. For the cloud, set the Softness to 17%, turn on Ambient Light, and set its Intensity to 17% also (Figure 12). That gives us a pretty cool looking 3D cloud!
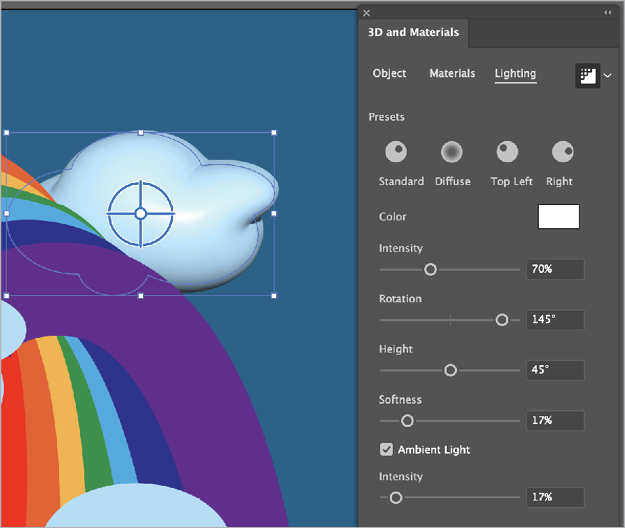
Figure 12. Adjust the Lighting settings on the clouds.
To make the rest of the illustration 3D, repeat the previous steps, and apply the same settings to all of your objects:
- 3D and Materials: Object: Inflate, Click Inflate, and then select Inflate Both Sides
- 3D and Materials: Lighting: Adjust Softness to 17%, select Ambient Light, and adjust its Intensity to 17% (Figure 13).
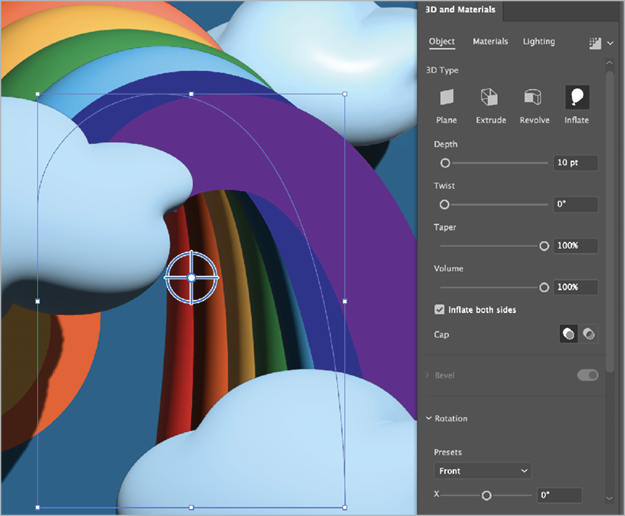
Figure 13. Adjust the Lighting settings on the rainbow ribbons.
With all of these steps completed we now have a 3D illustration (Figure 14).
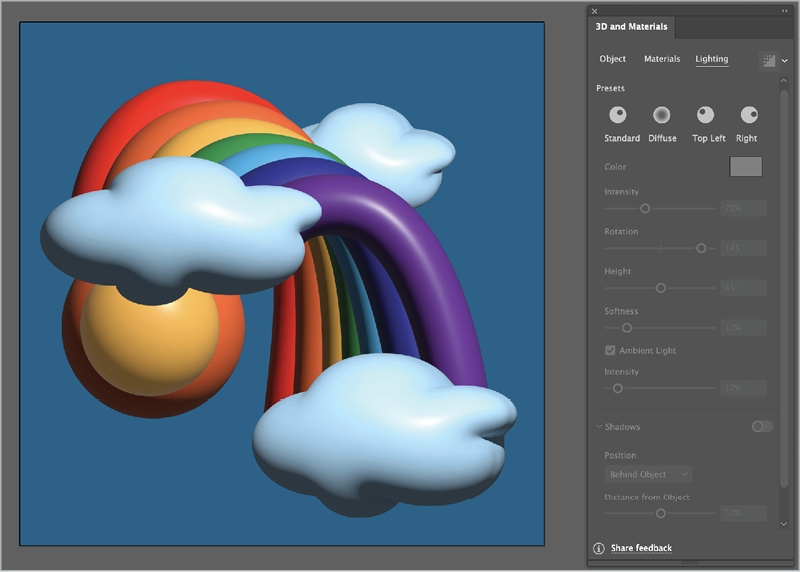
Figure 14. The completed 3D illustration
At this point, the background layer is looking a little too flat for me. If you locked your background as I did, choose Object > Unlock All to unlock your blue square. Make sure your Gradient panel is open by choosing Window > Gradient or by double-clicking the Gradient tool in the Toolbar. Using your Selection tool, select your blue background square and then select the Gradient tool with the Gradient panel open. Then, apply your preferred gradient type, I think a Radial Gradient will make this sky pop a bit more.
If your colors suddenly changed… don’t panic! You can use either the slider in the Gradient panel or the Gradient Annotator that appears over the selected object to rectify the situation. In both places, you’ll notice points at both ends of the gradient, called color stops. Double-click one of these for quick access to the color swatches you saved earlier. Apply the color you previously used for your clouds to the inside of the radial, and then repeat the process to apply the background sky color from your saved swatches (Figure 15).
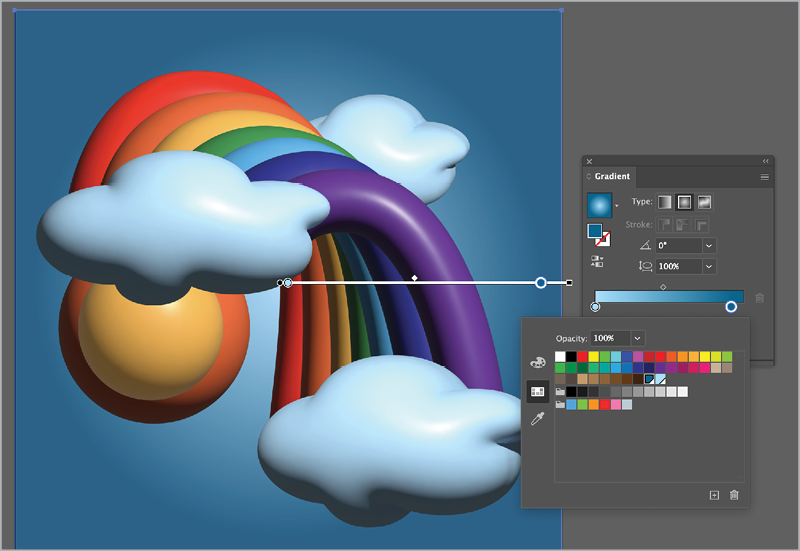
Figure 15. Apply a gradient to the background for more oomph!
Now it’s time to export your magical creation. With one of the 3D objects selected, go to the 3D and Materials panel, and click the drop-down arrow next to the Ray Tracing icon. Make sure Remember and Apply to All is turned on, and click Render. Then, choose Menu > Export > Export As and select your preferred file format (PNG and JPG are perfect for sharing on social media).
Why not just use a graphic style?
If you use Illustrator a lot, you might be wondering why you can’t just save the 3D effect from the cloud as a graphic style and apply it to the other objects. The reason is that the graphic style will copy all the appearance attributes, including the stroke and fill, which you obviously don’t want for the rainbow. There is a workaround of sorts: You can group an object before applying the 3D effect, save a graphic style, and then apply it to another group. In that case, fill and stroke colors won’t be included in the style. But when you apply the style to other grouped objects, you get a different look than if you’d applied the 3D settings to each object separately. In this case, grouping the bands of the rainbow and applying 3D to the group would create an interesting look, but not the one we’re aiming for.
More Adventures in 3D
We can’t talk about creating 3D in Illustrator and not touch upon the Adobe Substance Materials that are included. Using these materials can completely change the overall feel of your work, but be warned, it’s easy to fall down the rabbit hole of exploring all the combinations you can create! Let’s peek over the edge to see a few examples of what you can make.
Start by copying and pasting your entire illustration to the other artboards.
Tip: You can also duplicate artboards with their content. Sometimes this can be a lot quicker than copying and pasting 3D effects. To do this, take the Artboard tool, make sure the option to Move/Copy Artwork with Artboard is turned on in the Control panel, and Option/Alt-drag the artboard.
Apply Substance Materials
Once you have your file ready, go to your second artboard and select one of your 3D objects. In the 3D and Materials panel, click Materials. Here you’ll see that we used the Base Materials for our first rainbow. Below that are the Adobe Substance Materials. They offer so many options for activities and creating! I’ll wait here while you scroll through the list to check them out.
Every material has a number of customizable options, depending on the material type. Some materials are simple to work with, while others have multiple options, so you can fine-tune them down to the smallest detail. For the first one, let’s go metallic, as there are quite a few metallic materials available here. Select the Zinc Spade Pattern (about halfway down the list) and apply it to your clouds.
Then, go to the Properties area of the panel, and scroll down to access the many customizable options for Zinc Spade Pattern. To see the effect of one, adjust the Spade Pattern Tile to 15. Repeat these steps on your other clouds (Figure 16).

Figure 16. Customize the Zinc Spade Pattern.
Next, apply the Gold Leaf Fold material to your sun. With this material you can choose your own color. Click the color square to change the color for your second circle (Figure 17).

Figure 17. Change the color of the selected materials.
Apply the Gold Natural material to each rainbow segment, and change the color to match (e.g., for the red segment, click the color square and choose a shade of red, and so on) you’ll end up with something like Figure 18.

Figure 18. Our rainbow, sun, and clouds with shiny materials applied to them
Select the background sky rectangle and change its fill to black. Voila! Your second 3D rainbow is complete! (Figure 19).

Figure 19. Apply a black fill to the background, and celebrate a second completed 3D illustration!
Push the limits
For the remaining rainbows, I encourage you to get as creative as you want with the 3D materials. Push the limits of logic and good taste. Geniuses don’t think inside the box so why should you? When you’re ready to push it too far, might I suggest the Gingham Print Fabric, which has lots of customization options available, including two colors for the fabric (Figure 20).

Figure 20. Change the color of a Substance Material to custom. There are many ways of customizing materials, including changing their color(s).
You can even apply the Gingham Print Fabric (or whichever material sparks joy for you) to the background! For mine, I set the fabric colors to two darker shades of blue to contrast against the clouds and rainbow a bit more (Figure 21).

Figure 21. Select the background to apply materials.
The last rainbow is totally up to you. Experiment with different combinations of materials. Concrete and cardboard, sand and steel—the combinations are almost endless.
If the built-in choices aren’t enough, you can click the first button below the list to access even more materials. Just be aware that these additional assets are not included in your Creative Cloud subscription. An individual subscription to Substance 3D Texturing will cost you an additional $20. This gives you access to 30 asset downloads per month and three new apps: Sampler, Designer, and Painter. The full Substance 3D collection is $50 per month and includes 50 assets and even more apps, models, and lighting options. You can find all the subscription details here.
If your price range is more along the lines of free, then click the second button under the materials () to explore Substance 3D Community Assets. These were created and shared by other users and you can download them at no additional cost. Click the plus button and navigate to your downloaded file to load the new material into the panel.
Somewhere Over the Rainbow
I hope that our rainbow project is just the start of a wonderful journey into 3D in Illustrator. Endless possibilities are achievable when you combine your unique perspective with these amazing tools!
Commenting is easier and faster when you're logged in!

Recommended for you
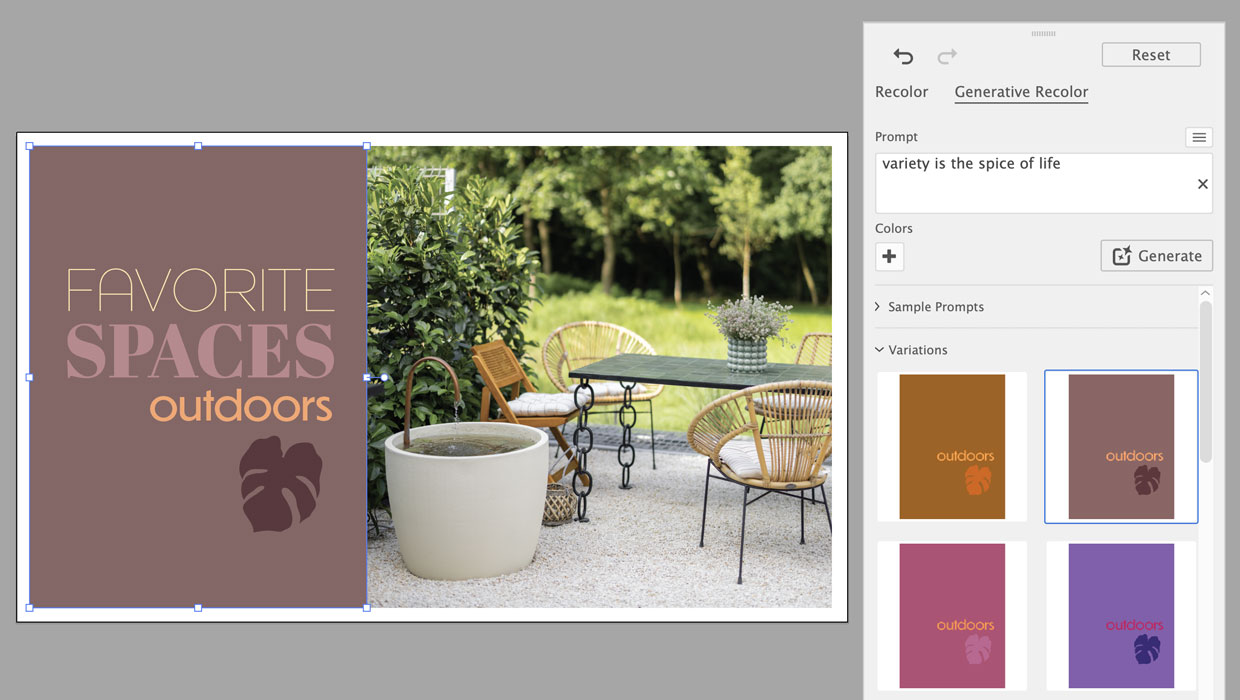
Using Generative Recolor in Illustrator
Refresh your color workflow by pairing a time-honored technique with the latest...

Illustrator Downloadable: Cozy Plaid Pattern Set and Palette
Use this Illustrator downloadable to evoke cozy warm feelings in your vector art...

Using Illustrator’s Paintbrush Tool
Go beyond simple paths and transform your artwork with this powerful tool