Learn PostScript with the Help of Photoshop
A short tutorial on programing in PostScript

PostScript is the programming language that made today’s design and publishing industry possible. In fact, the whole point of PostScript is to make graphics possible: from text to lines to colorful gradients and more. From the mid-’80s to this day, every major professional printer (I mean the hardware itself) has relied on this programming language to put marks on paper, film, plates, and more. But the cool part is that anyone can learn to program in PostScript, and in this short article I’ll show you how. For this lesson, you’ll need:
- A text editor — nothing fancy required; could be anything from Notepad to TextEdit to TextWrangler or BBEdit.
- Photoshop (or some other tool that can display PostScript)
One of the lesser-known features of Adobe’s Creative Cloud apps is that most of them have a PostScript language reader (called an “interpreter”) baked in. That means they can actually read almost any PostScript file — even ones that you write on your computer. We’re going to take advantage of that to write code and have it show up in Photoshop, so we can quickly see the effect of what we’re doing.
Making an EPS File
You’ve probably heard of an EPS file, right? EPS stands for “Encapsulated PostScript,” and ultimately it just means a PostScript file that has two lines of text at the beginning: %!PS-Adobe-2.0 EPSF-1.2 %%BoundingBox: 0 0 612 792 The first line just means “hey, this is PostScript.” The second line means “I’m going to draw inside a rectangle — called a bounding box — which is 612 points wide and 792 points tall.” (A point equals 1/72 of an inch, or about 28.35 per cm.) You can, of course, change the size to anything you want, but 612 x 792 happens to be the size
of a US Letter size page, so it’s convenient for some of us. (An A4 page is 595.276 pt x 841.89 pt, which you can usually round to 595 and 842.) OK, so to start our lesson, you want to copy those two lines into a new text file. (Be sure it’s a text editor, not a word processor; no formatting allowed!) Now we want to draw something on the page. Note that everything we do is going to be based on a coordinate system (like graph paper), with the zero-zero point in the lower left corner. Type this next: 100 200 moveto 500 600 lineto stroke That means “move your pen (as it were) to the point 100,200 (100 from the left edge and 200 from the bottom edge) and draw a line to the point 500,600.” PostScript won’t actually draw the line until you say “stroke”. So for example, you could draw a two-segment line like this: 100 200 moveto 500 600 lineto 100 600 lineto stroke OK, now save your text file, but instead of using “.txt” at the end, name it with “.eps” at the end. You don’t need to close your file; in fact, this will be easier if you leave that file open in your text editor. 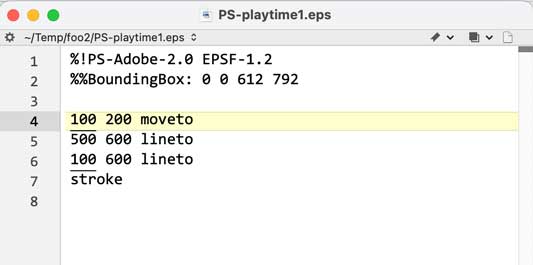
Placing in Photoshop
Coding is much more fun when you can get a visual! So let’s do that by placing this EPS file into Photoshop. First, make a new Photoshop document that is the same size as your EPS (in my example, that’s a U.S. Paper-sized file). The resolution can be anything, but I suggest 200 or 300 pixels per inch.  Next, choose File > Place Linked and choose your EPS file. (For this lesson, it’s important that you use Place Linked and not Place Embedded.) Photoshop will place your new EPS file on the page, but you’ll probably have to press Enter/Return to “fix” it in place. You should see something like a big “7”:
 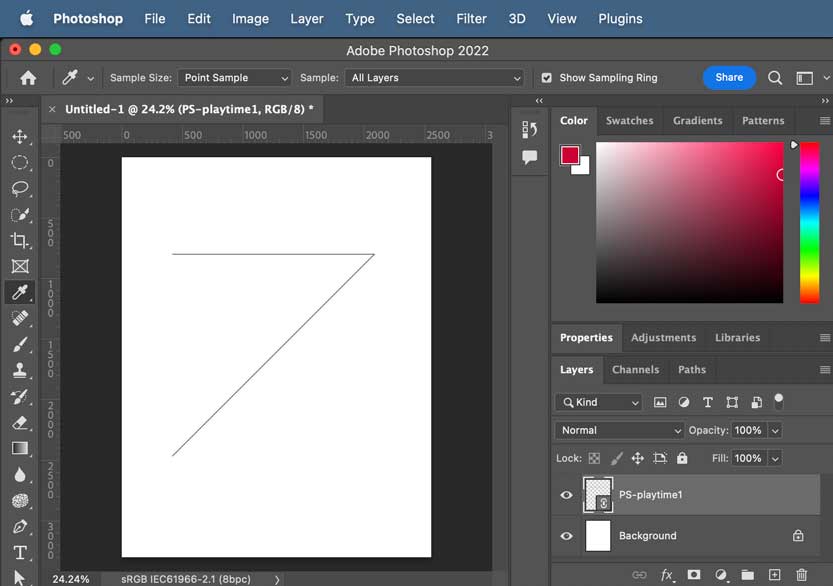 That’s PostScript made visual!
Drawing More Paths
OK, now let’s edit the PostScript and draw some more. Flip back to your text editor and let’s add a few lines of code, like this: 5 setlinewidth .8 0 .2 setrgbcolor 100 200 moveto 500 600 lineto 100 600 lineto closepath stroke Notice that in PostScript you always write the number or value first, and then what you want to do with it. So our new first line means “set the line width to 5 points thick.” The second line means “set the RGB color to 80% red, no green, and 20% blue.” (In case you care, you can do the math and find that equals RGB 204/0/51.) The “closepath” near the end just means “draw a line back to the original point.” OK, now save your file and flip back to Photoshop: 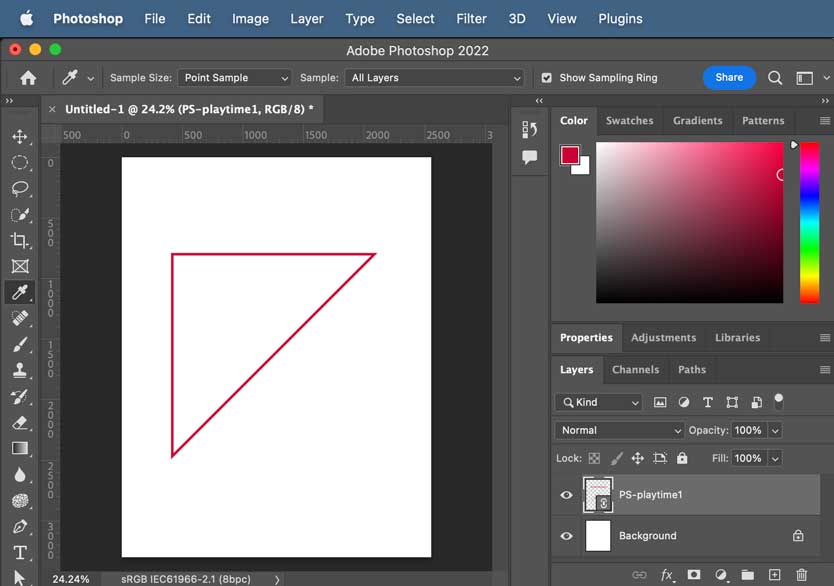 Pretty cool, right?! If you want to stroke and fill the path, you have to use a little trick like this:
 5 setlinewidth .8 0 .2 setrgbcolor 100 200 moveto 500 600 lineto 100 600 lineto closepath gsave stroke grestore .4 .6 1 setrgbcolor fill Here’s what’s going on: When you stroke or fill a path, PostScript says “oh, I see you’re done” and it throws away the path you drew. Putting “gsave” and “grestore” around the stroke means “remember the path, now stroke, now go back to what you just remembered.” Then we changed the RGB color and filled the path. Go ahead and save this file and flip back to Photoshop: 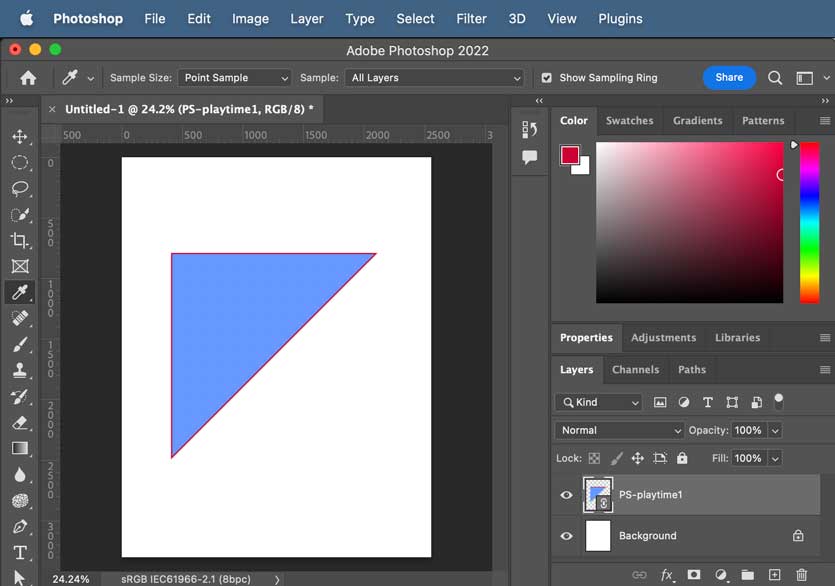 There are dozens of ways to draw paths in PostScript. Here’s just one more:
 5 setlinewidth .8 0 .2 setrgbcolor 100 200 moveto 500 600 lineto 100 600 lineto closepath gsave stroke grestore .4 .6 1 setrgbcolor fill newpath 400 400 moveto 400 400 150 30 300 arc closepath 1 1 0 setrgbcolor fill In this case, we added a “newpath” command — that’s not really necessary here, because the “fill” command clears the path. Then we move the “pen” to 400,400 and draw an arc. The values for the “arc” command are: x, y, radius, beginning angle, ending angle. In other words: draw an arc with a center at 400,400, a radius of 150 points, start it at 30 degrees up (from the horizon), and end it when you hit 300 degrees (out of 360). Try it! Save and switch back to Photoshop: 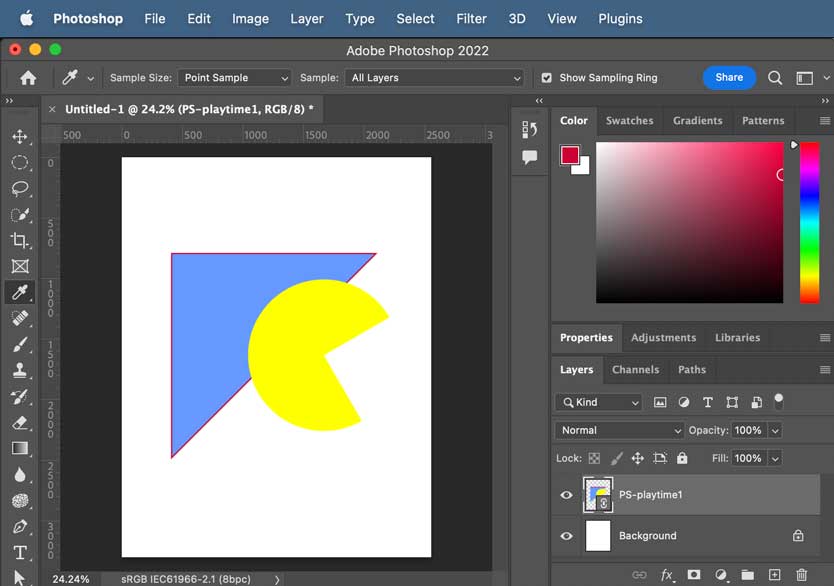 Isn’t that awesome? With just a few lines of code, you’ve made a drawing. Of course you can (and should!) go back and tweak the numbers and see what happens. Change the triangle’s shape… change the color and path of the “pac man” shape. Play with it!
Having More Fun
Anything you can do in a program like Adobe Illustrator can be done in PostScript — all the curves and lines and so on. Of course, it’s usually much easier to do it in Illustrator! (Which is specifically why Adobe created Illustrator 1.0 in the 1980s, just after inventing PostScript.) But there are fun things you can do in PostScript that are hard to any other way. The best example is “programmatic” or “algorithmic” code, which just means it’s running a program, using variables, if/then, repeats, and so on. Here’s a simple example: %!PS-Adobe-2.0 EPSF-1.2 %%BoundingBox: 0 0 612 792 /myCoordinate 0 def 2 setlinewidth 10 srand 50 { 0 myCoordinate moveto 600 600 lineto stroke /myCoordinate myCoordinate 20 add def rand 100 mod 100 div rand 100 mod 100 div rand 100 mod 100 div setrgbcolor } repeat Let’s explore what this does:
- The first two lines are for the EPS file, of course.
- Line 3 defines a variable called “myCoordinate” and sets it to the value zero.
- Line 4 sets the line thickness.
- Line 5: this is what’s called a “random number seed.” There’s no such thing as true randomness in PostScript, but you can fake it by changing this seed number.
- Line 6: this is the number of times we’re going to be repeating or looping a process
- Line 7: at first, this moves the pen to the coordinate 0,0
- Line 8: draw a line to 600,600
- Line 9: stroke the line
- Line 10: this says “set the definition of MyCoordinate to whatever it was plus 20” (that is, after the first line we draw, the variable will change to 20, then 40, then 60, and so on)
- Line 11: This looks crazy complicated, but look at the end first: we’re setting an RGB color. This is a trick to create three random R, G, and B values from zero to one.
- Line 12: repeat the loop!
OK, save it up as a new .EPS file and use File > Place Linked in Photoshop: 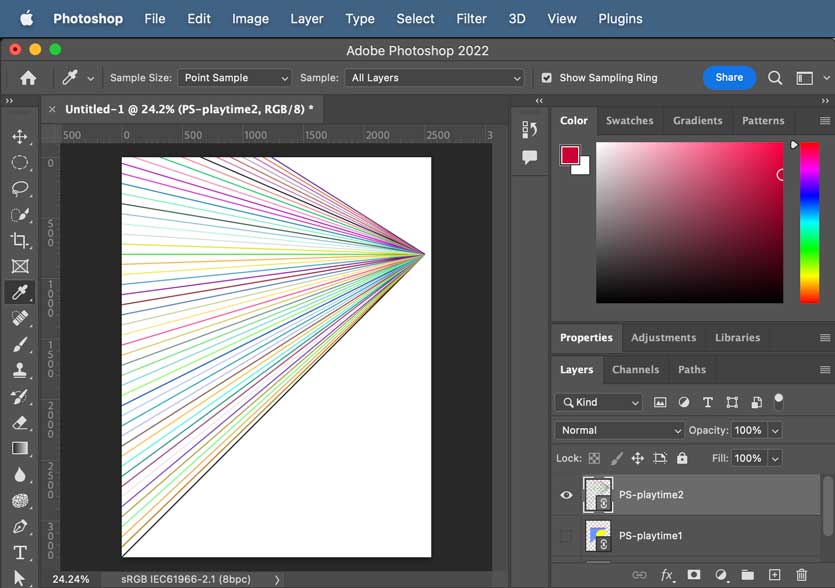 Pretty awesome, right? Change the value of the srand in line 5 and the line thickness in line 4, save and go back to Photoshop. In case you want the code above, you can download my files here:
You are on your way to becoming a PostScript maven… Enjoy!
Commenting is easier and faster when you're logged in!
Recommended for you

How to Prevent Problems with PostScript Type 1 Fonts in EPS and PDF Files
Two techniques for heading off big problems when Adobe drops support for Type 1...

How to Convert PostScript Fonts to OpenType with TransType
Need to modernize your font library to work with Adobe programs after they end s...

TypeTalk: Which Flavor of OpenType Is Best?
There are two kinds of OpenType fonts: CFF and TTF. Learn the difference and whi...


