
InReview: QuickResize
A review of a script that makes the job of resizing an InDesign document much simpler
This article appears in Issue 81 of InDesign Magazine.
It’s happened to all of us. For one reason or another you have to resize a document that you’ve pretty much completed. You have a couple of choices built in to InDesign: liquid layout or layout adjustment. Both feature kind of work, but require you to make certain choices, and if they’re not correct you wind up with either objects on the pasteboard (if shrinking the page size) or (if enlarging it) enough white space to make Jony Ive jealous. Fiddling around with this stuff is about as much fun to me as drawing a clipping path. Enter Quick Resize, a script from developer Ariel Walden (www.id-extras.com). The website description of this script states: “QuickResize presents a simple window where you can input the new size you’d like the current InDesign document to be.” Based on my test drive, simple is a very accurate description. Let’s take a look.
Installation
Because this is a script, there’s no installation routine. Instead, you’ll just need to copy the QuickResize.jsxbin file to your scripts folder in the InDesign application folder. While you could go searching for it, there’s a little trick for installing scripts that I’ll share with you to make it a bit more, shall we say, simple. Open InDesign and, if the Scripts panel is not part of your current workspace, open it (Window > Utility > Scripts), and right-click on either the User or the Application folder in the panel (Figure 1). Choose Reveal in Explorer (Windows) or Reveal in Finder (Mac).
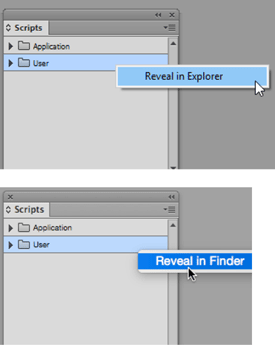
Figure 1: Right-click in the Scripts panel to reveal the location of your script files.
JSXBIN file inside the Scripts Panel folder (or a folder inside that folder). Once you’ve installed it, it should start working immediately, and you’ll find the script in the Scripts panel (Figure 2).

Figure 2: The QuickResize script in its natural habitat.
Activation
The script needs to be licensed before it can be used, so once it’s installed, double-click it to bring up the activation screen, which will prompt you for your serial number (Figure 3).

Figure 3: You will need to enter your serial number manually before you can use the script.

Figure 4: You can add a menu item for QuickResize by selecting this option in the About dialog box.
How does it work?
This script takes every item on the page and scales it up or down, leaving you with a completely editable layout. In some cases, that “simple” action may well be enough. What kind of choices do you have in resizing? Let’s take a look at the interface after launching (Figure 5). (Note that you must have a document open or you’ll get an error message telling you to open one.)

Figure 5: The QuickResize dialog box shows the current size of the document (A), the size of document after resize (B), and whether proportions will be constrained (C).
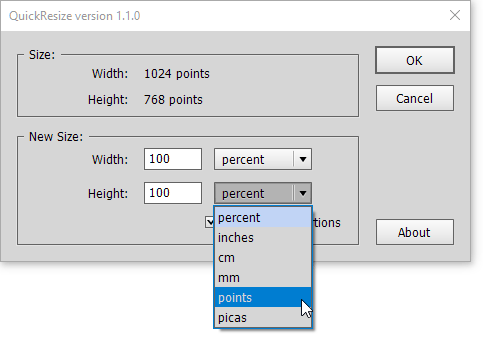
Figure 6: You can resize a document using several standard measurement units.
How well does it work?
First let’s take a look at the best part of this script. We’ve already covered the drawbacks involved in using the native tools in InDesign. While they work, in many cases (at least the ones I’ve been in) they leave me with more than a desirable amount of cleanup to do. Many other solutions to changing page sizes involved exporting and placing PDFs and then scaling them, but you may wind up with something difficult, if not impossible, to edit. With only a small change to the size, those solutions may be enough, but when you’re making a large change, it’s entirely possible that you may want to tweak the layout a bit, especially when it comes to text where a dramatic change in size may require some tracking or leading corrections. This script leaves you with a fully editable document. Let’s look at what happens when we increase the document to 200% (Figure 7).

Figure 7: Before (top) and after (bottom) increasing the document size to 200%. Hard to tell the difference!

Figure 8: Before scaling (top ) and after (bottom).

Figure 9: Type size displays normally after you redefine scaling as 100%.
The not quite so good
What about other aspects of the layout? Let’s look at some text that has a drop shadow applied (Figure 10).

Figure 10: Before (above) and after (below) scaling, a drop shadow remains the same size.

Figure 11: To change a document’s aspect ratio, deselect Constrain Proportions.
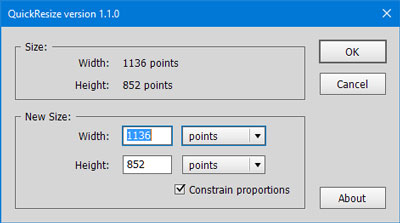
Figure 12: Resizing a document to fit an iPhone 5 screen.
The verdict
QuickResize is easy to use and does what it’s supposed to do; it quickly resizes any layout and certainly lives up to being simple. Will it work for you in every situation? As we’ve seen, of course not, but nothing simple does. Is it enough for you to invest $59 in? Only you can answer that, but I do recommend that you give it a try. A demo version that works in a very unique way is available for download. With it, you can test the script, but the results will be changed by up to 15% randomly. Product: QuickResize Company: Id-Extras Website: id-extras.com Price: US$59 Support: Mac and Windows, CS4 and later Rating: 4 butterflies
Commenting is easier and faster when you're logged in!

Recommended for you

Merging Paragraphs with Find/Change
Ginny wrote: I’ve imported 40 pages of directory listings each with a hard...

More Fun with Custom Stroke Styles
Another fun stroke style example, that sets a black keyline with a white gap.

Before&After: Design a Pocket-Size Brochure
Eight small pages unfold into an informative, letter-size sheet.