
InReview: i1DisplayPro and Spyder
Claudia McCue puts two worthy color calibration systems through their paces.

This article appears in Issue 85 of InDesign Magazine.
Does this sound familiar? You finish your design, and then print it out on your inkjet or laser printer, and it looks exactly like what you see on screen! HA—just kidding! Of course it doesn’t. You cross your fingers and send the job to the commercial printer. When you view the contract proofs or first press sheet, it looks exactly like… neither your screen nor your desktop printer (Figure 1). What can you hang your hat on? What can you do?

Figure 1: Which display tells the true story? (Hint: it’s the one on the lower right.)
Calibrating and Profiling Your Monitor
There’s hope: if you calibrate and profile your monitor, and profile your desktop printer, you have a much better chance of predicting printed outcome. High-end devices used by commercial printers and photography studios can be quite expensive, but in this article I’ll introduce you to two solutions that are well within almost any designer’s budget. Regardless of the method you choose for calibrating and profiling, there are some peripheral considerations:
- Your environment affects your perception: bright lights in the room compete with your screen. Colored clothing can reflect on the screen and influence what you see. Color workstations in prepress departments are surrounded by gray walls and subdued lighting; when I worked on the front lines I always wore black or dark gray clothing (partly because I have no fashion sense, but mainly because I didn’t want to compromise my color perception). Avoid lights aimed directly on the monitor.

This
is not the ideal environment to judge onscreen color.
- Lighting affects the appearance of printed output, whether from your inkjet printer, laser printer, or commercial printer. Compare the look of a piece under fluorescent lighting to its appearance under tungsten lighting or bright sunlight—you’ll see quite a difference. Print shops have expensive dedicated viewing booths using specialized bulbs from GretagMacbeth. If you aren’t prepared to invest $1500–$5,000 for a dedicated viewing booth, consider one of the “natural daylight” lamps from ottlite.com; they’re mighty close to 5000K.
- You should let your monitor warm up for at least 30 minutes before profiling. Yes, even LCD monitors need to warm up.
So, these tools I’ll talk about let you profile your device, which affects the way your system paints pixels to screen, so that images are more accurately rendered in Adobe applications.
Color temperature
Color temperature is based on the color of light emitted by an imaginary “black body” (bear with me; this gets easier) heated to various temperatures. The color temperature is expressed in Kelvins. Our own sun emits light in the 5000–6500K range; an incandescent light bulb might be about 2700K. Lower numbers are warmer (redder, yellower) lighting sources; lighting is cooler as the numbers go up. In the olden days, big, heavy CRT monitors shipped with color temperature set to 9300K—very bright, cold, bluish light, inappropriate for judging color in photographs on screen. This is counterintuitive (and seems inconsistent), but the current industry convention is to use 5000K viewing lights, but set the monitor to 6500K. Why? To more closely match the white stock usually used for proofing. White areas under 5000K on a monitor look warm and dark compared to what we expect paper to look like. Consequently, most commercial printers strike the compromise of setting monitors to 6500K (also called D65), while viewing proofs at 5000K. Now, let’s take a look at two affordable solutions that can calibrate and profile your display, so you have more reliable previews of your printed output.
i1Display Pro
X-Rite is the parent company of Pantone Inc., and a longtime purveyor of color control products for the graphic arts industry, as well as textiles, video applications, cosmetics, plastics, paint, and other coatings. In 2012 they introduced the i1Display Pro calibration system (Figure 2).
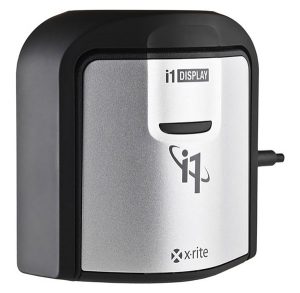
Figure 2: The i1Display Pro calibration system from X-Rite
- https://www.xrite.com/i1display-pro
- Retail: $279 (at Amazon and BH Photo, $204.79)
System requirements
- Mac OS X 10.6.x through Mac OS X 10.10.x, Microsoft® Windows® XP® to Windows 10 (32 bit/64 bit)
- Monitor resolution of 1024 × 768 pixels or higher
- Dual display support requires either two video cards or a dual-head video card that supports dual video lookup tables (LUT) being loaded
- DVD drive or high-speed Internet connection required for software install, download, and automatic software update
Features
- Measures ambient light
- Profiles multiple monitors
- Profiles projectors
Setup Install the i1 Profiler software from the included disk (it’s a good idea to check the X-Rite site for the most current version), and then plug in the device and launch the software. Choose the type of profile you wish to create (Figure 3); your options depend on the model of device connected. For the i1Display Pro, only monitor and projector profiling are available (note the red and white question mark icons labeling unavailable options).

Figure 3: Choose the screen you’d like to calibrate and profile.
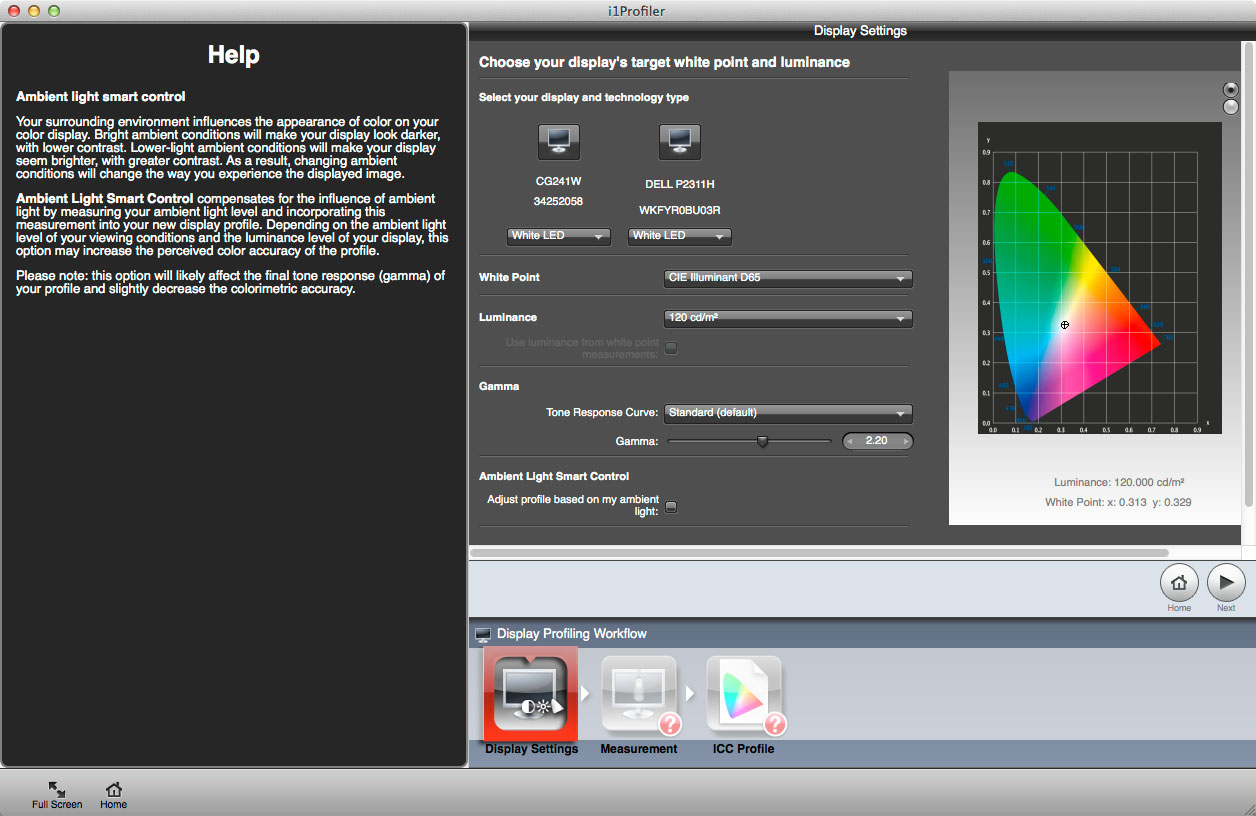
Figure 4: Set the white point of your display (recommended: 6500K).

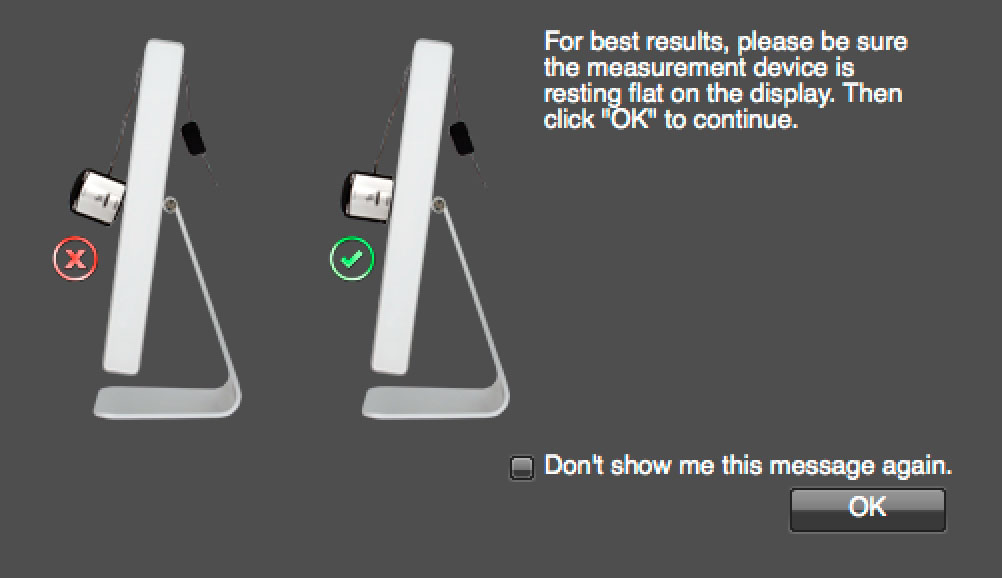
Figures 5 and 6: Onscreen graphics demonstrate how to orient the device and position it on your screen.

Figure 7: Name and save the profile, and view a Before/After version of an example image.
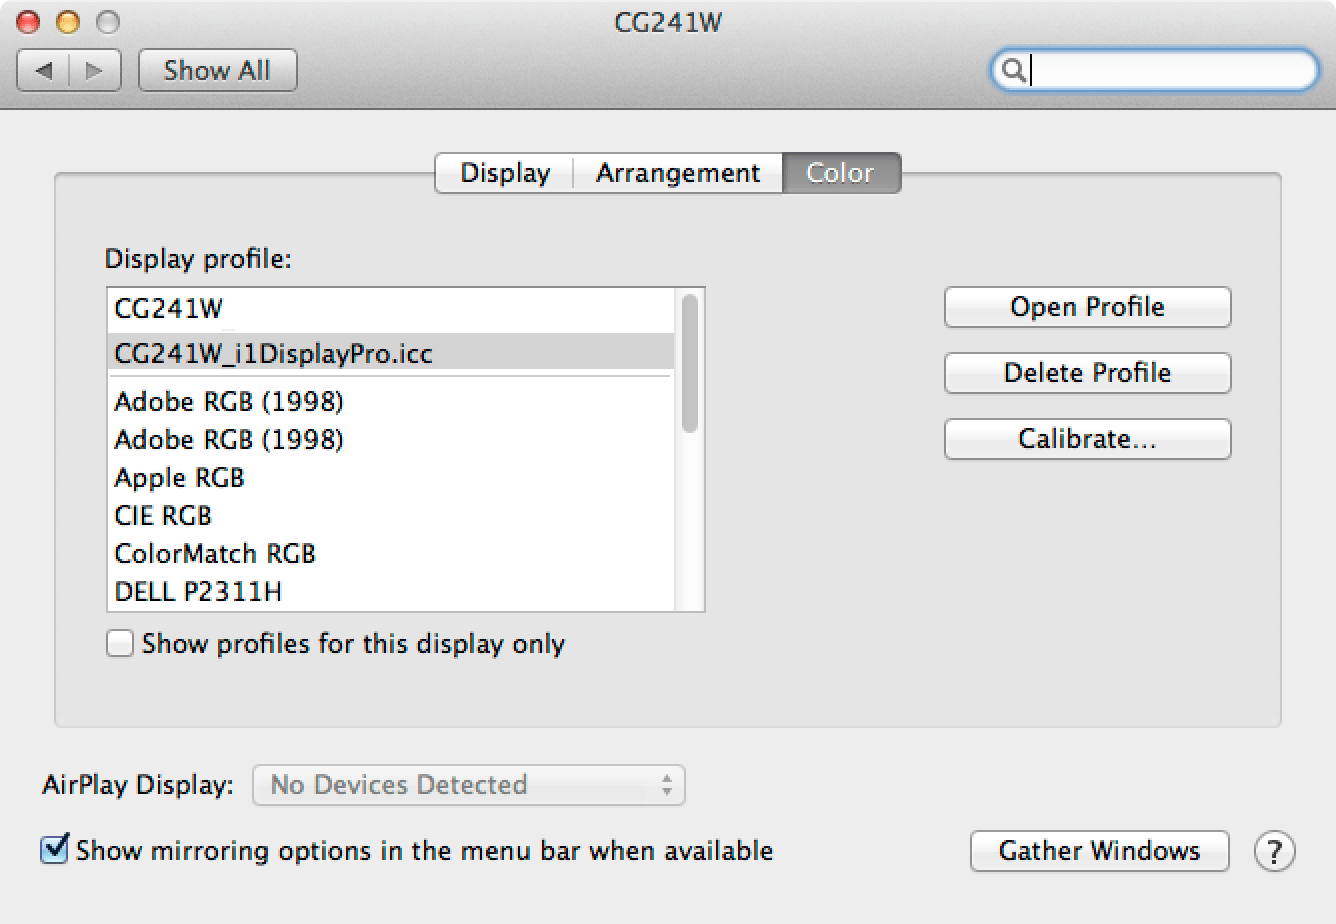
Figure 8: Invoking the new profile on a Mac.
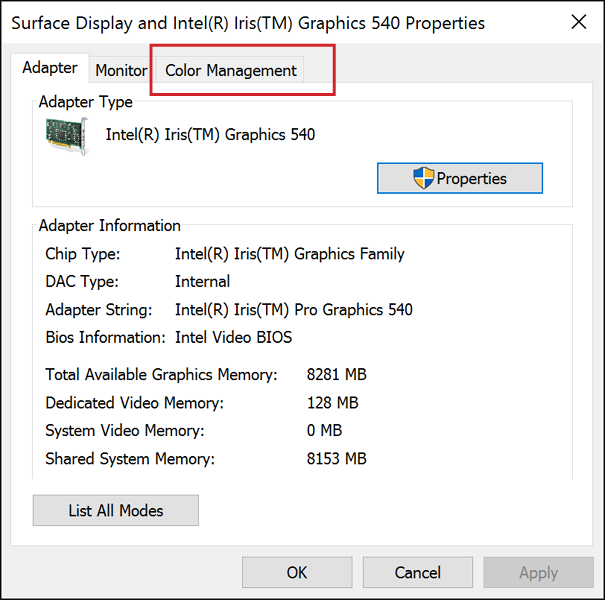 Because Windows apparently doesn’t want to rush into things, when you switch to the Color Management tab, you’re instructed to click the Color Management button (Figure 10).
Figure 10: One more step: click the Color Management button.

Figure 11: Select the profile, and designate it as the default profile.
Datacolor Spyder5Pro
Datacolor provides color measurement and management devices and software to a wide range of industries, like photography, printing, videography, and textile manufacture, including our subject today, the fashionable Spyder5Pro (Figure 12). 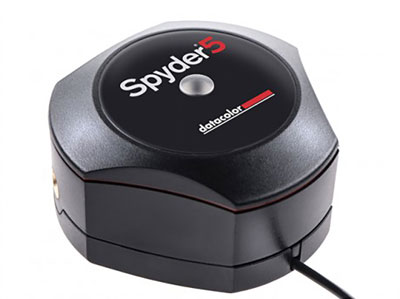
- https://spyder.datacolor.com/portfolio-view/spyder5pro/
- Retail: $189 (at Amazon and BH Photo, $149)
System requirements
- Windows 7, 8.0, 8.1 (32 bit/64 bit), Mac OS X 10.7.x through 10.10.x
- Monitor Resolution 1280 × 768 or greater, 16-bit video card (24 recommended, 1GB of available RAM, 500MB of available hard disk space
- Internet connection for software download
Features
- Measures ambient light
- Profiles multiple monitors
The Spyder5Pro is a somewhat simpler device than X-Rite’s i1Display Pro; it’s also a bit less expensive. It offers only monitor profiling (although Datacolor does market the Spyder5Elite, which profiles projectors, and Spyder5Studio, which adds the ability to profile print output). The Spyder5Pro is nicely self-contained; the lens cover doubles as counterweight, and the USB cable is integrated into the device. To use the Spyder for monitor calibration, take off the lens cover, and then pull it away from the body of the device by sliding it along its wire so the cap can be hung behind the monitor (Figure 13).
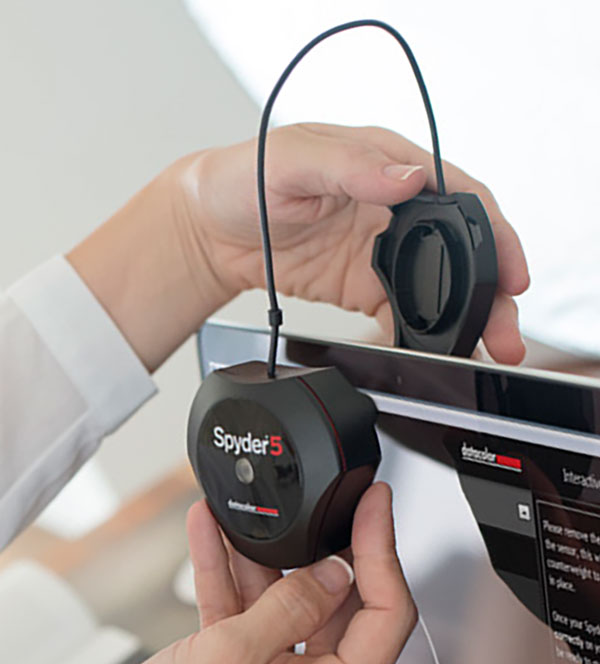
Figure 13: Pull the lens cap along the wire until it’s in a good position to serve as a counterweight.
Setup
Before plugging in the SpyderPro5, install the software. There’s no disk in the petite Spyder package; a card in the top of the box directs you to the download site for the Spyder5Pro software. Note: On the Mac, the software is installed in a Datacolor folder on your hard drive, not in your Applications folder. When you launch the software, you’re advised to let your monitor warm up sufficiently, set your typical lighting, establish your monitor settings, and plug in the device (Figure 14).

Figure 14: A little advice before you get started.

Figure 15: First, measure the ambient light so the monitor’s brightness can be set appropriately.

Figure 16: Choose which monitor you wish to calibrate and profile.
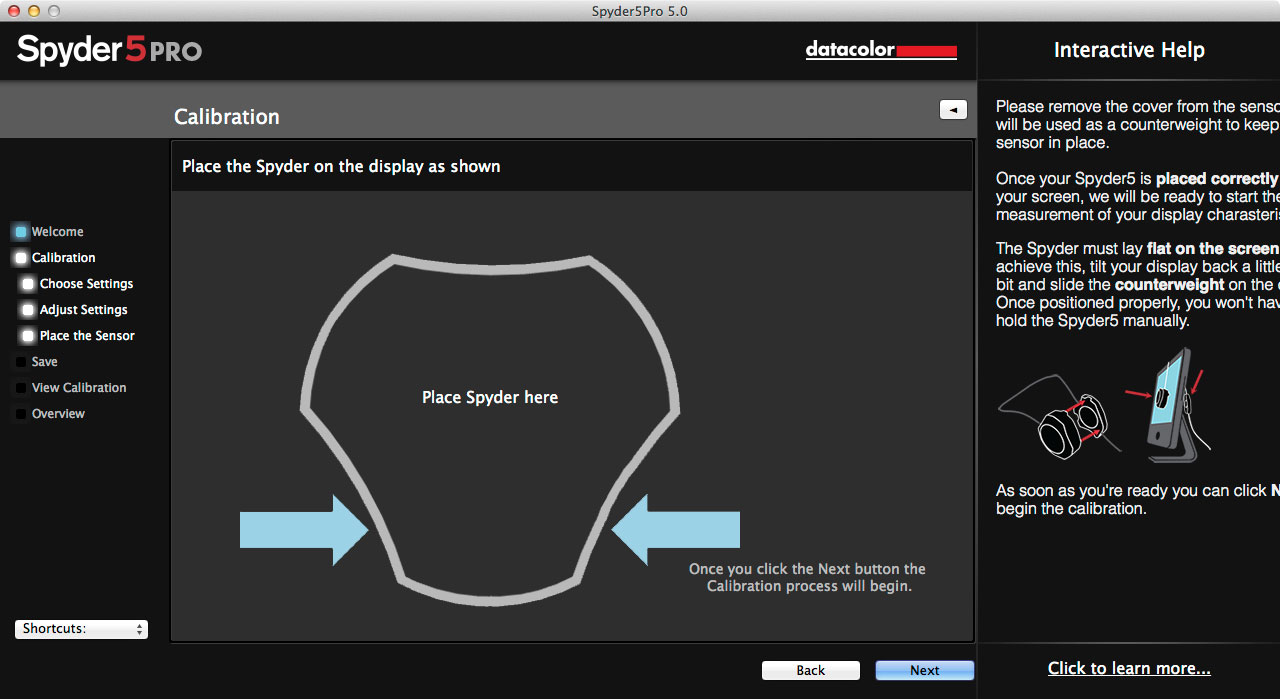
Figure 17: Tilt the monitor back, and place the Spyder device in the indicated position.
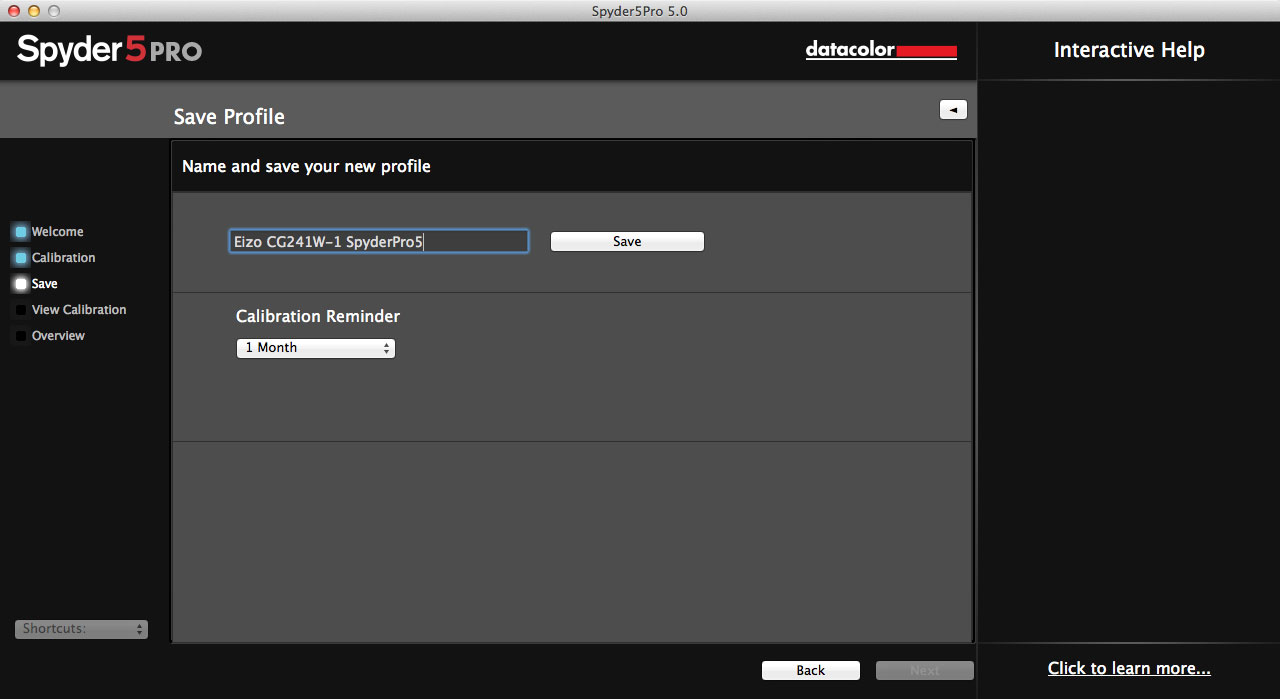
Figure 18: Name and save the newly generated profile.


Figure 19: Compare before and after images.
What’s the Verdict?
Both the X-Rite i1Display Pro and the Datacolor Spyder5Pro do a stellar job of calibrating and profiling a monitor. Honestly, I’d be hard-pressed to pick one over the other. Color cast and contrast are excellent with both; if I had to nit-pick, I’d say that the Spyder5Pro results in an ever-so-slightly darker image—and I mean really slight; maybe half a skosh, if that—not enough to truly make a significant difference in fidelity. Only a longtime color twit like me would notice (Note: “color twit” is not a recognized job description). If you need to profile and calibrate just your monitors, you couldn’t go wrong with either device. If you also need to set up a projector, go with the X-Rite i1Display Pro.
Commenting is easier and faster when you're logged in!

Recommended for you

Redax 4.5: Secure, Reliable Redaction for PDF
Appligent, Inc. (www.appligent.com) the leader in PDF redaction, is announcing R...
Tips for Filling Type with Gradients
How to make fun effects by filling type (regular or curved) with gradients.
Tip of the Week: Turn Off Multiple Layers Simultaneously
This tip was sent to Tip of the Week email subscribers on January 22, 2015. Sign...