InDesign 101
A beginner's guide to Adobe InDesign
This article appears in Issue 101 of InDesign Magazine.
While most InDesign Magazine readers have been using Adobe InDesign for years, each day new users are drawn to this powerful page-layout program. And the first question of every new user is: “Where to start?!” Fortunately, we have an answer: Start right here.
This is InDesign 101: The Basics. I’ll show you how you can get up to speed in InDesign quickly so that you can create basic documents and—perhaps more importantly—edit templates and other people’s documents. If you’re just now picking up InDesign and you want to ensure you get a good foundation, follow me!
First Things First
It’s important to understand that InDesign is a page-layout tool: that is, it lets you bring together text, graphics, shapes, videos, and so on, and place them precisely on a page. That’s why it’s the most popular tool in the world for creating page-based documents, such as books, magazines, newspapers, ads, brochures, and more.
You can certainly create these kinds of documents with other tools—such as Adobe Illustrator or Photoshop or even Word—but you’ll never be as efficient or productive as you would if you used InDesign. And the longer the document you need to create, the more you need InDesign.
In the past, InDesign was used exclusively for print-based documents. But today InDesign has features that let you create a wide variety of digital publications, too, including reflowable EPUB, fixed-layout EPUB, and even web documents that can be viewed in a browser. These interactive documents can contain audio and video, animations, buttons, and more.
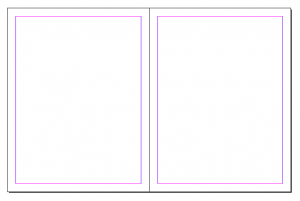 Some people call it an “artboard,” but in InDesign it’s a page. Actually, InDesign thinks in terms of
“spreads,” which can contain one or more pages. For example, the left- and right-hand “facing” pages in a printed book or magazine make up a single spread.
The Workspace
Let’s take a quick tour around InDesign’s workspace, so you’ll know where to find the important stuff. The Tools panel on the left side of the screen (Figure 1) is obviously pretty important, but it can feel overwhelming at first.

Figure 1: The Tools panel. Notice the positions of the Selection tool, the Type tool, and the Rectangle Frame tool. Note: By default, the Tools panel appears in a single-column format. You can switch to the two-column format shown here by clicking the tiny double arrows at the top of the panel.
Fortunately, for most tasks you really only need to use three tools:
- The Selection tool (the “black arrow”) lets you select and move objects.
- The Type tool (looks like a “T”) lets you create text frames and select text inside them.
- The Rectangle Frame tool (the box with an “X” in it) lets you create graphic frames into which you can put pictures.
At the top of the screen, you’ll find the Control panel, which is like an “inspector” panel: It changes based on what kind of object and tool you have selected. For example, when you have text selected with the Type tool, it will show you text-formatting options; when you have something selected with the Selection tool, the Control panel lets you see and adjust object settings, such as size, position, and so on (Figure 2).

Figure 2: The Control panel changes based on what you have selected on your page and which tool you have selected in the Tools panel.
Most of InDesign’s features are hidden inside panels, and you can find all the panels inside the Window menu. But several of the most-important panels are visible in the “dock” along the right side of your screen. You can open (or close) any of these panels by clicking its name or icon. The panels you’re going to use most are:
Pages: The Pages panel gives you an overview of all the pages in your document, and lets you move, add, delete, or style them.
Links: As you’ll see later in this article, when you place an image onto your page, InDesign tracks it in the Links panel.
Stroke: You can apply strokes (some people call them “borders”) to objects and text in the Control panel, but the Stroke panel offers many more options.
Swatches: This lets you change the fill and stroke colors of text or objects. You may be tempted to use the Color panel instead, but the Swatches panel is usually the better choice.
Paragraph Styles and Character Styles: These panels aren’t visible by default (in the “Essentials”) workspace, but you can find them by choosing Window > Styles. You’ll use these to create and apply text formatting; I’ll cover them in a later article.
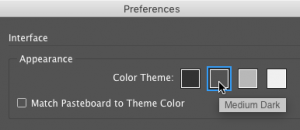 You can change the brightness of the user interface (called the “UI”) by opening the Preferences dialog box (from the InDesign menu on the Mac, or the Edit menu on Windows) and clicking the Interface pane from the list on the left. Appearance defaults to “Medium Dark” but some people prefer Medium Light, or even Light.
Opening Documents
Everyone knows you can create a new document by choosing New from the File menu. But InDesign’s New Document dialog box can be a little confusing. First, I should point out that InDesign has two different “New Document” dialog boxes: the original one and a new one (which first appeared in version CC 2017; Figure 3).

Figure 3: InDesign’s legacy New Document dialog box (left) and the newer version (right).
If you prefer the original style, you can still get it by turning on the option called “Use Legacy New Document Dialog” in the General pane of the Preferences dialog box.
Most of the features inside the New Document dialog boxes are pretty self-explanatory (such as margin size, number of pages, and so on). But here are two checkboxes you need to watch out for:
Facing Pages. This option is on by default, but you often need to turn it off. When it’s on, your document pages are set up as two-page spreads with a left- and a right-hand page (sometimes called verso and recto). This is great for books and magazines. But if you’re creating a one-page document, or a document for on-screen viewing—or any kind of document that does not have pages that face each other—turn this off.
Primary Text Frame. If you’re making a book—where there is a big block of text on every page—then turn on this option. Otherwise, it’s generally safer to leave it off.
Instead of creating a new document, you may want to open a previously-created document or template. (A template is simply a “starter” document you can edit, adding your own text and graphics.)
There are many websites that offer template files you can download and use, including InDesignSecrets (here’s a list of free templates; and here’s a list of premium templates for annual members). Also, Adobe Stock now provides InDesign templates (some free, some requiring an additional Stock membership), which you can find either by visiting stock.adobe.com or by clicking on Print, Web, or Mobile at the top of the updated New Document dialog box.
 One of the most common questions that new InDesign users ask is: How do I change the rulers and measurement system for my document? For example, perhaps you want to use millimeters or inches instead of picas. In the updated New Document dialog box, you can choose the units of measurement when you create your document. Or you can always change them by opening the Preferences dialog box (from the InDesign menu on the Mac, or the Edit menu on Windows), and clicking the Units & Increments pane in the list on the left. If you change these preferences while no documents are open, it will apply the changes to all your future new documents.
 Navigating Documents
Now that you have your document open, you’re going to have to navigate around it—zooming in and out, panning around, switching pages, and so on. Because this is such a critical part of laying out a page, InDesign offers a multitude of options. Here are a few you need to master:
Scroll bars. This is the most obvious (but rarely the most efficient) way to pan around a page, or even from one page to the next.
Document window. You can navigate from page to page using the controls in the lower-left corner of the document window, or zoom in and out with the control in the upper-left corner (Figure 4).
Pages panel. Double-click on any page in the Pages panel to jump to it.
Shortcuts. The Layout menu (in the menu bar at the top of the screen) helps you navigate from page to page, and the View menu lets you zoom in and out. Similarly, the Hand and Zoom tools in the Tools panel let you pan or zoom. But it’s a good idea to learn a few of the basic navigation shortcuts, because you’ll be using them so much (see “Navigation Shortcuts”).
Working with Text
Perhaps the most confusing aspect of InDesign for a new user is that all text needs to reside in a text frame—you cannot simply open a document and start typing. To make a rectangular text frame, select the Type tool and drag it on the page. You can change the size or position of the frame by switching to the Selection tool (Figure 5).
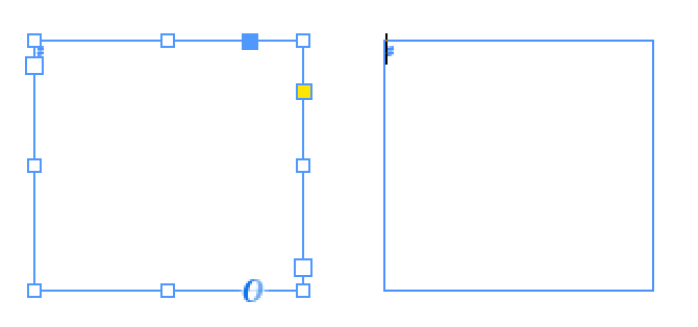
Figure 5: A text frame selected with the Selection tool (left) and with Type tool (right). Once you have chosen the object with the Selection tool, drag inside it to move it, drag a corner or side handle to resize it, or drag just outside a corner handle to rotate it.
To type text (or edit text inside the frame), switch back to the Type tool and click inside the frame. (Shortcut: Double-click inside a text frame with the Selection tool to switch to the Type tool automatically.)
Once the text cursor is flashing inside a text frame, you can type, paste text in, or place a Word or RTF file from disk by choosing File > Place. (In general, pasting small amounts of text is okay, but for longer documents, Place is better.)
If the text is too large to fit inside the text frame, you will see a red + symbol in the lower-right corner of the frame. This indicates that the frame is overset. You can fix this by making the frame larger, or by threading the text frame to another text frame (for example, an empty frame on another page). To thread two text frames together, first click the first frame with the Selection tool—not the Type tool!—and then click the tiny square in the lower-right corner, and finally, click anywhere on the second frame. To see the thread line, choose View > Extras > Show Text Threads.
Once you have text inside a frame (or threaded across frames), you’re going to want to format or style it. First, use the Type tool to select the text you want to change. Most of the text formatting features can be found in the Control panel. However, note the “A” and “¶“ buttons on the left side of the panel: these let you switch the panel between Character and Paragraph modes (Figure 6).

Figure 6: When the Type tool is selected, the Control panel has two modes: Character formatting (top) and Paragraph formatting (bottom).
Character formatting applies to just the selected text; paragraph formatting always applies to an entire paragraph. For example, font and size are character formatting; left indent or drop caps are paragraph formatting. Note that the wider your screen, the more features fit inside the Control panel, and on a wide enough screen, both character and paragraph features appear side-by-side.
Another way you can style text is to change its color. You can change the fill or stroke (outline) of any selected text or object in the Control panel (in Character mode) or in the Swatches panel. In the Control panel, Fill and Stroke color are two separate widgets (the one on top is Fill). In the Swatches panel, click on the Fill or Stroke icon in the upper left corner of the panel to set which one you want to change before you click a color swatch (Figure 7).

Figure 7: Changing the fill and stroke color in the Control panel (left) and the Swatches panel (below).
|
Action |
Mac OS |
Windows |
|
Zoom in |
Command-+ or spacebar- Command-click |
Ctrl-+ or Ctrl-spacebar-click |
|
Zoom out |
Command-minus or spacebar-Command- Option-click |
Ctrl-minus or Ctrl-Alt-spacebar-click |
|
Pan/scroll around (temporary Hand tool) |
Option-spacebar-drag |
Alt-spacebar-drag |
|
Zoom to 100% |
Command-1 |
Ctrl-1 |
|
Fit page in window |
Command-0 (zero) |
Ctrl-0 (zero) |
|
Next page |
Shift-Page Down |
Shift-Page Down |
|
Previous page |
Shift-Page Up |
Shift-Page Up |
Working with Pictures
InDesign lets you import a wide range of graphics onto your pages, from sharp-edged “vector” graphics to photographic “pixel” images. But before you bring in any pictures, think about these two important guidelines:
- You should avoid using copy-and-paste to import pictures. Instead, use File > Place to import pictures. Also, be sure nothing is selected in your layout (Edit > Deselect All) before you Place, because “Replace Selection” is turned on by default.
- It is often best to import “native” formats. For example, for Adobe Illustrator graphics, import the .AI or .PDF files. For a Photoshop file, you can import the .PSD file. This is not a strict rule, but it’s worth trying because it can enable more features and more efficient workflows.
If you select an empty frame on your page and then choose File > Place to choose a graphic, InDesign will put that picture into the frame. But if you haven’t selected a frame first, then InDesign attaches a little thumbnail image to your cursor. You can click once to place the image at that location on the page, or—even better—you can drag out an area on the page with the cursor, and InDesign will create a new frame and place the picture into it.
Just like with text, images are always inside graphic frames. If you click once on a graphic frame with the Selection tool, you select the frame—and if you resize the frame, you crop the image. That is, you change what part of the image inside the frame is visible.
If you double-click on the image (or single-click on the little “donut”-shaped icon in the middle of the frame), you select the picture inside the frame. Now you can resize or move the picture independently of the frame (Figure 8).

Figure 8: Selecting a graphic frame (above); selecting the image inside the frame (right). Notice that the image has been cropped so that it is larger than the frame that contains it.
Tip: To resize both the frame and the picture, hold the Command key on the Mac or the Control key on Windows while you drag one of the handles on the frame. Hold down the Shift key to maintain the correct height/width proportions.
Here’s another super important tidbit about graphics in InDesign: when you use Place to import a picture to your page, InDesign doesn’t actually embed the image into the document. Instead, it creates a link from your document to the picture file on disk. This has several ramifications:
- If you rename, delete, or move the image, then InDesign can’t find it, and it will be listed as “Missing” in the Links panel (Window > Links; see Figure 9).
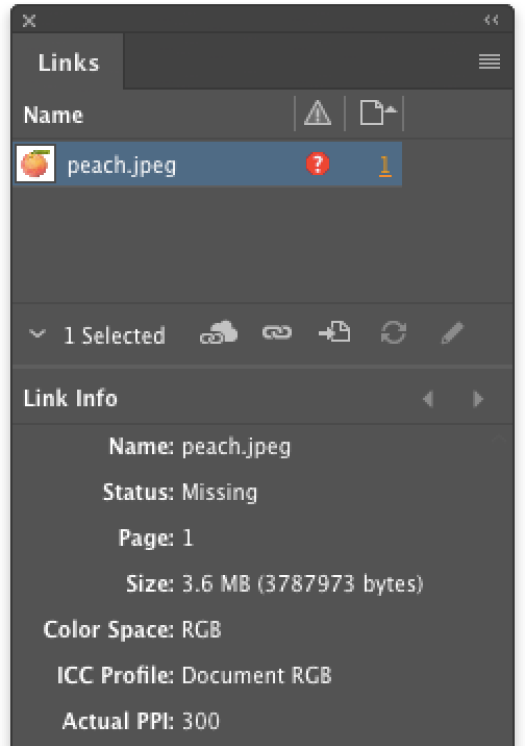
Figure 9: The Links panel displays every placed image along with its status (OK, Modified, or Missing). When you select an image in the panel, the Link Info area shows additional information about it.
- If you edit the image in a different program and save your changes, it will be listed as “Modified” in the Links panel. You then need to select it and update it. (Click the Update button in the Links panel.)
- If you move your InDesign document to another computer, it may not be able to find the images you placed. You can collect all the images together into a single folder by using File > Package.
Tip: If the picture isn’t too large, and you know it won’t need to be edited in the future, you may want to select it in the Links panel and then choose Embed from the Links panel menu in the upper-right corner of the panel. (Avoid doing this with huge Photoshop images, because it will make your InDesign file size enormous.)
Printing and Exporting
Your ultimate goal in using InDesign is to export or print your document, right? But before you do that, view it in Preview mode by pressing the W key (of course, first make sure you’re not editing text, or else that will just type the letter “w”). Preview mode hides all non-printing objects: your guides disappear, edges of frames disappear… even parts of objects that are hanging off the side of the page onto the pasteboard disappear. This is what the final page is going to look like when you print it or export to PDF. You can actually still work on the document while in Preview mode if you want. Then, when you’re done previewing, just press W again, and you’re back in the normal screen mode.
The Print dialog box (File > Print) is pretty self-explanatory, of course, but there are a few quick things you need to know:
- Before you click Print, you should look through at least three of the panes in this dialog box by clicking their names in the list on the left: General, Setup, and Output. Yes, there are a lot of options, but it’s worth taking the time to get it right (Figure 10).
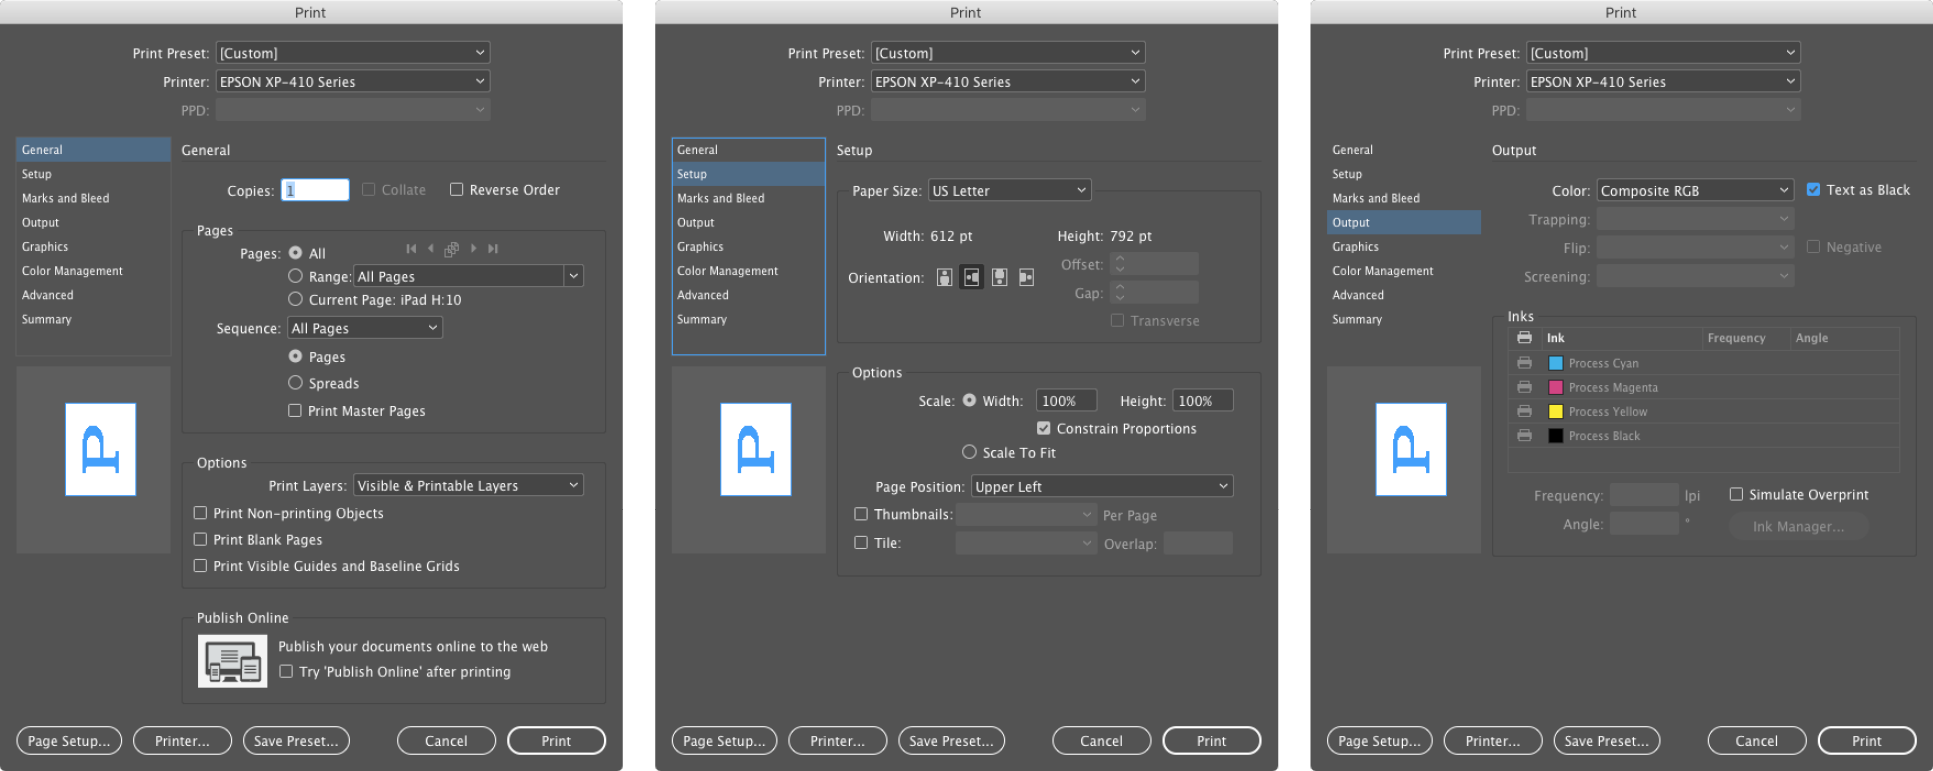
Figure 10: The Print dialog box contains dozens of options.
- If you’re trying to use the double-sided feature or some other special option on your printer, you need to click the Printer button at the bottom of the Print dialog box to access the “printer driver” settings.
If, instead of printing, you want to export a PDF, EPUB, or one of several other formats InDesign can create, you should choose File > Export. Here are several export tips to keep in mind:
- There are two options for PDF export: Print and Interactive. You should use Interactive only if you’re including videos, audio, or buttons. For most PDFs, choose Print. You can still maintain hyperlinks and bookmarks in Print PDFs, if you turn on those checkboxes in the PDF Export Options dialog box.
- EPUB (Fixed Layout) is another great way to share your documents with people, but note that your audience must have the appropriate reader software.
- You’ll see HTML listed in the Format pop-up menu in the Export dialog box, but this is only a simple export of text and graphics, without any page design.
- You should consider trying the Publish Online feature. This is a very simple way to export your entire document as an interactive website, which is hosted on Adobe’s servers. It’s a terrific way to share your documents with others. To use it, choose File > Publish Online and follow the (easy) instructions. It will provide you with a URL that you can then copy and send to people to view in any modern web browser.
Putting it All Together
InDesign is “industrial strength” design software, and we have only scratched the surface of how to get the most out of it. Nevertheless, this short “101” article should get you up and running. Pretty soon, though, you’ll be hungry to learn more. Fortunately, we have thousands of pages of tutorials, tips, and insights throughout over 100 issues of InDesign Magazine, and on the InDesignSecrets.com website.
But before we go, I want to leave you with one piece of advice for you to remember whenever you find yourself seemingly in trouble inside InDesign. As Douglas Adams wrote in Hitchhiker’s Guide to the Galaxy: “Don’t Panic!” We at InDesignSecrets are here to help you find solutions and make using InDesign easier!
Commenting is easier and faster when you're logged in!
Recommended for you

Special Characters
Nigel French weighs in on how to locate those hidden gems on the Glyphs panel—an...

All About the Adobe Certified Associate Exams
Becoming an Adobe Certified Associate is a great way to demonstrate your abiliti...

InDesign Nightmares
Terrifying tales of the evil that lurks in some InDesign files, and how to survi...


