

Follow this link to find out more.
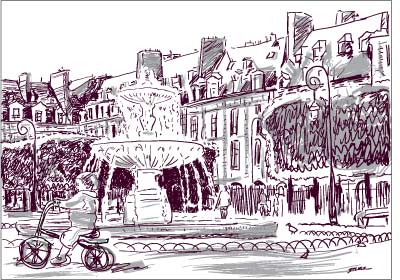
It’s easy to create spontaneous painterly and calligraphic marks in Adobe Illustrator-and perhaps with more flexibility than in any other digital medium, thanks to Illustrator’s vector-based strokes. Sharon Steuer drew this sketch of Paris’ Place des Vosges using a pressure-sensitive Wacom tablet and two different Illustrator brushes. She customized a brush for the thin, dark strokes, and used one of Illustrator’s built-in brushes for the underlying gray washes. When you use a pressure-sensitive, pen-like stylus and tablet to create highly variable, responsive strokes, you can edit those strokes as paths, or experiment by applying different brushes to the existing paths.

The final drawing
Setting up a template
You can start drawing on a blank Illustrator artboard, but if you want to use a sketch, scanned photo, or digital camera photo as a reference, set up the image as a non-printing template layer. For her template image, Steuer used a scanned TIFF photo of Place des Vosges. To place an image as a template layer, choose File > Place, locate your file, enable the Link and Template check boxes, and click the Place button. If the image imports at too large a size, unlock the template layer, enter a more reasonable Width value in the Transform palette, and press Command-Return (Mac)/Ctrl-Enter (Win) to resize it proportionally.
Toggle between hiding and showing the template layer using Command-Shift-W (Mac)/Ctrl-Shift-W (Win), or by clicking in the visibility column in the Layers palette (the icon for a template layer is a tiny triangle/circle/square, instead of the Eye icon). Illustrator automatically dims the image to make your drawing easier to see.

The original photo (left), brush strokes drawn over the dimmed template photo (center), and the template hidden (right)
You can customize the template layer by double-clicking its layer and changing options in the Layer Options dialog box. When you import an image as a template, Illustrator automatically enables the Template, Lock, and Dim check boxes for you. You can’t disable the Lock checkbox if the Template checkbox is enabled, but you can still unlock it in the Layers palette.
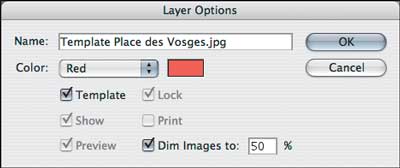
Customizing the template layer options
Setting up an expressive brush
In order to sketch freely and with accurate detail, you’ll need to adjust the default Paintbrush tool settings. Double-click the Paintbrush tool in the Tools palette to open Paintbrush Tool Preferences. Drag the Fidelity and Smoothness sliders all the way to the left so that Illustrator records your strokes precisely. Make sure “Fill new brush strokes” is disabled; you don’t need to change the other settings.
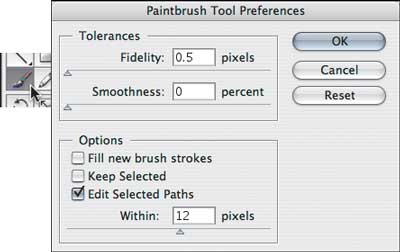
Customizing the Paintbrush Tool Preferences
To create a custom brush, click the New Brush icon at the bottom of the palette and click OK for a New Calligraphic Brush. Experiment with various settings, name your brush, and click OK. For this piece, Steuer chose the following settings: Angle=90°/Fixed; Roundness=10%/Fixed; Diameter=4 pt/Pressure/Variation=4 pt. If you don’t have a pressure-sensitive tablet, try Random as a setting for any of the three Brush Options, since Pressure won’t have any effect. The Paintbrush uses your current stroke color (if there isn’t a stroke color, it will use the previous stroke color or the fill color). Now draw. If you don’t like a mark: 1) choose Undo to delete it, or 2) use the Direct Selection tool to edit the path, or 3) select the path and try redrawing it using the Paintbrush (to hide or show selection outlines, choose View > Hide/Show Edges). To edit a brush, deselect everything (Edit > Select All), double-click the brush in the Brushes palette, and make changes. Illustrator will ask you if you want to apply the new settings to strokes you’ve already drawn with this brush; click Apply to Strokes if you want to do this or click Leave Strokes to apply the new settings only to new strokes. To edit a copy of a brush, drag it to the New Brush icon to duplicate it, and then edit the copy.

Angle, Roundness, and Diameter can be set to respond to pressure, to vary randomly, or to remain fixed
Save any versions of your artwork that you like. Now try applying different brushes to specific strokes and to the entire piece. To try more Adobe-made brushes, choose Window > Brush Libraries. In Figure 6, two Adobe brushes are applied to the same strokes as the custom brush.

Strokes made with Steuer’s customized 4 pt flat brush (left); applying Adobe’s default 3 pt Round brush (center), then the 1 pt Oval brush
Adding a wash
For this piece, Steuer added depth by introducing gray washes underneath the dark brush strokes. To easily edit the wash strokes without affecting the dark ink strokes, create a new layer between the ink and template layers and draw your strokes on that layer. To avoid altering other layers while you brush in the washes, you may want to lock all layers other than the one on which you’re drawing. A quick way to lock all layers except one is to Option-click (Mac) or Alt-click (Win) a layer’s Lock icon.
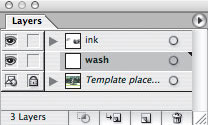
A new layer (wash) created for wider wash strokes to appear under existing darker strokes on the Template placeholder layer
Select or create a brush suitable for washes, and select a light wash color. Steuer used the Dry Ink brush from the default brushes palette in Illustrator CS. In the Layers palette, click the wash layer to make it the current drawing layer, and paint away.

Detail of the drawing before and after adding a wash
Introducing new elements later
Steuer also drew an extended version of the same pen and ink drawing. In this version, Steuer wanted to add young Noah riding a bicycle past the fountain. However, the fountain drawing’s existing strokes occupied the area where she wanted to add Noah. Steuer solved this using a technique that isn’t available with conventional ink: She used the Pencil tool to draw a path over the existing drawing, and filled the path with white to bring back the color of the paper. This restored an empty area where she could add the drawing of Noah, so it looked like it was there from the beginning. Steuer drew Noah on a separate layer so that she could easily edit Noah independently of the rest of the drawing. 10-boybeforeafter.jpg
Version of the drawing that includes the boy on a bicycle

White filled path added (left) to make room for boy on bicycle (right)
This article was last modified on January 3, 2023
This article was first published on February 8, 2005
Commenting is easier and faster when you're logged in!

Recommended for you

Scanning Around With Gene: Milk, the Wholesome Food
I’ve never much cared for dairy products, especially the liquid or creamy...

Tip of the Week: Keeping Table Rows Together
This InDesign tip on how to tidy up your tables was sent to Tip of the...
Free InDesign Script to Export JPEGs or PNGs at a Precise Size
InDesign has had the ability since at least CS2 to export pages to JPEG. But the...