How to Skip Page Numbering for Pages That Shouldn’t be Numbered
You can use a numbered list instead of automatic page numbers to skip numbering certain pages in an InDesign document

What if you have pages in your document that shouldn’t be numbered — that is, you want to skip page numbering for those pages. Can you make page numbers skip certain pages in InDesign?
For example, lets say you want to put an insert (an ad, or tab, or section divider, or something like that) in the middle of a document. Maybe you want to add it between pages 34 and 35. If you add a new page in InDesign, then page 35 becomes 36 — and if it’s a facing pages document, that means it changes from a right page to a left-hand page. If you add two pages, then it stays a right-hand page, but changes to page 37. What if you need it to stay page 35?
Two solutions come to mind: First, you could select the page that follows the divider, choose Layout > Numbering & Section Options, and turn on Start Page Numbering At. That way, the page becomes a new Section, and you can control the page numbering manually.
The problem with that, of course, is that if the page numbers change before the section, then you have to remember to update the section page numbers yourself.
Use Paragraph Numbering Instead
So here’s another option: Instead of numbering your pages with the normal “current page number” character, use paragraph numbering instead.
I first wrote about this a few years back, and explained that the trick is:
- create a new frame with one paragraph in it, and with at least one character (like a space) on that paragraph
- give that paragraph a numbered list, and make sure you create and use a List that spans across stories and is set to “continue from previous number”
- then, on the document pages, override the master page frame by Cmd/Ctrl-Shift-clicking on the frame
The benefit of this method is that you can insert pages where you want and choose whether they should be included in the numbering. The main problem with this method is that you have to override the master page frames (and if you have hundreds or thousands of pages, that would be annoying).
Once More, With Pictures
That said, if you do want to try this, here’s the step by step, with pictures…
First, here’s my master page, with small blank text frames where I want the page numbers to go:

Next, I place my cursor inside one of the frames, type a space (there has to be at least one character in there to work), and then open the Bullets & Numbering dialog box (fastest way to do that is to Option/Alt-click on the Numbering button in the Control panel):
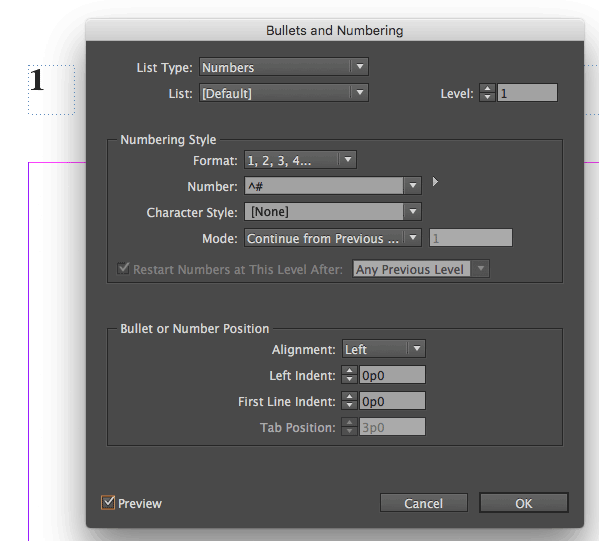
You can see above that I have changed the Number field so that it only inserts the number. Next, I need to create a new List from the List pop-up menu (that enables the numbering to span unthreaded frame):
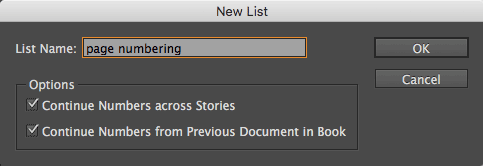
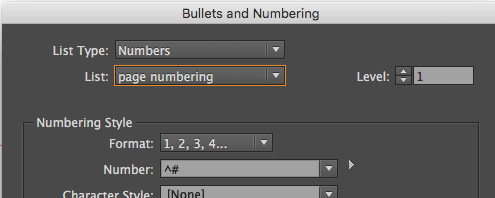
After I click OK, my new List shows up in the dialog box:
The problem is that when I return to my document pages, the numbering doesn’t update. For example, here I have flowed text in to my document, and I am looking at Page 4 (you can see it is selected in the Pages panel)… but it still shows as page 1:
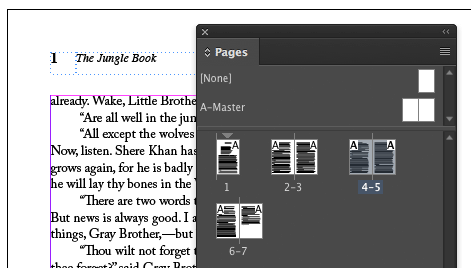
To make the automatic numbering start working, we have to Command-Shift-click (or Ctrl-Shift-click) on the frame, to override it from the master page. As soon as we do that, the number updates:
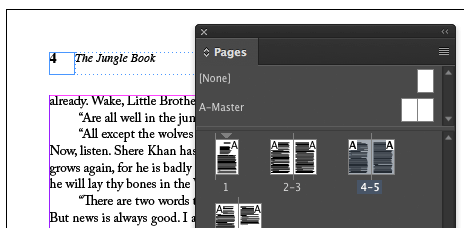
Now check this out… I add 2 pages after page 3, and they are blank (no master page applied). What was page 4 is now page 6, right? If I were using real page numbers, it would appear as page 6 in the upper-left corner. However, because of this trick, it skips over the blank pages and still appears as page 4:
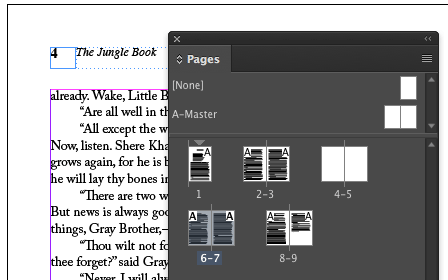
In a perfect world, InDesign would have a “skip page numbering” feature that you could just apply to a page. But until they get that feature, this is a pretty useful workaround.
This article was last modified on January 25, 2024
This article was first published on November 21, 2016
Commenting is easier and faster when you're logged in!
Recommended for you

How to Number Pages of a Spread With a Range
Editor’s Note: this post was excerpted from Jeff’s handout from Crea...

InDesign How-to: Restart Numbering in a List
Make your layouts smarter with list numbering that automatically restarts after...

Use Numbered Lists Instead of Auto Page Numbering
Sure, InDesign has an automatic page number feature. But sometimes other numberi...


