When you’re working in PowerPoint and the line or shape you need is not one of built-in options, you’ve just got to draw your own. There are three drawing tools in PowerPoint: the Curve Tool, the Freeform tool, and the Scribble Tool. Each of them create paths that are made up of anchor points. Here’s how to draw with them.
You’ll find the three tools on the Insert Ribbon, under Shapes, in the Lines group.
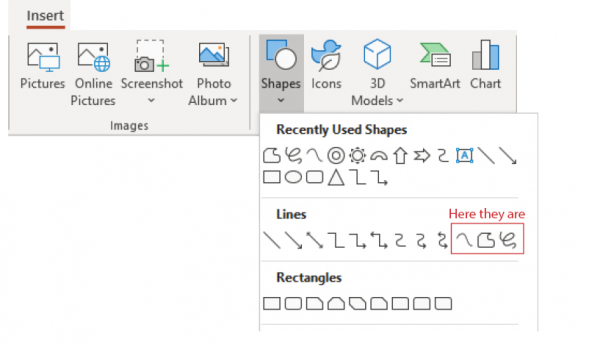
PowerPoint’s three drawing tools are on the Insert Ribbon, under Shapes.
Before you get started, if you’re looking to be a bit precise in your drawings, you might want to display grids on your slide so you can position your anchor points in the right spot (don’t worry, you can adjust these later). To show the grid, right-click anywhere on an empty part of your slide and choose Grid & Guides…, then check the box next to Display grid on screen. You can also experiment with the Spacing settings but the choices are a bit limited.
You might also find it useful to zoom in as much as is practical, so you can be a bit more exact with where you click.
The Curve Tool
The Curve Tool allows you to create an open or closed path where all the anchor points are rounded (smooth points).
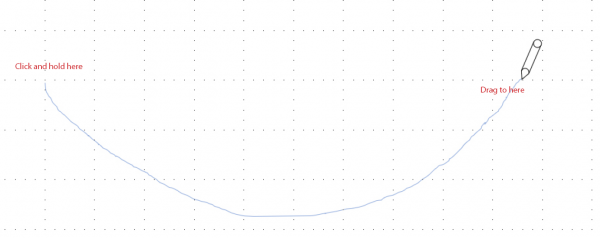
To use it, first select the Curve tool and notice that your cursor changes to a crosshair. Click where you want the first anchor point of your shape to be positioned and release the mouse button. Then move to another location and click and release again to indicate where the second anchor point should go.
As you move away from this second point, you’ll notice that your line is curving around that second anchor point. Now click to place all of the subsequent anchor points in their desired locations. Each time you do so, you’ll see the line curving through the points that you’ve placed.
Note: Click and drag does not work with the Curve Tool.
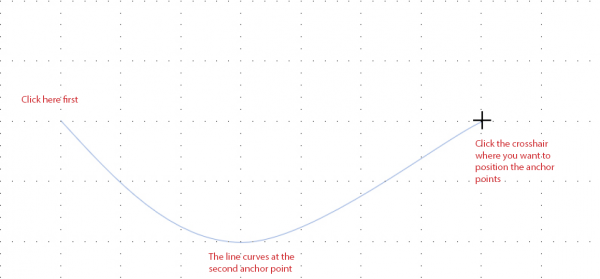
Drawing a curve
To complete an open curve, do either of the following:
- Double-click where you want the final anchor point to be; or
- Complete all anchor points and then tap ESC to end the drawing process.
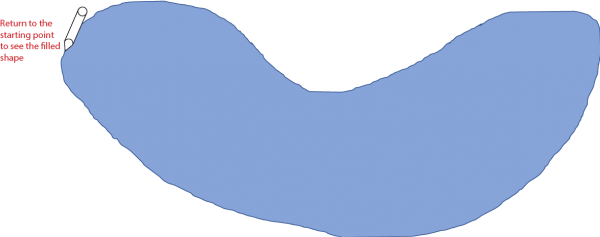
To complete a closed curve shape:
- Move back over the first anchor point of the path you’re creating. The shape will be filled with a semi-transparent shade of the default fill color to show you when you’re in the right spot. When you see the filled shape, click to finish drawing the shape.

When you return to the starting point, the shape will appear filled.
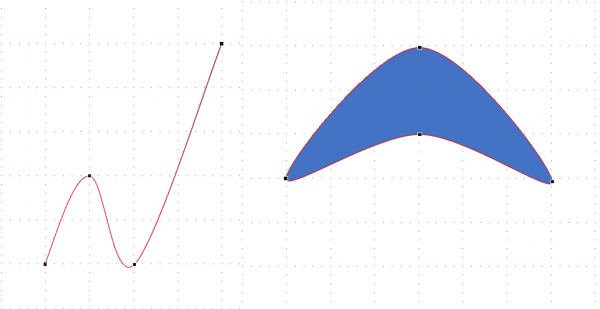
Anchor points indicate where you clicked when you created the shapes.
The Scribble Tool
The Scribble Tool allows you to draw one continuous shape made up of lots of points.
To use it, first select the Scribble tool and notice that your cursor changes to a pencil. Click your left mouse button while you drag the pencil around on the slide. A line will be left as a trail. The path is finished when you release your finger.
Drawing a scribble
To complete an open scribble:
- Release your finger from the mouse in the location where you want the path to end.
To complete a closed scribble shape:
- Move back over the first anchor point of the path you’re creating. The shape will be filled filled with a semi-transparent shade of the default fill color to show you when you’re in the right spot. When you see the filled shape, release.
When you return to the starting point, the shape will appear filled.
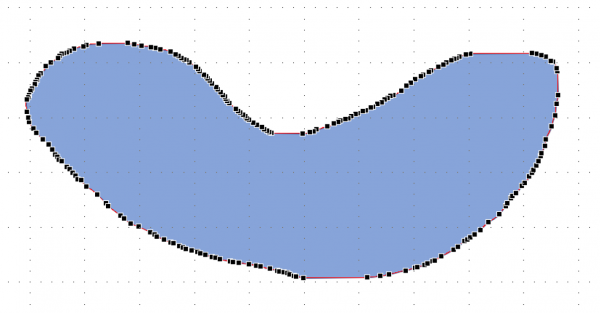
A scribble shape is made up of many anchor points, placed close together.
Freeform Tool
The Freeform Tool is a combination of the Curve Tool and the Scribble Tool. You use click & release to create a path with singular anchor points, or click & drag to make a scribbled path shape. You can combine both techniques in the same shape.
To give it a try, first select the Freeform tool and notice that your cursor changes to a crosshair. Click where you want the first anchor point to be positioned and release. You can continue clicking and releasing to make single anchor points (like the Curve tool, but with sharper points), or at any time you can click and drag to make multiple anchor points (like the Scribble tool).

Drawing a freeform path.
To complete an open freeform path, do either of the following:
- Double-click where you want the final anchor point to be; or
- Complete all anchor points and then tap ESC to end the drawing process.
To complete a closed freeform shape:
- Move back over the first anchor point of the path you’re creating. The shape will be filled with a semi-transparent shade of the default fill color to show you when you’re in the right spot. When you see the filled shape, click to finish drawing the shape.

Freeform shapes can contain corner points where you clicked and released, or many anchor points where the mouse was dragged.
Constraining the position of anchor points
You can hold down your Shift key while you’re using the Curve or Freeform tools and your anchor points will be constrained to draw lines that are vertical, horizontal or on a 45° angle.
And after the shape is drawn
I rarely get my hand-drawn shapes perfectly drawn the very first time I try but this isn’t a problem as they can be adjusted after they’re drawn.
Right-click on your newly-created path and select Edit Points to display the anchor points that you’ve created. You can click and drag these to new locations to get your path looking just right.
And if you’ve drawn a closed shape that you would prefer to be open (or vice-versa), right-click on the anchor point and select Open Path or Close Path.
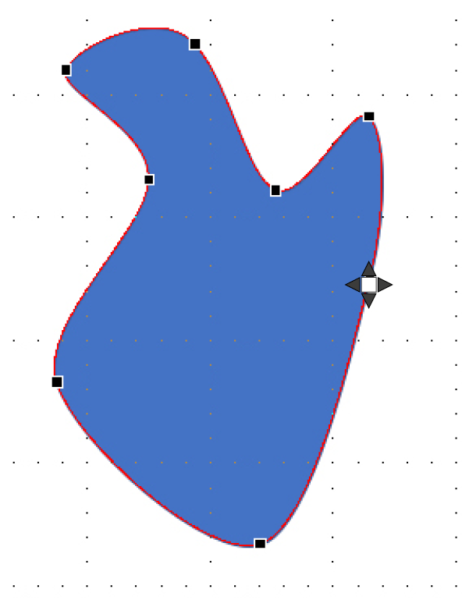
Click and drag the anchor points to perfect your shape.
This article was last modified on August 9, 2021
This article was first published on February 10, 2020
Commenting is easier and faster when you're logged in!