


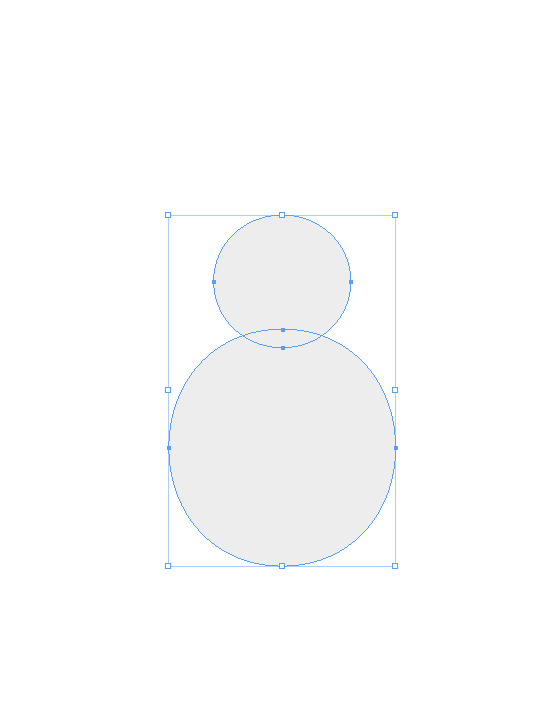
Do you want to build a snowman? Come on let’s go and play! I know that this is InDesign But that’s just fine Who needs Illustrator anyway? With sincere apologies to fans of Disney’s Frozen, let’s see how easy it is to make an InDesign snowman with transparency effects (just don’t call him Olaf, or you’ll invite the wrath of the Mouse’s copyright lawyers). Start by making a snowball and rolling it downhill. Just kidding. Draw two ovals for a head and body and fill them with about 7% black. This content is available exclusively for CreativePro members. Already a member? Please sign in at the top of the page. CreativePro membership keeps you up to date with resources, solutions, and community to strengthen your professional development. For just $6.50/month (billed annually), you’ll get access to valuable benefits, including: Get $10 off with the discount code: TEMPLATE
This content is available exclusively for CreativePro members. Already a member? Please sign in at the top of the page. CreativePro membership keeps you up-to-date with the technology, solutions, and resources to strengthen your professional development. For just $6.50/month (billed annually), you’ll get access to valuable benefits, including: Get $10 off with the discount code: TEMPLATE
 Give them some dimension by applying Bevel and Emboss and Inner Shadow with the Effects panel.
 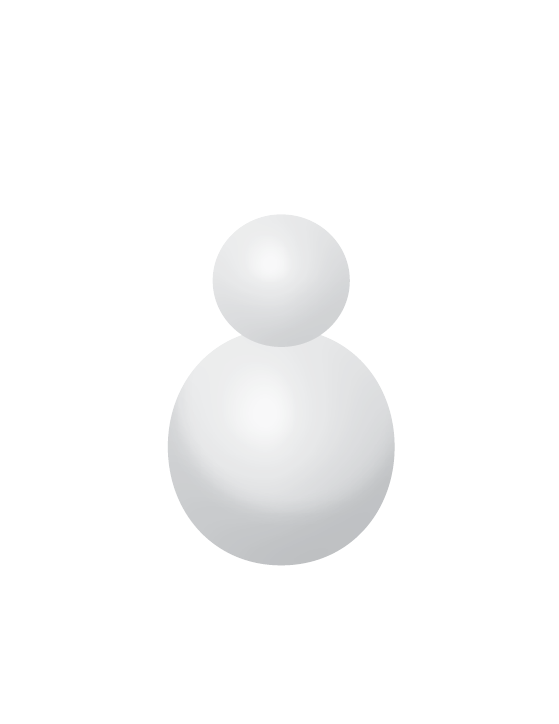 Use the Pen tool to add some arms. Apply a similar 3D effect to the arms with bevel and emboss and a drop shadow. Then make them blend into the body shape with a Gradient Feather at the shoulders.
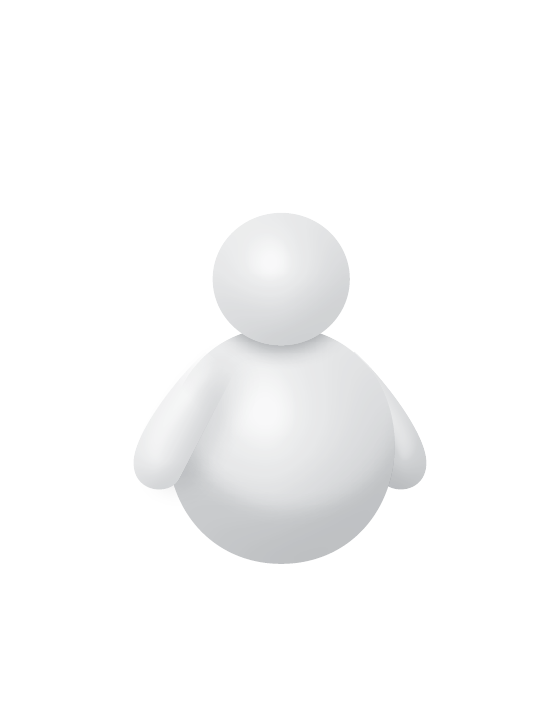
 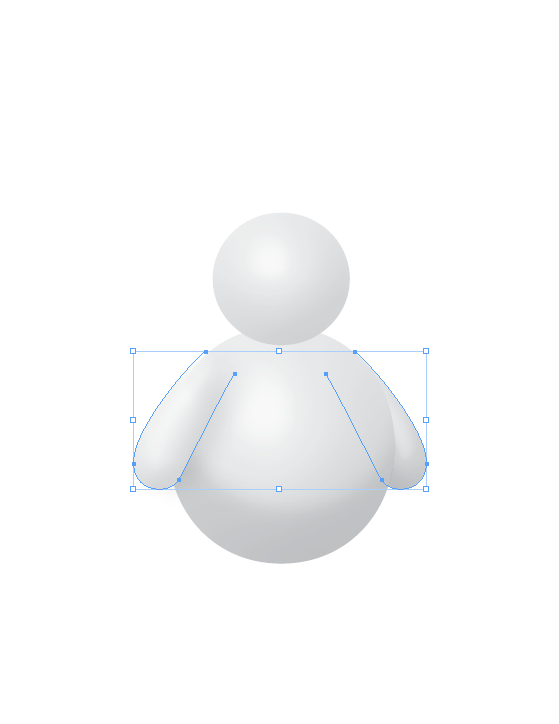 The next part is a little tricky. We need to add a shadow under the head that only appears on the head (and not on whatever background we decide to add later). To accomplish this, duplicate the head in place, apply a drop shadow, then cut the duplicate head and paste it into the body shape. It may help to hide the original head temporarily while you do this.
 Next, add some facial features. An orange triangle with a little bevel and emboss quickly becomes a carrot. Distort some black
 Olafs ovals with the Direct Selection tool for eyes.  Fashion a hat by starting with a rectangle and an oval for the brim, then tweaking the shapes with the Direct Selection tool. Make the sides of the rectangle concave, and the top convex.
 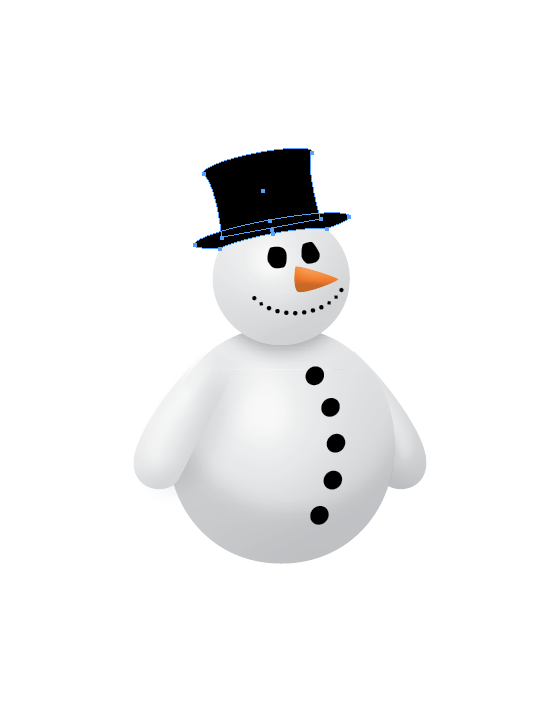 Make the hat fancy and shiny by adding a red band and a highlight.
  This is another case where you can draw a couple relatively simple shapes (ovals and rectangles work fine), group them, and paste them into the hat shape.
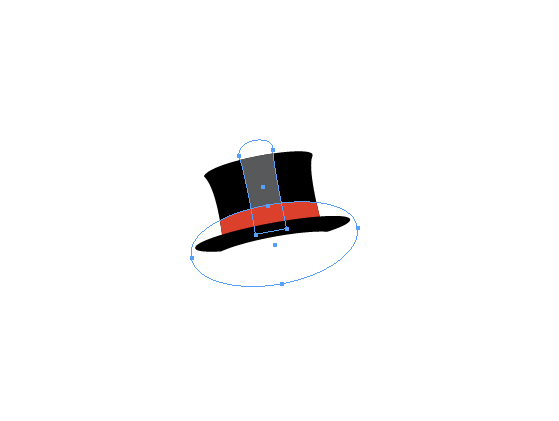

 As before with the head shadow, let’s add a hat shadow with some help from the magic of Paste Into. Duplicate the brim in place, add a drop shadow and paste the object into the head shape. That way the shadow only appears where it should (on the head).
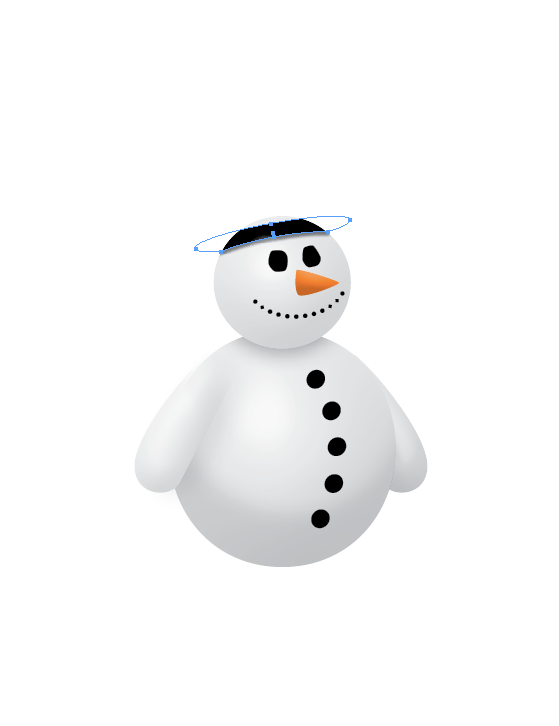
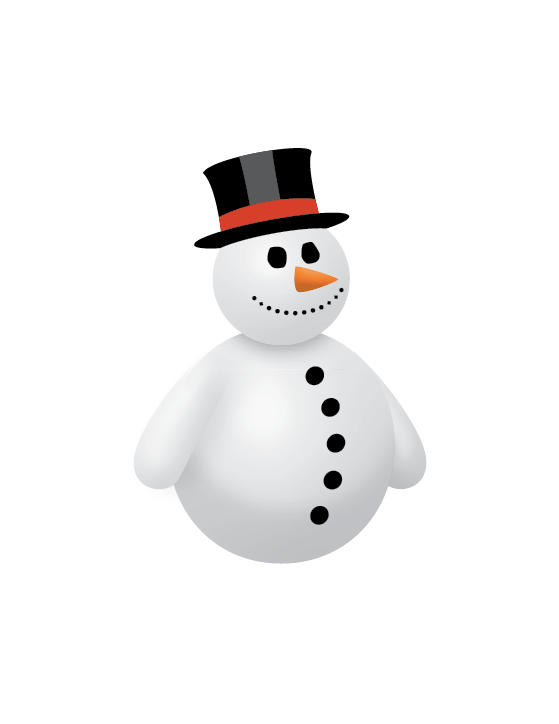
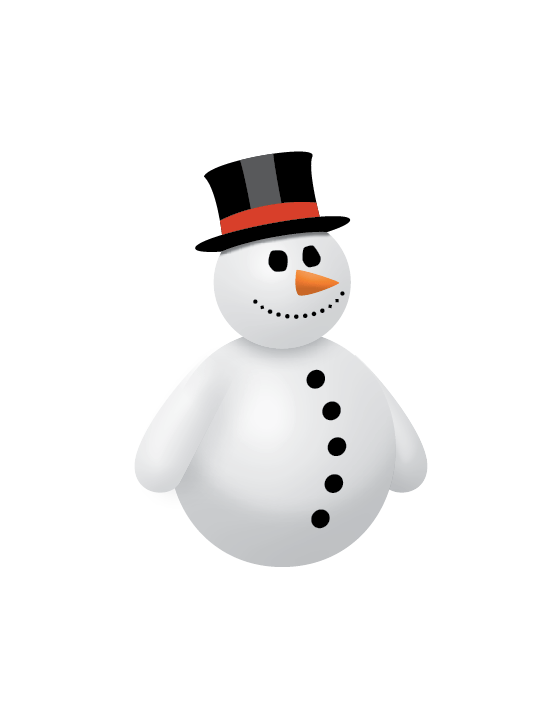 Add a background with curved gray shape for the ground and a cyan-white gradient filled rectangle for the sky.
  Last but not least, we need to add a shadow under the snowman so he doesn’t seem like he’s floating in the air. Since the shape of the shadow needs to be flatter than the round body, we need to use a transparency trick. Fill an oval with white, set the Object to Multiply in the Effects panel. This makes the white fill disappear, but it will leave a shadow of the oval visible. Add add drop shadow and make sure that you have set it so the object does not knock out the shadow.
 Now we’ve got ourselves an InDesign snowman! Tweak any of the shapes or effects to taste to suit your wishes. You could even try animating parts of him.
  Too busy shopping and making cookies to do all this? If you’re currently logged in to InDesignSecrets.com as a Premium member, a link appears below that you can use to download a snippet file of the snowman. It’s neatly organized so you can identify each part of the snowman and manipulate it if you want to.
  Enjoy! Click here to download the snowman snippet.
No
Your Subscription to Members-Only Content Has Been Cancelled
This could be due to one of the following reasons:
Don't want to upgrade to our full service?
You can still access our free content, including articles and templates, below.
CONTINUE WITH FREE ACCOUNT
No
Your Subscription to Members-Only Content Has Been Restricted
This is due to a recent failed payment on your account. To remove the restrictions, please go here to update your billing details and pay your recent invoice.
No
BECOME A MEMBER
BECOME A MEMBER
Commenting is easier and faster when you're logged in!

Recommended for you
Edit Illustrator Effects in the Appearance Panel
Use Illustrator’s Appearance panel to change, add, and blend effects applied to...

Holiday Text FX, part 1: Candy Cane Text
Make your documents more festive this holiday season with some fun text effects...
The Rough Cut Effect
We spend so much time and effort to make things look perfect in InDesign. Now it...