

InDesign 2026 gives users a whole new way to quickly create and modify page layouts. It’s called Flex Layout and it’s similar to the CSS Flexbox model that web designers use to arrange items in rows and columns on a webpage. If you often find yourself fiddling with the spacing and/or alignment of items in columns or rows, this new feature might be a game changer for you. Here’s a quick intro to Flex Layout in InDesign.
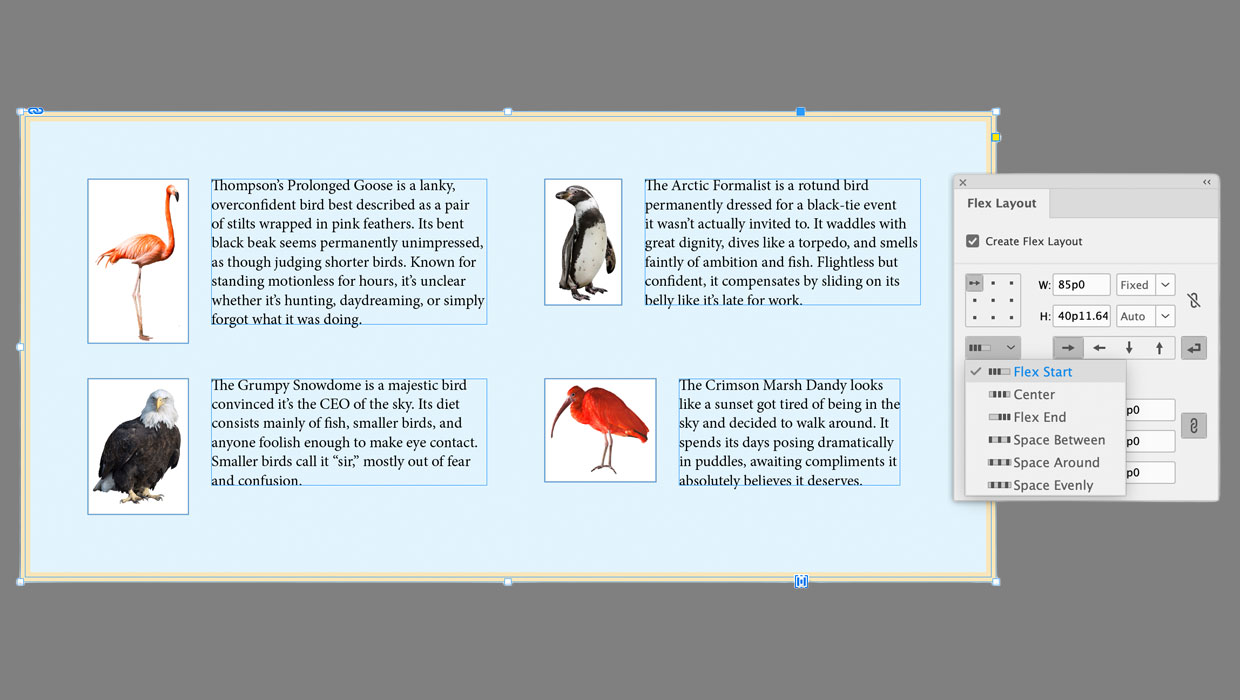
As an example, let’s say you have to put together a guidebook to birds. Each entry consists of a group containing a photo and a paragraph of text. Now you want to arrange those entries in a grid.
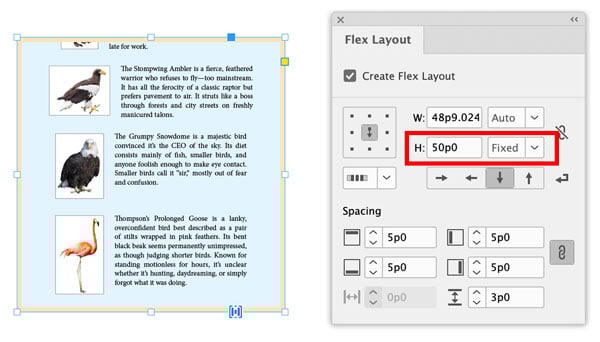
Start by selecting all the items and open the new Flex Layout panel (Window > Flex Layout).

Then, click the Create Flex Layout checkbox. A bounding box appears around the container and an adornment appears on the bottom right to indicate you have a Flex Layout selected.
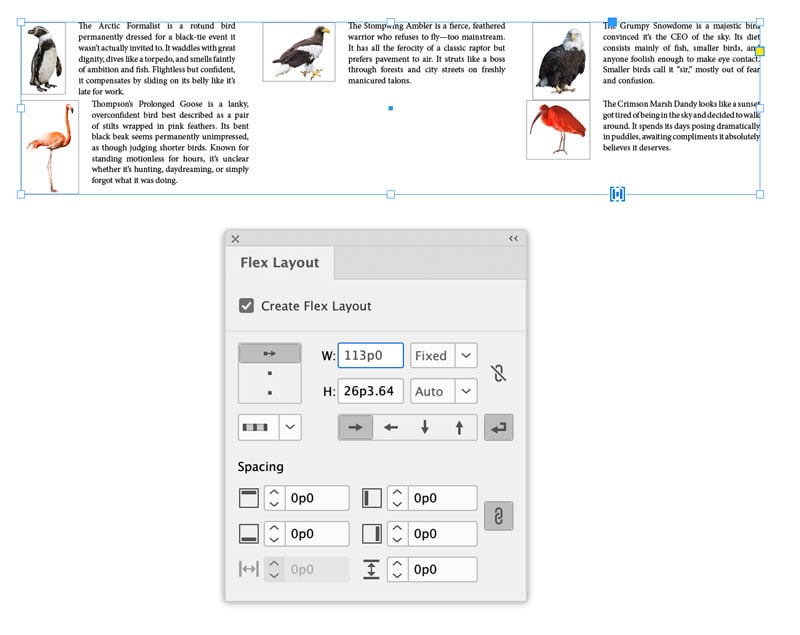
Now you can choose whether the container will have a fixed width and/or height, or set them to auto.

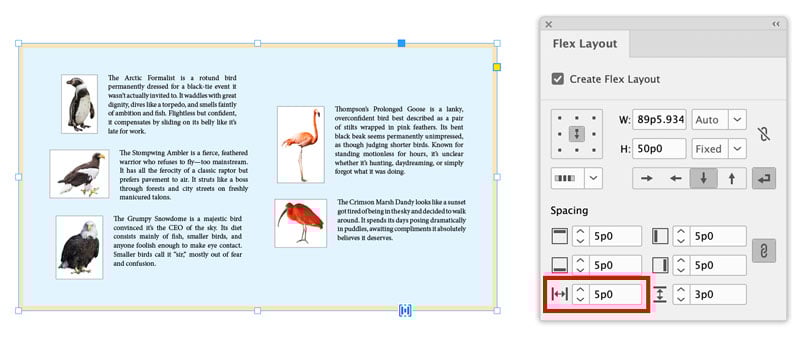
You can arrange items in columns or rows.


And apply a fill and/or stroke to the container.

There are options for setting padding around all sides of the items, spacing in between items, and reversing the order of items.
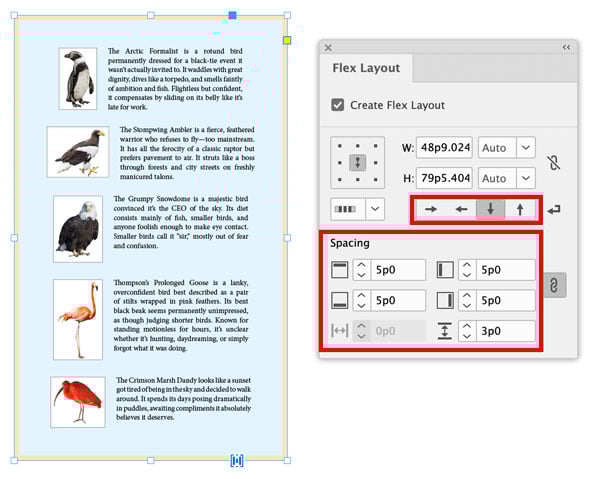
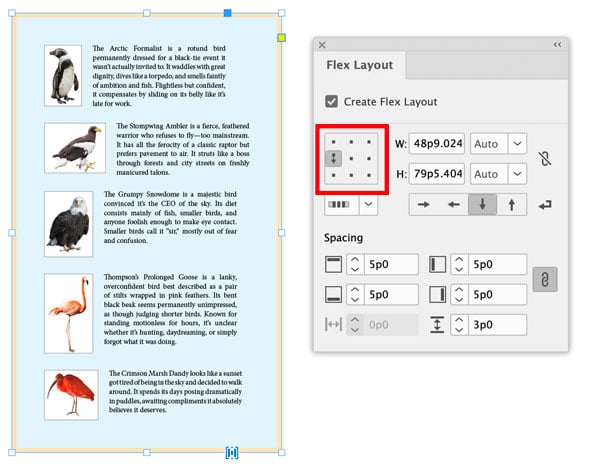
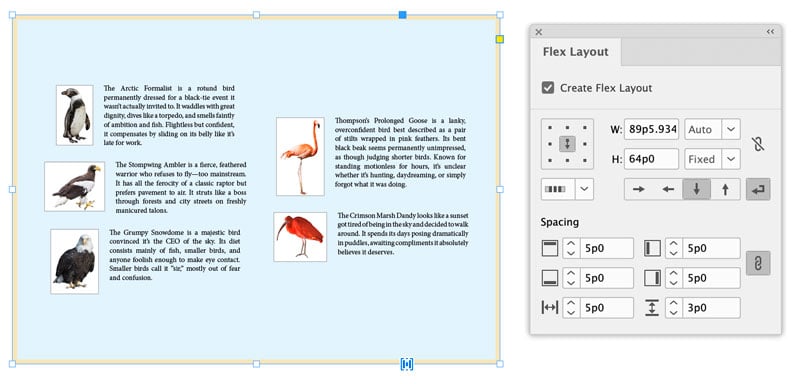
Within the container, items can be aligned left, right, or center, and top, middle, or bottom.


Resizing the container by adjusting Width and Height values, or by dragging with the Selection tool will automatically change the Width/Height from Auto to Fixed.
Then, you can use the Wrap Content button to have InDesign create more rows or columns to fit the content.

You can add spacing between the rows and columns.
When working with containers of fixed dimensions, you can use the controls in the panel to tell InDesign what to do with the extra space. For example, with columns aligned to the top and Flex Start selected, the extra space will be at the bottom/end of the container.

With columns aligned to the bottom and Flex End selected, the extra space will be at the top/start of the container.

Or, you can center the items.
Or, choose Space Around,

Space Between,
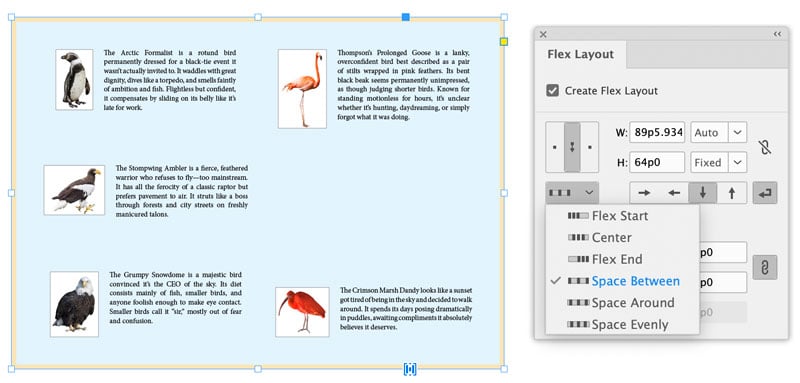
or Space Evenly.

A few other things to note:
- To add an item to a Flex Layout, drag and drop it anywhere within the container. Or, copy the item, select the container, and paste. The drag-and-drop option can be a bit annoying, as every time you drag something over a container, InDesign assumes you want to add it (i.e. you can’t release an item over a container without adding it).
- To remove an item from a Flex Layout, drag it out of the container (or select it and cut/delete).
- To rearrange items within a Flex Layout, drag them where you want them.
- To duplicate items within a Flex Layout, Alt/Option-drag them.
- To remove the container, but leave all items intact, turn off Create Flex Layout in the panel. All items will remain grouped.
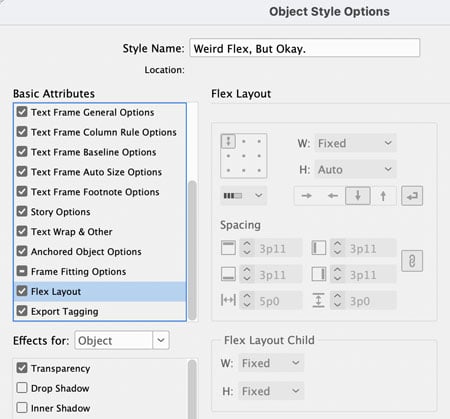
- Flex Layout settings can be part of an object style, if you create a new object style based on a Flex Layout. But you can’t edit Flex Layout settings in the Object Style Options dialog box (they’re all grayed out). However, you can make overrides and then redefine the style from the Object Styles panel menu.
Consider experimenting with Flex Layout for content that you would otherwise arrange and align with tables, multi-column frames, anchored items, span and splits, align and distribute, etc.
Let us know what you think of this new feature in the comments!
This article was last modified on October 28, 2025
This article was first published on October 28, 2025
Commenting is easier and faster when you're logged in!

Recommended for you

Single or Double Spaces Between Sentences?
Should you put one word space between sentences or two? This question continues...

Creating an Interactive Portfolio
Sandee Cohen shows how to collect and display your best work in an interactive p...

TypeTalk: Hyphens at Your Discretion
TypeTalk is a regular blog on typography. Post your questions and comments by cl...