
Getting Started with Data Merge in InDesign
Learn how to automate repetitive layouts in InDesign

This article appears in Issue 11 of InDesign Magazine.
Clients! they ask for the impossible, like hundreds of customized versions of a couple of InDesign documents—overnight.
Thanks to InDesign’s Data Merge, I can deliver—and so can you.
With Data Merge, you can designate areas in your InDesign document that will populate from a comma-delimited file (CSV) or a tab-delimited (TXT) file. These text files can also contain references to images to further personalize your layout. It’s like Microsoft Word mail merge but with the ability to use page layout’s best text-composition engine and all of InDesign’s wonderful graphic features.
There’s no better way to get comfortable with Data Merge than to try it yourself. Imagine your client, Anne from ACME Cosmetics, suddenly drops this project into your lap:
[See the (members-only) link to download the sample files above or at the end of the article.]
Tip: You can try the sample CSV file, too. Notice that the same data is separated by, or delimited with, commas instead of tabs.
1. Open Anne’s Data
To begin, open ACME_clients.txt, the TXT file from Anne (Figure 1), in a text editor or word processor. A tab-delimited TXT file or a comma-delimited CSV file can be generated by most spreadsheet and database applications, including Excel and FileMaker Pro; also, they can be written in any text editor, such as Apple’s TextEdit or Windows NotePad.
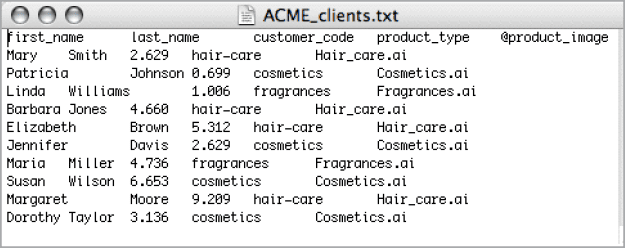
Figure 1. In the tab-delimited TXT file,
the @ symbol defines links to images.
The first (header) line of the file must list the names of each field. You’ll use those in your InDesign template, so make sure these field names mean something to you. Name them something logical, like first_name or last_name.
class=”p4″>2. Set Up the Data for Variable Images
In the TXT file, add the @ sign before the product_image field name. The @ sign tells Data Merge that the data contained in the field is the file name of an image file.
In this example, the images files are in the same directory as the InDesign template, so the file name is enough. If the images were in a different folder, you’d have to specify the full path to the file (e.g., /HD/Users/Username/Desktop/Images/hair_care.ai on macOS or c:\imagesair_care.ai on Windows).
3. Create the InDesign Prototype
Open the provided InDesign templates (Figure 2) into which the data from the text file automatically flows (ACME_Invite.idml and ACME_Name_tag.idml), including the fields that correspond with the data in the TXT or CSV file, where the text and image will appear for each of Anne’s customers. You can practice with these files or create your own to link to our hypothetical client’s data so you can get the hang of inserting and working with field names.
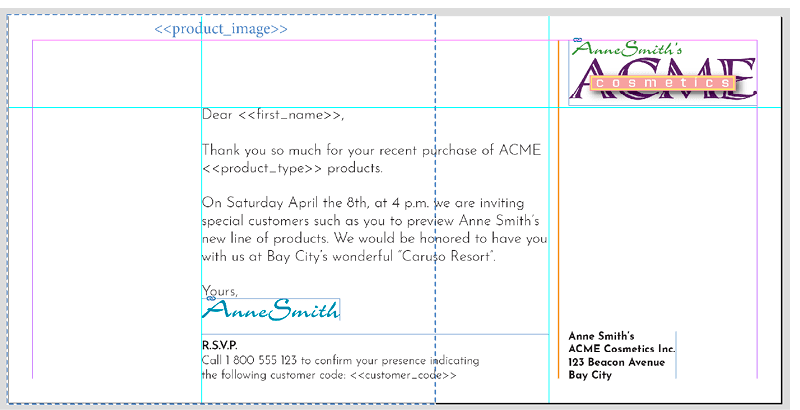
Figure 2. Our template for the customized invitation
4. Meet the Data Merge Panel
Go to Window > Utilities and choose Data Merge. If no data source has been selected, the panel will guide you through what to do next (Figure 3).
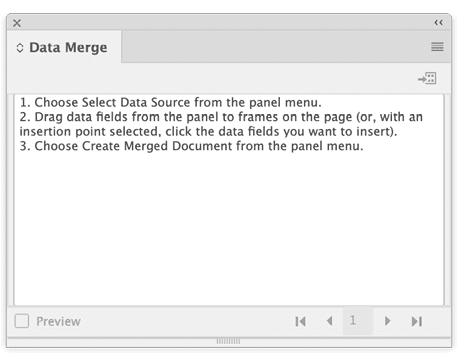
Figure 3. The Data Merge panel when no data source is selected
5. Select the TXT File
Now you need to tell Data Merge where to get the data from. Choose Select Data Source from the panel menu and select ACME_clients.txt. You will then see all the items listed on the first line of your text file in the panel. Text and images are indicated by separate icons you can see in the first column of the panel, to the left of the field name (Figure 4).
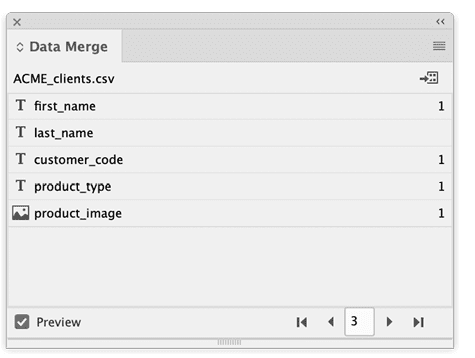
Figure 4. The Data Merge panel with a data source
6. Assign the Text and Image Fields
You can assign the data to areas in your layout in a couple of ways.
The first method is useful when the data needs to be in a specific place in an existing text (such as the ACME invite): Insert your cursor where you want to see the data, and click the row in the Data Merge panel (Figure 5).

Figure 5. You can insert the data field into your layout from the Data Merge panel. You can format the field name as you would any text, either locally or with styles.
The header name in double angle brackets will be inserted in your layout.
When you need to link an image frame with the data, drag the fields from the Data Merge panel and drop data into any frame in your layout (Figure 6).
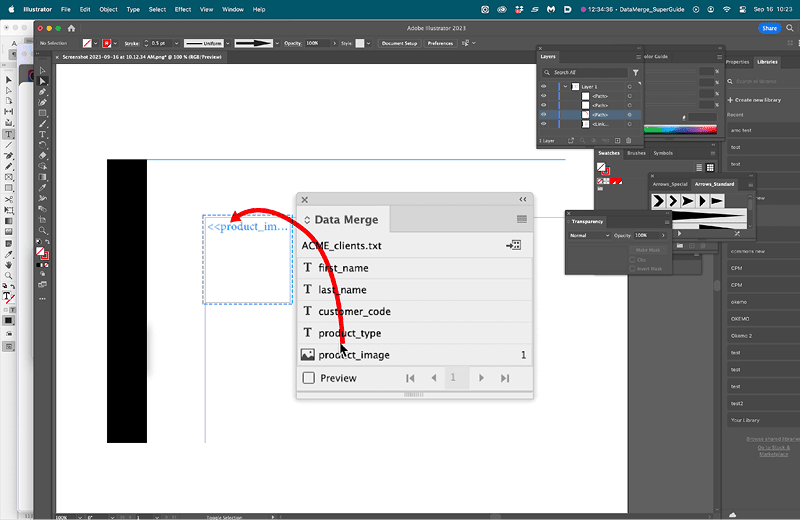
Figure 6. Drop an image field into a graphics frame. The Content Placement Options menu in the Data Merge panel lets you control how to fit your images in the frame and whether to link or embed the files.
It’s as easy as that. Now you can format the text data as if it were normal text.
7. Preview
Now that InDesign knows where to find the data and how you want the data to look, you can preview how the data will behave in your layout by turning on Preview in the Data Merge panel or its menu (Figure 7). You can also navigate in preview mode, scrolling record by record to see how the actual data will work in your design.
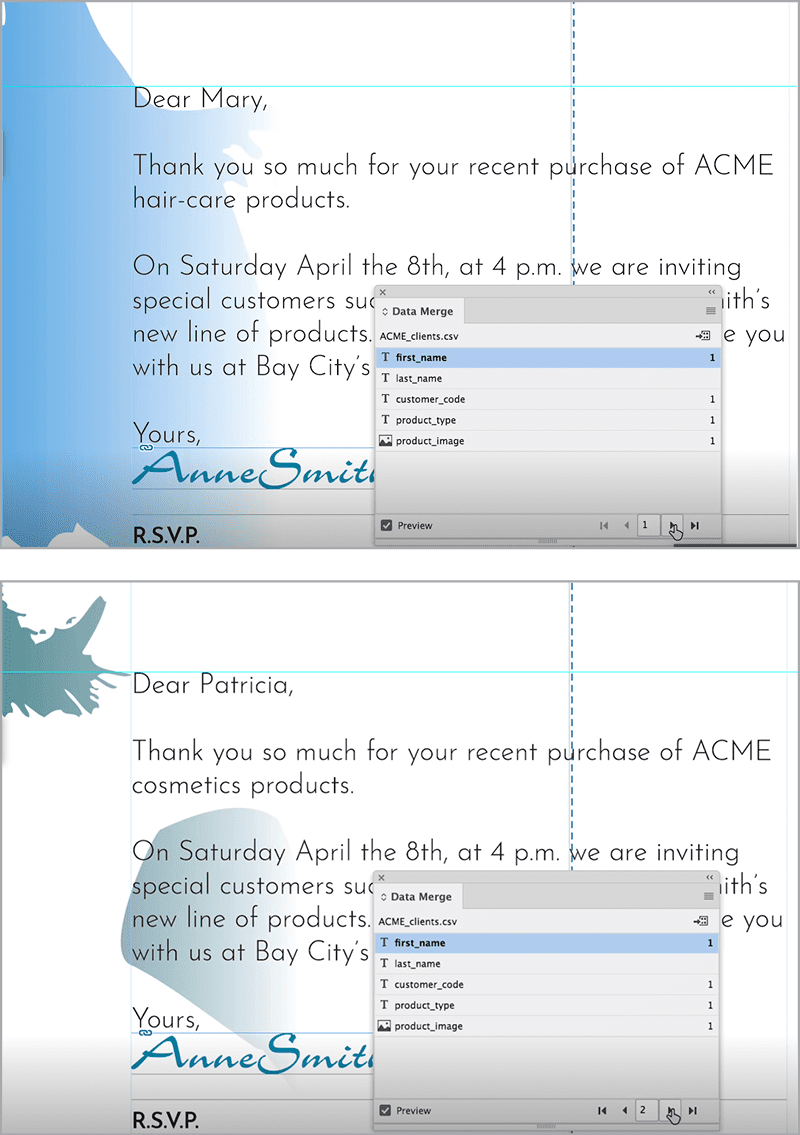
Figure 7. Before you commit to exporting or printing your merged file, you can step through each record to see how the data merge will work with the settings you are choosing.
8. Let It Flow!
Once everything looks as you want it to, your template is complete. Now, to create a document with individual pages for each record in your data file, choose Create Merged Document from the panel menu. Doing so will take you through the journey of configuring and previewing options before you commit to printing or exporting your merged file.
In the Records tab (Figure 8), you can choose which records to merge into your layout, whether to create single or multiple records per page, and how images should fit in assigned graphics frames. You can also instruct InDesign to alert you to overset text or missing images in the generated file.
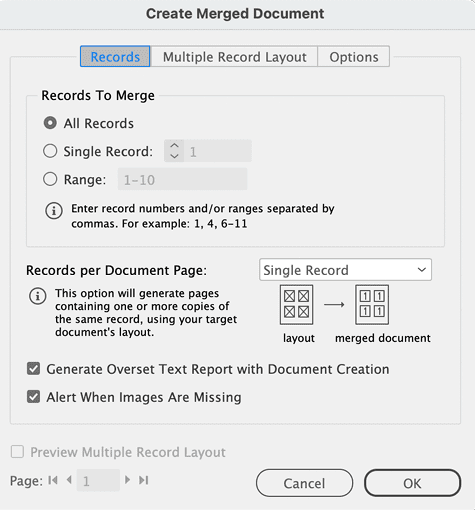
Figure 8. You can select one record per page or multiple records per page.
9. Print or Export the Final Invitations
InDesign then creates a new file with a new page, by default, for each data line of your original TXT (or CSV) file (Figure 9). You can either print or export the file as a PDF.

Figure 9. One of the final merged invitations
10. Name the Tags
Lastly, it’s time to make the product launch name tags. You can create templates for single objects (such as the name tag in Figure 10) and automatically generate layouts with multiple instances of the object on a page.

Figure 10. One for Mary, one for Patricia, one for Linda, one for Barbara, one for…
InDesign can repeat your layouts multiple times on a page if you set the Records Per Document Page option to Multiple Records. (You can find this option in the Multiple Record Layout tab of the Create Merged Document dialog box, Figure 11.) There, you can specify margins, layout, and even the spacing between the repeating objects. The number of tag repetitions depends largely on the space available on the document page. You’ll probably have to try several options (and maybe even change the page orientation) until you manage to fit as many tags as possible on a page.

Figure 11. The Multiple Record Layout tab lets you output multiple records on each page—great for making these nametags.
So, in response to Anne’s email you can say, “No problem. The printer will get it all by tomorrow,” thanks to Data Merge!
Download the sample files for these projects here and follow along!
Commenting is easier and faster when you're logged in!

Recommended for you

Data Merge Into Inline Anchored Objects So They Flow in a Story
Loic does it again with this free script that performs the impossible!
Printing Documents 2-Up (or n-up) on a Page in InDesign
There are no good ways to do n-up printing in InDesign, but there some excellent...

How to Improve Data Merge with Scripts in InDesign
Learn how to harness more power from InDesign's data merge feature by using scri...