
Getting Started with Canva
Design like a pro without breaking the bank, and have fun while doing it.


This article appears in Issue 7 of CreativePro Magazine.
Remarkably simple to use, Canva makes quality design and content creation accessible to everyone—even if you’re not an art school graduate or Adobe power user. With this software—available on desktop, web, and mobile—you can start a new project from scratch or take advantage of thousands of professionally made templates for print, social media, presentations, and even video. Plus, Canva facilitates collaboration between teams or clients.
Oh, and did I mention that it’s free?
In this article, I’ll show you how to get started in Canva with a simple project, and then examine some of the other features and offerings.
Make Your First Project
To get started with Canva, create a free account at canva.com. You can continue working in the web browser, or you can download desktop and/or mobile versions for macOS, Windows, iOS, and Android from the Features menu (Figure 1).
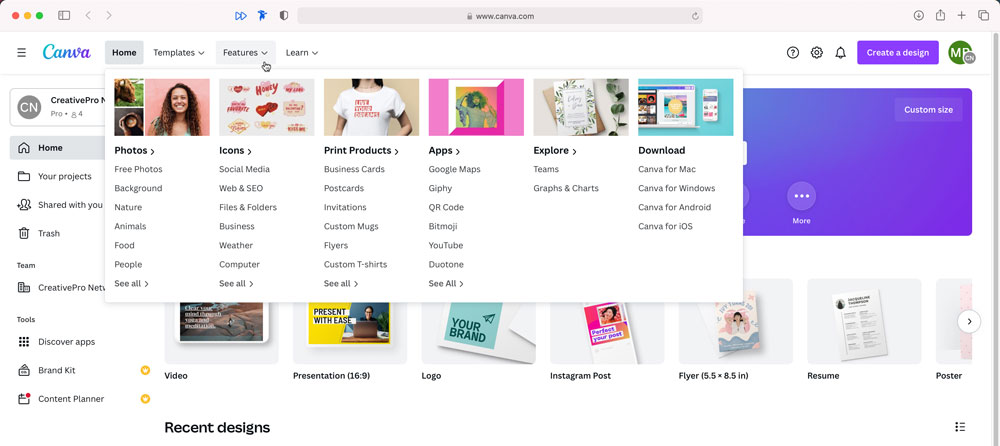
Figure 1. The home base of the Canva desktop app (macOS version)
For my first project, I figured I’d get my feet wet by creating something simple: print materials for my son to use in his endless campaign for a new household pet!
My first move was to enter the keyword cat into the search field (Figure 2). I was quickly met with 3,968 cat-themed templates. I chose one, which opened in a new browser tab, and began customizing it.
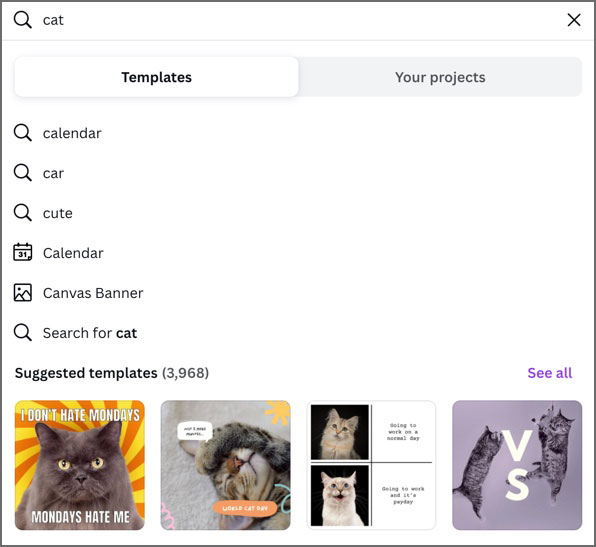
Figure 2. Canva’s motto is “A template for everything,” which as any internet user can appreciate, includes nearly 4,000 cat-themed templates.
As you’re working on a document, you can click the Elements icon on the left side of the window to search in a sidebar for shapes, photos, graphics, tables, charts, frames, stickers (animations), video, and audio (Figure 3). I searched for cat again and found a surprisingly robust catalog of cat meows, purrs, growls, hisses, and other related sounds, including an audio file titled “Cat Dig Litter Box.” Meow!
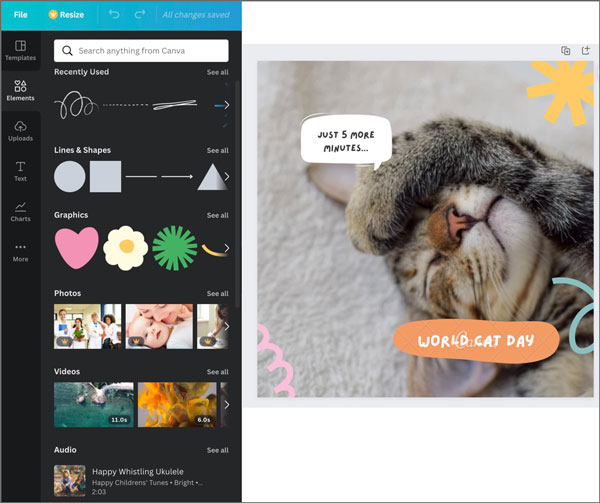
Figure 3. Use the Elements tab on the left to search for shapes, photos, graphics, video, and even audio assets to add to your project.
Adding, removing, and replacing various elements to customize the template is simple—just drag and drop. Transformation controls appear on elements so you can size and rotate them easily. You can also use familiar keyboard shortcuts like holding Option/Alt as you drag to resize an element from the center, or Option/Alt-drag an element to duplicate it.
Right-clicking brings up a context menu with items such as Copy, Paste, and Delete (as you might expect), as well as Animate and Comment (which you might not).
In some contexts, you will see options for adding a hyperlink or arranging your object with commands like Send Backward or Send to Back. As you drag elements around it’s easy to align them with dynamic guides that look and act very much like Adobe’s Smart Guides. It all feels very intuitive.
You can Shift-click to select multiple items, group things as needed, and Command/Ctrl+Z to zap away any moves you’d like to undo. (Happily, many of the commands have assigned keyboard shortcuts, unlike other similar products.)
After replacing the default template photo, I edited the text and swapped out some of the premium graphic elements (easily visible, thanks to a watermark) for similar options that are included in the free access plan (Figures 4 and 5).

Figure 4. Premium graphics are clearly labeled in Canva.
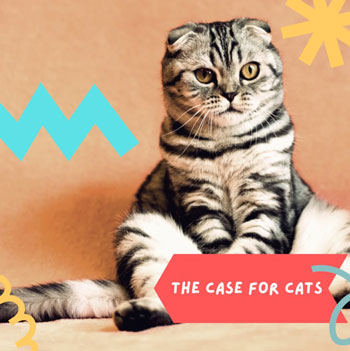
Figure 5. My project, after customizing the template
I added a second page and searched the templates again, this time with the term lists, to find art I could use for itemizing reasons to love a cat (Figure 6).

Figure 6. The template I chose for my second page after searching for lists
While customizing page 2, I discovered that clicking the swatch of a particular element not only allowed me to access new colors by keyword or hex code, but also presented me with swatches for the existing colors in the document, making it easy to change the page 2 template to match the template on page 1. Canva even pulled swatches from the photos I’d already placed, ensuring that my colors would work with the art (Figure 7).
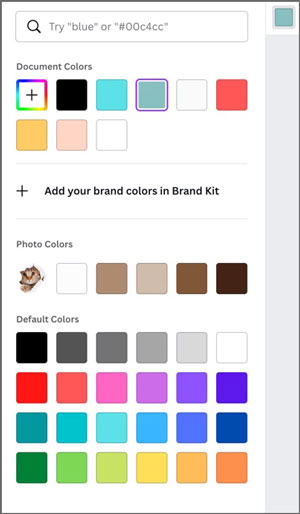
Figure 7. Canva provides easy options for maintaining consistent color across project pages.
I found text editing intuitive as well, with Canva offering several modern styles and effects, including the option to curve the type (Figure 8). With oodles of font options, I used Lazydog, which felt like a particularly fun choice for a project about cats. (It’s the small things in life, right?)
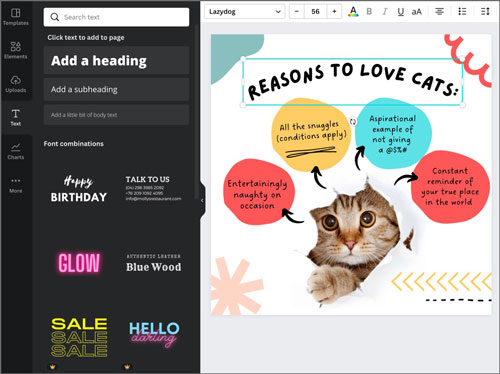
Figure 8. Choose from several text styles and oodles of fonts. Canva also provides the option for curving type.
I created a third page to explore what might be one of Canva’s coolest features: the ability to painlessly add charts.
Canva provides 16 styles of customizable charts, graphs, dials, progress bars, and more (Figure 9). I chose a donut chart to illustrate how the cats I’ve known and loved over the years have generally spent their time each day.
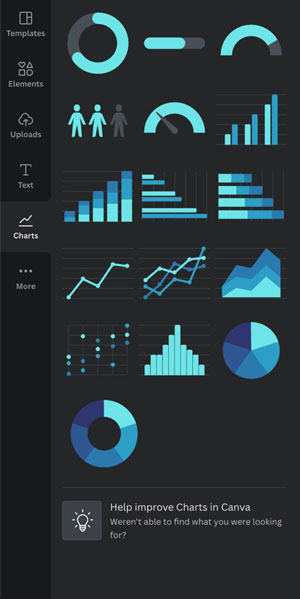
Figure 9. Sixteen chart options make creating infographics a breeze.
The process was as simple as filling in a table-based form to name each data point and designate a percentage (Figure 10). Then I was able to choose one color, which automatically applied a palette of distinct but related colors to my chart. Just like that, it was finished!

Figure 10. The donut chart option after adding custom data points and choosing a key color (aqua)
You Can Do Much More
But wait—there’s more! A lot more.
- Canva also lets you make basic image edits (like cropping and adjusting brightness, color, and contrast) and apply tasteful animation options.
- You can use Canva for presentation design, with the ability to record and add voiceover narration or webcam footage painlessly.
- You can share your files and work with a team.
- Along the way, you can level up your skills via the Canva community. You can find users in several large and active Facebook groups, live online events, and training resources for everything from design theory to personal branding.
- When you’re ready to publish your project, you can post directly to various platforms, including Instagram, Twitter, Facebook, and HubSpot. Or you can save your project to the usual cloud storage platforms like Google Drive and Dropbox. And finally, you can also download, embed, schedule, or even publish your finished project to a webpage in just a few clicks.
You can also order your completed project printed on a hoodie, business card, mug, notebook, stickers, and more—directly from within Canva (Figure 11). For my project, it all made purr-fect sense.
Beyond the Free Plan
Canva’s core functions are free, but a Canva Pro account ($12.99 per month or $119.99 per year for up to five people) unlocks even more features, like the ability to create a Brand Kit to save custom colors, fonts, and logos for easy access and reuse. Meanwhile, the Magic Resize feature makes it easy to adapt any design for multiple outputs or layouts.
Pro users also get access to a background remover, the ability to upload your own fonts, extra storage, a built-in content planner you can use to schedule social media posts, and more.
Canva also offers an Enterprise plan for large teams (30 or more people) for $30 per month per user, with more finely grained controls, unlimited storage, and more.
Ultimately, Canva is so easy to use that even an avid Adobe fan can appreciate how much of the heavy lifting it can do. I give it two paws up.
Commenting is easier and faster when you're logged in!

Recommended for you

This Week in InDesign Articles, Number 54
InDesign goodness comes in a wide vareity of forms, from articles to videos to s...

5 Freelancing Mistakes to Avoid
Freelancing can be a source of freedom or overwhelming anxiety depending on situ...
