


![]() We’ve all been there before. Situations where you’re working on long documents like big reports, magazines or better yet, catalogues, and you realise you have to reuse graphic elements in your layout. So what do you do? You design your element and duplicate it to use on other pages, changing and tweaking it a little bit as you go along. And along the way you know that it would just have been easier to have started out with a fresh copy of that object every time instead. InDesign libraries allow you to store and reuse graphic elements throughout your layout, whether they’re text frames, linked graphics or groups of objects. Here are a few interesting uses and tips for working with library items.
We’ve all been there before. Situations where you’re working on long documents like big reports, magazines or better yet, catalogues, and you realise you have to reuse graphic elements in your layout. So what do you do? You design your element and duplicate it to use on other pages, changing and tweaking it a little bit as you go along. And along the way you know that it would just have been easier to have started out with a fresh copy of that object every time instead. InDesign libraries allow you to store and reuse graphic elements throughout your layout, whether they’re text frames, linked graphics or groups of objects. Here are a few interesting uses and tips for working with library items.
A few handy library applications
The price tag
Price tags are a classic example when it comes to libraries. They usually consist of a collection of objects that represent the price or promotion of an item in your work. And you need those individual items to look exactly the same throughout your catalogue. Maybe you have different coloured versions, or promotional versions. Just keep a dummy version of your price tags in a separate library and you can start spreading them through your layout. The only thing you have to do is change the actual number.

You can add as many price tag versions as you need.

Making barred prices look the same is often time consuming so a library helps.
Table structures or review boxes
Also quite common are mini templates of complete layout elements that frequently reoccur in your work. Say you have a magazine that does music album reviews. Why not end your article with a “verdict” box that holds a few predefined text frames that are ready to go? And you can add these as separate versions, choosing the one you need from your library as you go along.
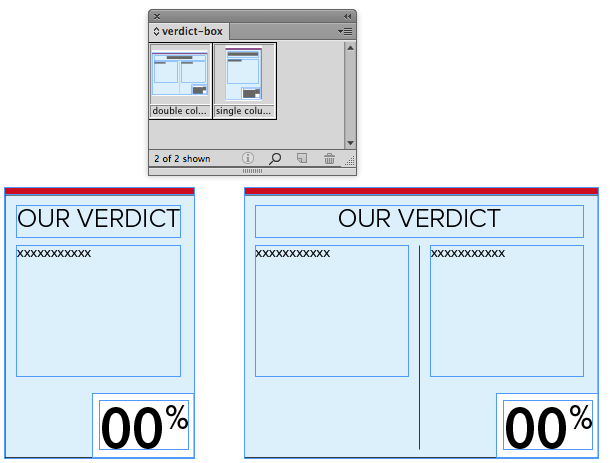
Choose between a one or two column layout.
Let’s talk tables. Editing individual rows, columns and cells require a lot of manual labor. And this is time that you’d rather spend doing actual design work. So decide on a few table designs and keep them close in your library. This way you can drag out a fresh copy anytime you need it and start inputting text or pasting in numbers from Excel.
Tip: I noticed that it’s usually easier to remove rows or columns than it is to add them, so make sure you add more than enough rows and columns before you save them in your library. That way you only have to remove the ones you don’t need at the end.
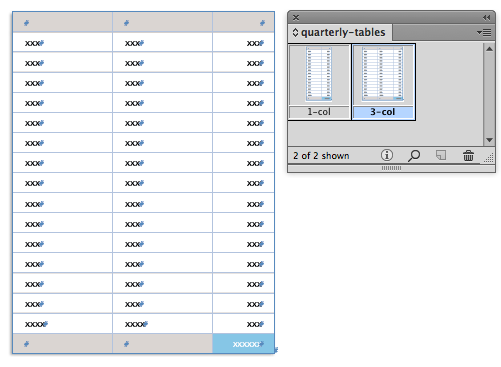
Make sure the tables are long enough before you save them.
Logo alignment
This technique might not be as well known as the previous ones. When you’re dealing with a clients corporate identity it’s important to respect the logo placement guidelines. Meaning that some logo’s need to have a minimum safe distance from the page border or from other elements. Again this can be a time-consuming process where you have to keep track of the distance between the logo and other elements. Try this instead: drag out a few perfectly designed graphic frames following the corporate guidelines. These measurements are usually applied as percentages e.g. a logo that needs to keep at least 50% of its height away from the outer edge of a page. If you set these things up before you drag the logo to a library you’ll also save these safe zones in the item. Meaning you can just drag out the logo when needed knowing you’ll always have the “padding” you need around it. Plus it doesn’t matter how big you scale the logo afterwards because the padding will just grow with it.
This logo has been perfectly aligned following the corporate guidelines.
How to start with a library
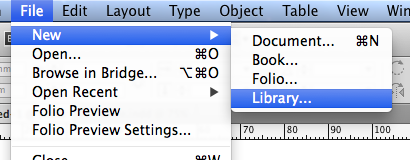
Setting up a library is very easy to do. First you choose File > New > Library… and save your library on your hard drive. Be sure to give it a good descriptive name since that’s gonna act as the panel name inside of InDesign. Once you’ve saved it you’ll see your library item appear on screen as a new panel.
Adding items to a library is very simple
- Click and drag items to the library to add them as untitled objects.
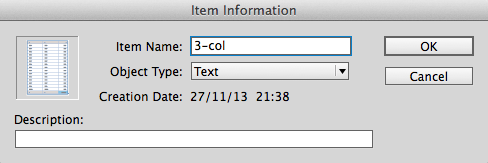
- ALT/OPT click and drag items to the library to name them as you add these. The Item Information window that becomes available also allows you to set the object type and an object description. You can set up these criteria to later quickly search for specific items or rearrange your library items in the panel based on these criteria. Personally I’d love to be able to add object types of my own to this list for specific jobs but unfortunately these options haven’t been updated since the stone age. So I know what I’ll be asking for Christmas this year.
To place items from a library onto the page is just as easy:
- Click and drag items from your library to your page to place them on the cursor position.
- Select the item in the library, click the library panel menu and choose Place Item(s) to place the item on the same co-ordinates from where you originally added them to the library.
A few extra library tips:
- Unfortunately there is no link between the placed library item and the original instance that’s still sitting in the library. It doesn’t work like Symbols inside of Adobe Illustrator. This means that updating already placed items globally is a pain. So make sure you apply the necessary text- and object styles to your items before you save them in the library. This way you can still edit the styles after having placed them on the page. It’s not perfect but it’s better than nothing.
- Usually you’re not the only person working on large layout jobs so there’s a good chance that your colleagues need to work with the same library. Once a library on a shared drive has been opened it locks itself meaning nobody else can open it anymore. To overcome this you can use the following procedure:
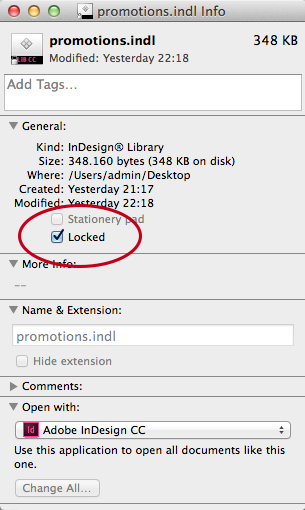
On a Mac: it’s pretty easy to share a library file on a server with other Mac users. Simply select the library.indl file in the Finder and use the shortcut CMD+I to open the info window. There you click the Locked button to lock the file. This means that you cannot add new items to the library, nor can you edit existing ones. But it does allow other network users to open up the same library file. This works because InDesign is just opening up a copy of that file when you double click it. I know that not being able to edit the existing library might sound like a pain but its sometimes better than having 5 different versions among users.
On a PC: the locked file trick doesn’t work for PCs unfortunately. On a PC you have to open the library.indl file by using the actual Open command inside of InDesign. There you select the library and choose “Copy” from the bottom options to open a copy of the file.

- If you have activated the “Paste Remembers Layers” option from the Layers panel menu, then the actual layer will also be saved in the library. This means that this original layer will automatically be added to your document when you place your library items.
- Items with linked graphics in them will keep this link when being placed on your page. This means that you still need the original links as the images don’t get embedded into the library, only the reference to the image so be careful.
- Libraries are external files that have to be opened manually to have them available in InDesign. But because they are stored as panels you can dock them in your interface and then save that configuration as a custom workspace. That way InDesign will open up all these external library files when you switch to that workspace, so no more manual looking for your files and just let InDesign do all the work for you.
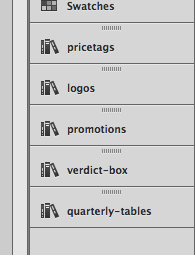
Dock and customize your libraries in your interface.
This article was last modified on December 30, 2021
This article was first published on December 2, 2013
Commenting is easier and faster when you're logged in!

Recommended for you

Tip of the Week: Show Your Options
The best way to access import options in InDesign when placing an image
Search All InDesign Keyboard Shortcuts Quickly with Show Set
Sign up for the InDesign tip of the week to get a new tip, roundups of new artic...
Tip of the Week: Viewing Link Thumbnails
This tip was sent to Tip of the Week email subscribers on January 8, 2015. Sign...