


Recommended for you
Article
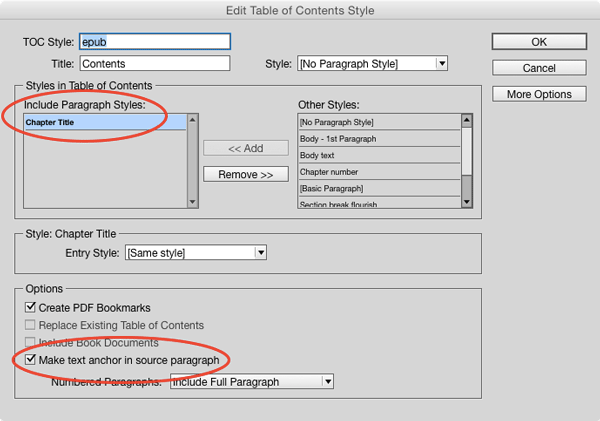
Free InDesign Template of the Month: Reflowable EPUB
Time for another exclusive template for our Premium members! (Not a Premium memb...

Article
Adobe’s Free InDesign Templates Now Available at InDesignSecrets
Adobe stopped shipping their free InDesign templates with CS5. Now you can find...
Article
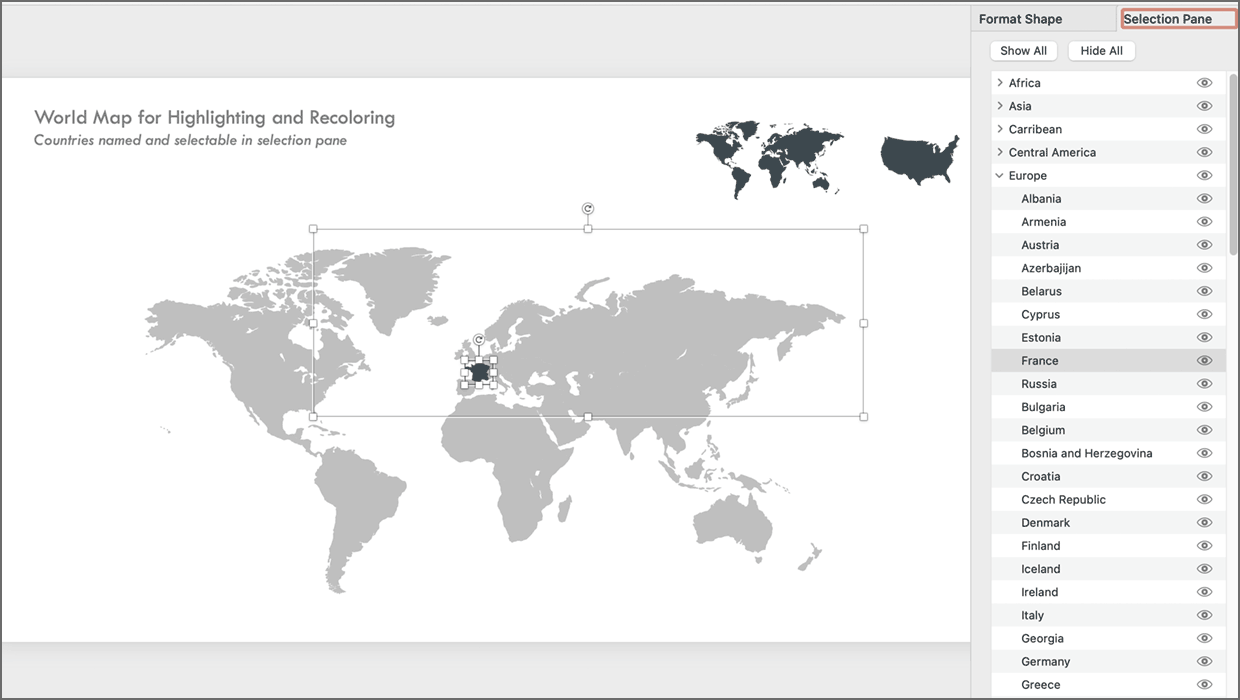
PowerPoint Maps Template
This PowerPoint template contains maps of the United States and world countries...