
Fixing Dust and Artifacts in Lightroom
Like any well-meaning photographer, you try to keep your lenses clean. But dust is everywhere! Here's how to rid your photos of it in Lightroom.
Dust is everywhere, but we usually don’t see it. You may not notice dust on your lens or sensor while you’re shooting photos because you’re focused on capturing the scene in front of you. Plus, the displays on the backs of most cameras obscure such details unless you’re specifically looking for them.
Fortunately, dust and other artifacts are easy to fix in Lightroom. And if the job is too difficult, Photoshop is waiting off to the side, ready to bring more sophisticated healing tools to the task.
Visualize Spots
Like any well-meaning photographer, I try to keep my lenses clean. But to take photos, I have to get out into the world, and the world is full of dust. So I take my photos, and import them into Lightroom later after the light has faded, and that’s when the spots appear. Little blotches in an otherwise perfect gradation of color—especially in areas without much texture, such as a clear sky.
Click the images below for larger versions.

When they become apparent, you have a few options. Of course, you could throw away your camera gear and pursue a less frustrating hobby, but we know that’s not going to happen. Not when you can do the following.
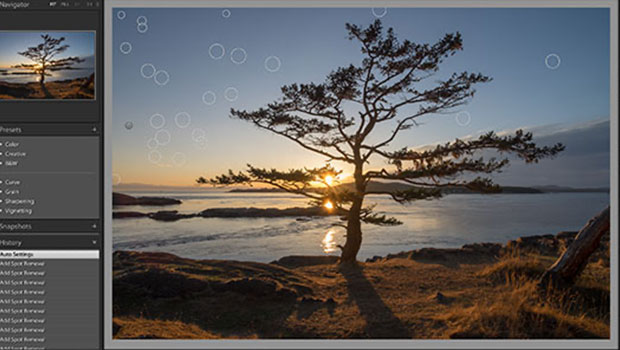
Lightroom Classic CC, Lightroom CC for desktop, and Lightroom CC on mobile devices each include a healing tool that samples nearby pixels to fix a circular area—perfect for removing spots. Even better, Lightroom Classic and Lightroom CC on the desktop include a great Visualize Spots feature to help you find them. It displays the image in high-contrast black and white to reveal areas of contrast. Both applications take a similar approach, with slightly different names. Here’s how:
- In Lightroom Classic CC, open an image and switch to the Develop module. In Lightroom CC, open a photo in the Detail view.
- In Lightroom Classic CC, select the Spot Removal Tool, or press the Q key. In Lightroom CC, select the Healing Brush, or press the H key.
- Click the Visualize Spots checkbox; it’s below the photo in Lightroom Classic CC and in the editing panel in Lightroom CC. Use the Threshold slider to set the sensitivity of the effect to more effectively reveal spots.


- In the tool’s settings, set a Size that’s slightly larger than the area you want to fix. You can also press the bracket keys—[ and ]—to adjust the size of the tool.
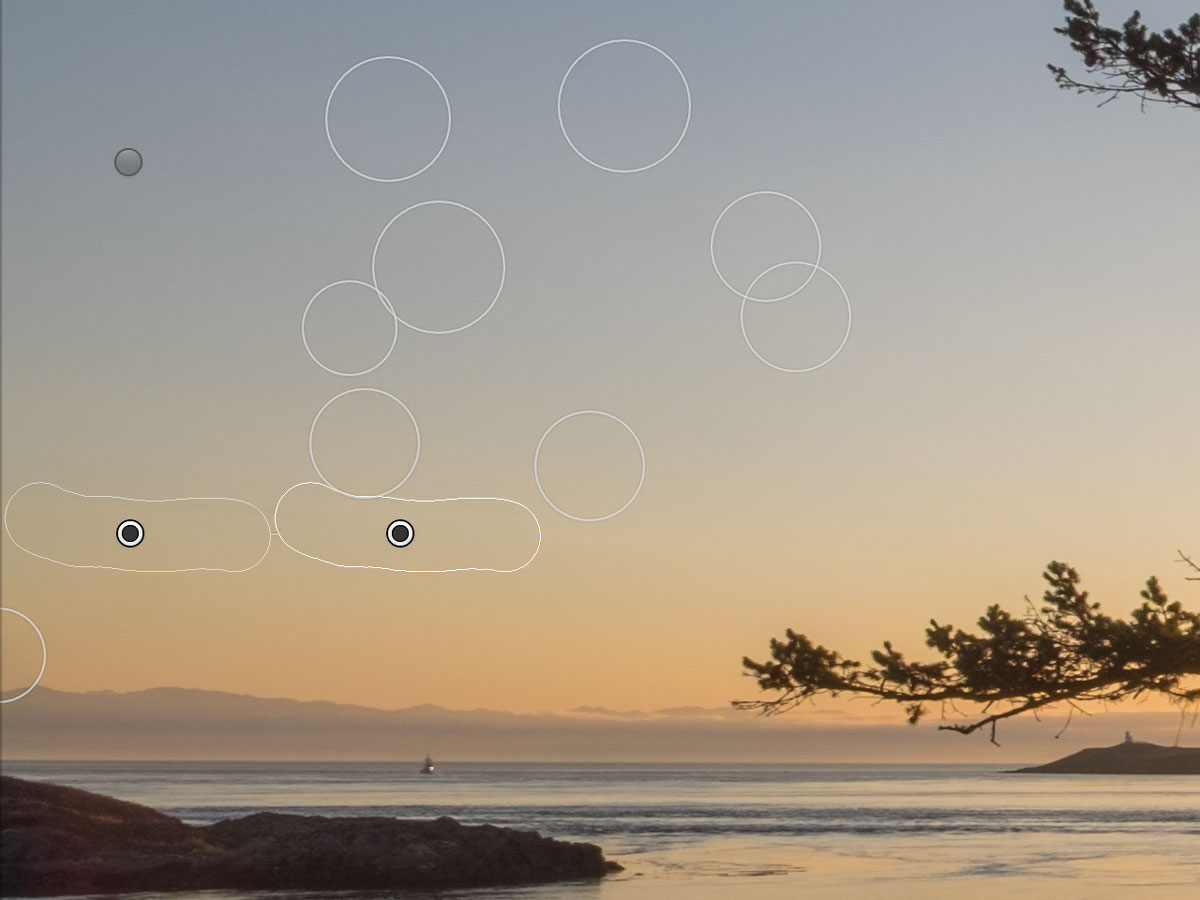
- Click on a spot to fix it. Lightroom automatically selects a comparable area nearby to replace the pixels.

- You can click and drag either portion of the fixed area—the source or the replacement—to adjust the area and how it’s repaired. Sometimes Lightroom grabs a crazy, dissimilar area for no good reason, so it’s good to be able to rein it in.
- If necessary, adjust the Feather and Opacity sliders to fine tune the effect. Normally, the tool is set to Heal, which blends the replacement pixels with the surrounding pixels. You can also choose Clone, which directly copies the replacement pixels from the target area.
- Continue clicking spots until you’ve stamped them all out. Quote Macbeth’s “Out, damned spot!” if it gives you satisfaction.

The tool in Lightroom CC on an iOS or Android device is almost identical to the one in Lightroom CC for desktop, but without the Visualize Spots feature. It’s best to zoom in to 1:1 size or further to help identify the spots. Tap or draw on the area you want to fix.
It should go without saying—but I’m going to anyway because it affects me more than I’d like to admit—that a clean screen makes this task much easier. Too many times I’ve attempted to fix a dust spot unsuccessfully, only to realize that the grit was on my physical display.
Bring in the Reinforcements
The Spot Removal and Healing Brush tools work on more than just dust spots. For areas that require larger fixes, drag to cover the offending pixels.

This approach can be hit or miss in Lightroom, depending on the nearby pixels. Although the tools do a pretty good job, they don’t offer the superior content-aware fill feature found in Photoshop CC.
If you reach that point: in Lightroom Classic CC, choose Photo > Edit In > Edit in Photoshop CC; or, in Lightroom CC, choose File > Edit in Photoshop.
Lightroom creates a copy of the image (as a TIFF file) and opens it in Photoshop. Use the Spot Healing Brush tool, the Healing Brush Tool, or Content-Aware Fill to replace the pixels you want to fix. When you’re finished, save and close the image; the edited version is added to the Lightroom library as part of a stack with the original.
Dust-Off
Unless you’re compulsive about cleaning your lenses, you’ll run into dust spots at some point. If you don’t catch them while shooting, don’t worry: Lightroom can do most of the work of fixing them, and there’s always Photoshop for more extensive repairs.
This article was last modified on March 10, 2021
This article was first published on November 19, 2018
Commenting is easier and faster when you're logged in!

Recommended for you

A Different Light: An Introduction to Infrared Photography
Learn how to capture images in a whole new light.

Using Location Data in Lightroom
Use location tools in Lightroom to pinpoint your favorite photo spots.

Photography Camera ISO Explained
ISO is part of the Exposure Triangle along with Aperture and Shutter Speed. ISO...