

The fonts we use today contain a huge array of Unicode characters. So how do we find the fonts that contain the particular character we want? Sadly, we cannot use InDesign’s Glyphs panel. This panel has many great features, including the ability to create glyph sets for the characters we use frequently. But it contains no search capability, and no way to find a particular glyph across different installed fonts.
There is a great utility which meets this need, but it’s for Mac only. It’s installed on all recent versions of Mac OS X, but it’s not turned on by default, so many Mac users may not even know that it exists. The utility is called the Character Viewer, and this is a brief introduction to its powers. (A free Windows utility called BabelMap is mentioned at the end of this post.)
Turning on the Character Viewer
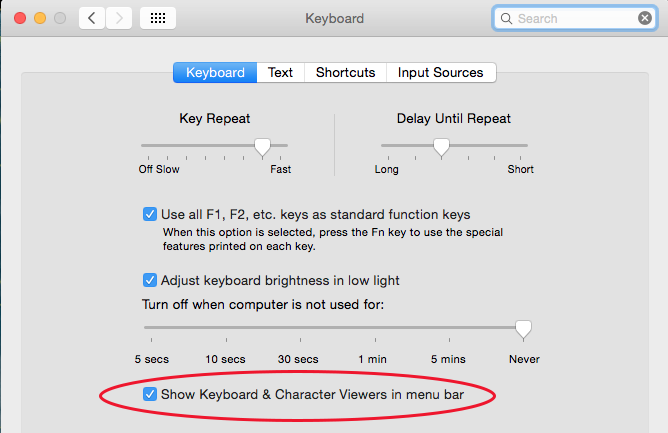
To turn on the Character Viewer, open System Preferences > Keyboard. Click on the Keyboard tab, and select Show Keyboard & Character Viewers in Menu Bar. (In earlier versions of Mac OS X, you’ll find the same setting in the Language & Text preference on the Input Sources tab.)
Turning on Character Viewer
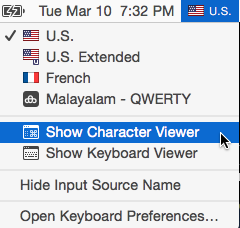
This turns on the Input menu on the menu bar in the Mac Finder next to the date and time. If you only have one language selected, it will show a black-and-white icon. If you have chosen more than one language to display, the flag of the currently selected language will appear. Select Show Character Viewer to open the utility.
Mac Input Menu
A Quick Tour of the Character Viewer
When the Character Viewer opens, it will probably look something like this:
Opening Character Viewer
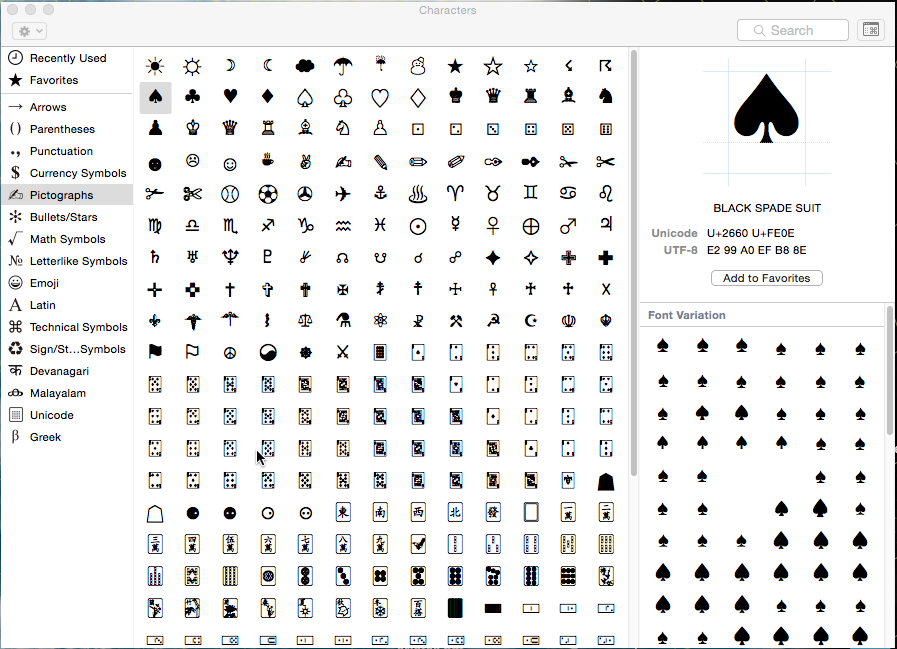
On the left side is a list of glyph categories (which you can edit as described below). When you select most categories, glyphs within that category appear in the middle section. The glyphs displayed are based on the current Unicode Standard. Currently, there are more than 110,000 characters covering 100 scripts.
When you click on one of these glyphs in the middle section, its name and Unicode number appears at the upper right. A Font Variation section appears at the bottom right. Font variations represent the way that glyph is displayed in fonts that are currently installed on your Macintosh. In the example above, I clicked on the Pictographs category, then selected the glyph called Black Spade Suit (a black spade from a deck of cards), and you can see that many fonts on my computer include this glyph.
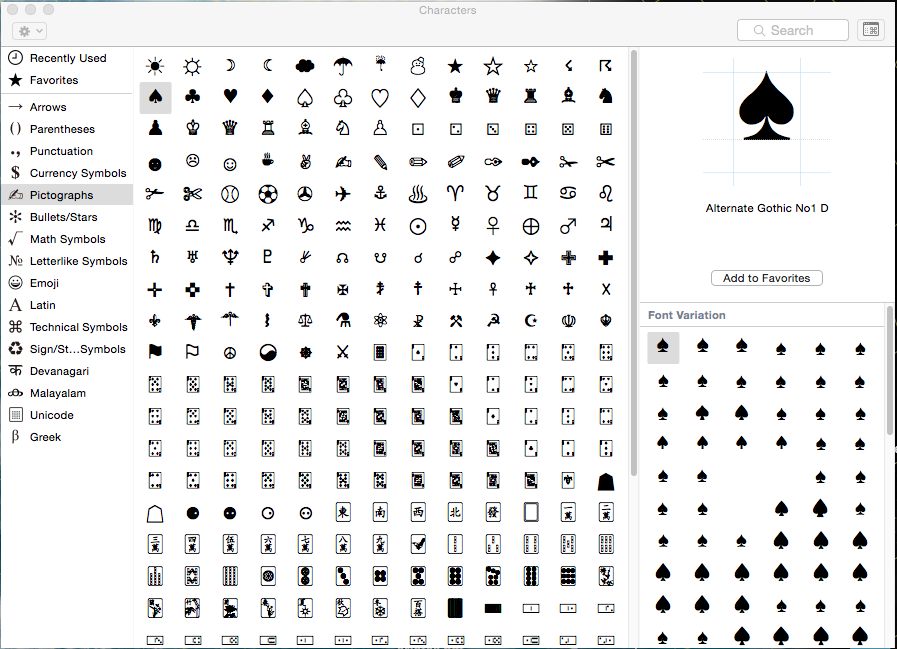
If I click on one of the font variations, its name and a larger display appears at the upper right:
Showing the Glyph
Finding the Glyph You Want
The first thing you should do is to customize the categories which appear in the Character Viewer. Click on the Action menu (small gear icon) at the upper left and select Customize List…
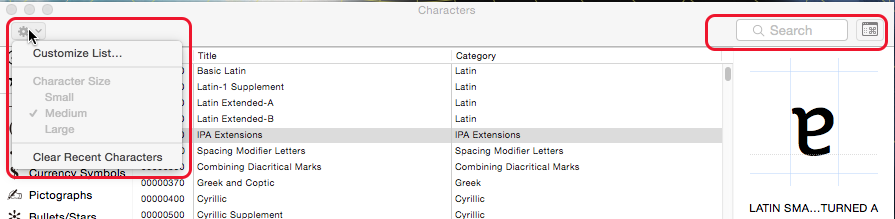
Customizing Category List
Scroll through the category list and select the categories you’re interested in seeing, then click Done.

Customizing the Category List
I’ve found three main ways to find the fonts that contain the glyph you want:
1. In the Character Viewer, click a Category, and scroll to find the glyph you want, then follow the procedure I outlined above. Examine each of the glyphs displayed in the Font Variation section, and pick the font that includes the glyph display you like.
2. Search for a glyph by its Unicode Name (for example, Question Mark). When I search for “Question Mark” in the Search field highlighted at the upper right in the illustration above, I may get more results than I expect. It includes the results for all glyph names which contain Question Mark, like Inverted Question Mark:
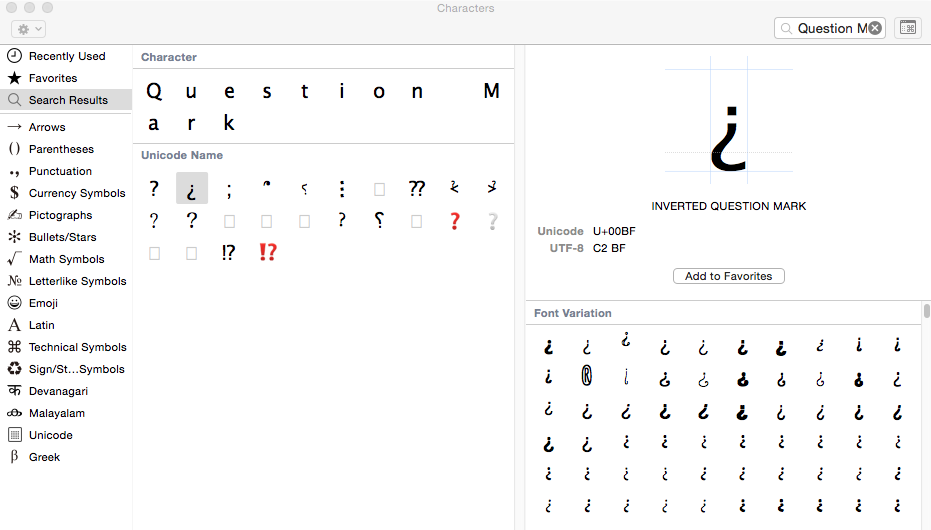
Search Results
3. Search by the Unicode number of the glyph that you’re interested in. Maybe you’ve found the glyph you want in your current font, but you don’t like its display. You’d like to see what it looks like in other fonts. In the InDesign Glyphs panel, when you pause over a glyph display, the Unicode name and number are displayed. When I pause over the ornament shown below, I see its Unicode name, “Floral Heart” and its Unicode number 2766.
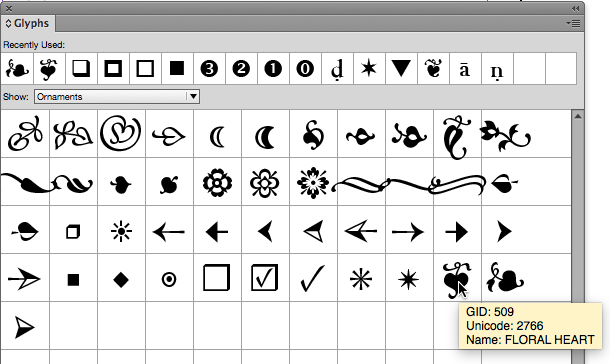
Unicode Number in Glyphs Panel
In the Search field on the Character Viewer, enter the Unicode number in this format: “U+2766” and press Return. Here is the result:
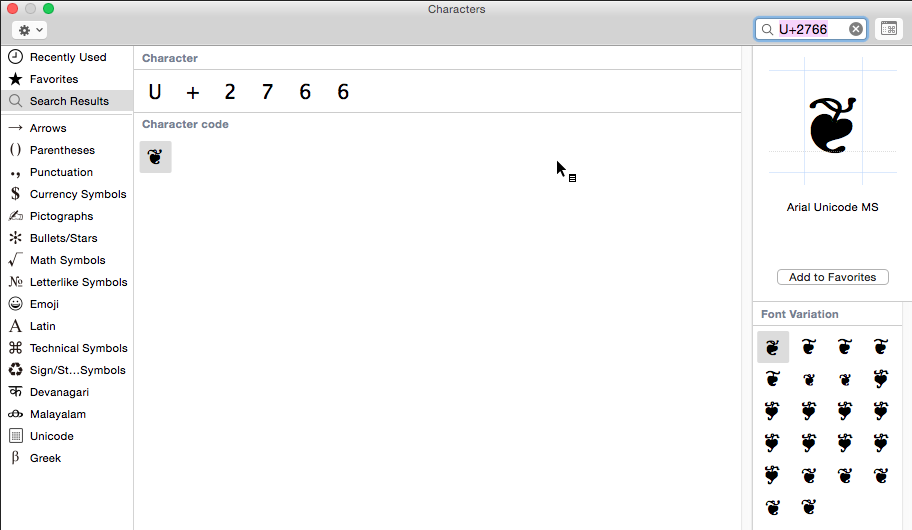
Unicode Search
A Few Character Viewer Tips
Here are a few other tips I’ve learned:
- The button at the upper right toggles between the normal view I’ve shown and a super-compact view. The latter view is only useful if you’ve saved Favorites or are viewing Recent glyphs
- In the normal view, you can select a glyph, then click Add to Favorites. Then these favorites will appear in the Favorites category on the list on the left side.
- It doesn’t look like the Character Viewer is resizeable but if you move to its left, bottom, and right edges, you can drag to resize. You can also move over the boundary between the different sections and resize a section to make it wider or narrower.
- If you use Apple apps (for example, Mail, Pages or TextEdit), you can open the Character Viewer by choosing Edit > Special Characters. If you’re using the Fonts panel in those apps, choose the Action menu (the gear icon) > Characters. In those apps, you can insert glyphs by double-clicking like you do with InDesign’s Glyphs panel.
- Even more interestingly, the Public Preview of Microsoft Word 2016 also includes Edit > Special Characters so you will soon be able to insert glyphs into your Word documents more easily. (Earlier versions of Word don’t include the feature.)
A Free Utility for Windows Users
This article was inspired by a question on the Adobe InDesign forum asking how to find a font which used a particular glyph. Because I’m not regularly a Windows user, I couldn’t recommend a similar Windows utility. Fortunately, Joel Cherney, a regular forum contributor on font issues suggested a free Windows utility: “I’m a fan of BabelMap. It performs a variety of useful font-related tasks. It has three different ways to do what you’re asking for, my favorite of which is ‘examine the clipboard, and tell me all the fonts on my system that have all of these glyphs.’ It will also let you key in text, or enter individual code points.”
This article was last modified on July 25, 2019
This article was first published on March 12, 2015
Commenting is easier and faster when you're logged in!

Recommended for you

The Interrobang Is 60?!
A look at the history and usage of the obscure mashup of an exclamation point an...

CreativePro Video: Glyphs and Text Alternates
In this week’s CreativePro video, Nigel French explains how text alternates can...

Using Math Symbols in InDesign
Use the InDesign Glyphs panel to populate your work with the correct math symbol...