
Enhance Print Workflows with “Interactive” Features
Some "interactive" features are perfect for print documents; for example, Object States make great layer comps! Eugene Tyson explains.

This article appears in Issue 40 of InDesign Magazine.
InDesign CS5 has introduced a host of interactive options for exporting interactive and rich media PDF and SWF files straight from InDesign. But, surprisingly, some of these “interactive” features can also be used to great effect even when you’re creating print documents. Take the Object States panel, for example. While Adobe makes a big deal about this being used for slideshows and animated photo galleries, I often use it for my printed documents as a sort of layer comps feature. Layer Comps is a feature in Photoshop that lets you set up different arrangements for an image. Each comp can save the position of the elements that make up the graphic. The Object States panel can do a similar thing, by letting you save different versions of the same basic content—or even very different content—inside one InDesign file. Then you can choose which version you want with a single click in the panel.
Swapping Ads
One of my most time-consuming tasks is creating multiple layouts for the same project. For example, I may have to make three versions of an ad (full page, half-page, quarter-page), and then quickly choose among them when laying out a publication. My goal is to get to the finish line quickly and efficiently so that I can spend more time on design and less on productions.
In the past I’ve tackled this problem in multiple ways, none of which really suited my exact needs and each of which I found to be clumsy. For example:
- Layers: Placing multiple objects on multiple layers means adding too many layers, which can become unmanageable. It’s also hard to turn off one layer and turn on another quickly.
- Pasteboard swapping: I’ve tried putting frames and groups on the pasteboard, but I can’t swap
out one layout with another quickly, and too many items on the pasteboard creates a messy InDesign document. Plus, you have the unfortunate displeasure of accidentally removing artwork from the pasteboard if you accidentally delete a spread that contains the artwork on the pasteboard. - Snippets and Libraries: Snippets and libraries can store the artwork, plus the layers the artwork is on, and you can place it all in exactly the same place on the page. However, these require an extra file to be stored with the job. Worse, it requires swapping that graphic with the one in the layout (that is, you have to delete one and place another). Snippets and libraries are very useful for sharing layouts, graphics, and other things among team members. But I need a method that only I have access to while I’m laying out a page quickly.
- Importing INDD: I’ve also tried creating new InDesign files for each piece of artwork, then importing each one. Again, this involves another file, though admittedly once it’s placed into the layout it works reasonably well, as it carries with the job for packaging. And you can have multiple page sizes for full-page, halfpage and quarter-page artwork. But if I place an InDesign file with multiple pages, I have to relink to the file to choose another page to import.
There are other options, such as importing a PDF or INDD with multiple layers that you can hide/show with the Object Layer Options dialog box. However, none of these are as clean and easy as the new Multi-State Objects panel. It lets me quickly swap layouts within the same document without relying on external files or clogging up my pasteboard with artwork I could potentially lose. It works perfectly for my print needs.
An Introduction to the Object State Panel
You can create a multi-state object (MSO) in two ways, depending on whether all your variations are complete when you make the MSO. Let’s say you have three or four versions of a photo, only one of which you’ll use in a layout. You can place all versions on the page, select them, and convert them into a multi-state object by clicking the middle icon at the base of the panel (Window > Interactive > Object States). In this case, each of those objects becomes a different state of a single “multi-state object.” The second method is better when you want to create variations on a theme. Draw a frame or place a graphic in InDesign. While the object is selected, click the “new multistate object” button, the middle icon at the base of the Object States panel. If you have more than one object selected and want them all to be added as a single object state (not broken down into separate states), hold down Option/Alt key when you click the buttons. That adds the selected objects as a single state. However, because an MSO must always have at least two states, InDesign technically clones the selected object(s)—exact duplicates of each object, one in each state.
Naming your Multi-States
The Object State Panel will now have two states: State 1 and State 2 (Figure 1). It’s a good idea to appropriately name the MSO and each of its States. To change the name of the MSO, type it in the Object Name field of the Object States panel. To change the name of a state, click-pause-click on the name in the panel.

Figure 1: The Object States panel.
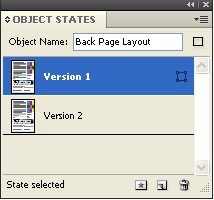
Figure 2: The Object States panel with states I named.

Figure 3: The Layers panel.
Adding Objects to a State
After you create your multi-state object, you may want to add additional objects to it, either as additional states, or to add objects to an existing state. To create a new state, select both an object on your page and the MSO, then click the “new multistate object” button (the middle icon in the panel). Even though that seems like it should create a new MSO, it simply adds your new object to the existing MSO. If you have more than one object selected, they’ll be added as individual new states—unless you hold down Option/Alt, in which case they’ll all be added together as a single new state. You can also add one or more objects to an existing object state: select the MSO and click the state you want to add to (in the Object States panel); now Shift-click on the object you want to add (so both the MSO and the object are selected), and finally click the Add Object to Multi-State icon on the Object State Panel (that’s the first button in the panel). Note: Adding multiple objects to an Object State combines all the objects into a single layer. If you’re a stickler for having your layers ordered, this is not for you. Instead, consider drafting the content in a new document, then placing that InDesign file into the layout, and then adding it to a multi-state.
Selecting and Editing Each State
Once you have two or more states in an MSO, you will likely need to select and edit them. Click a state in the Object State panel to select it. To edit the currently visible state, double-click the MSO on the document page. Once you select an individual state, you can make any changes to the object: resize it, move objects on it, recolor it, change its shape, change its text, replace an image, and so on. You can even have one state as a graphic and another state as a text frame—each state is completely independent of the other states. Note: There is a subtle difference in appearance between selecting the MSO itself and the objects in one of its states. A heavy dashed line indicates the MSO is selected; a lighter dashed line indicates the objects in a state. If you move the MSO itself, all the objects in all the states move; if you drag the objects in one state, the other states are not affected.
Exporting for Print PDF
Because you’re using this “interactive” feature for print purposes (to create various versions or comps), you need to understand how to print or export the document properly. The first rule is that when you print or export your file, whatever is visible (whichever state is selected for each MSO) will show up, and the others will be ignored. The second rule is that if you use File > Export > PDF (Print), you must select “Include Appearance” from the Interactive Elements pop-up menu in the Export PDF dialog box. If you forget this, then your Interactive elements, including the multistate objects you have created, are not output to PDF and there will be a gaping hole on the page.
Case Study MSOs and Movie Ads
To demonstrate how you might use MSOs for a real-world print situation, I’ve created an advertisement for a fictional movie. The ad will appear in print as a whole page, halfpage, and quarter-page (Figure 4). To make my MSO, I place the three ad versions into one InDesign layout at the same time, position each where it should be on the page, select all three, and click the Create New State button in the Object States panel (Figure 5). Now I name each state appropriately, and select the full page ad.

Figure 4: These three ads are destined for different ad spaces in a publication.

Figure 5: Click the Create New State button in the Object States panel.

Figure 6: One click in the Object States panel brings up the quarter-page ad.
Multiple Scenarios
The three-ad scenario is only one MSO example. Here’s another: I need to create 20 thematically similar posters for a bookshop, each with a different book cover and price. Instead of creating 20 files or even twenty pages, I can put all of it on one page in one InDesign file. The common design elements sit on the page, and I place the book cover and price within an MSO. It’s completely up to you how you handle your workflow—but if you’re like me and don’t want to be bogged down with files and versions files or multiple pages and multiple layers on top of other layers, then at least give Object States a try. It just may enhance your print workflow.
Commenting is easier and faster when you're logged in!

Recommended for you

InDesign How-to Video: Find Text Between Two Characters
In this week’s InDesignSecrets video, Erica Gamet demos how to find text in InDe...
Nonfiction Design
Designing nonfiction texts can be a lonesome quest, but you can dodge the design...
Populate InDesign Form Fields from a Text File with a Script
If you’ve ever used InDesign’s PDF form tools to make a List Box or...