


This article appears in Issue 124 of InDesign Magazine.
InDesign comes with three frame tools: the rectangle, the ellipse, and the polygon. And for the basic purpose of housing content, these tools suffice most of the time. But if you’ve come to think of these as your only options, it’s time to break out of that mental frame! With a few quick modifications, you can make unique shapes to hold photos, colors, patterns, and text—and, importantly, to do so in ways that reinforce the design’s meaning.
While you can create similar results with clipping masks in Photoshop or Illustrator, you might find that using the frame tools within InDesign offers some advantages in efficiency and control. In this article, I’ll walk you through some techniques and show potential applications for inspiration.
Change Individual Points on Frames
Simply moving one or two points on a factory-default frame can create a myriad of new shapes. Here are a few shown in gray—the shifted points are highlighted in pale blue (Figure 1).
Figure 1. Frames created by simple point transformations
Simply click on the frame’s anchor points with the Direct Selection tool (Shift-click to select multiple points) and move them with your arrow keys or mouse, or reshape the point by manipulating its control handles. To change a point from corner to smooth, select it with the Direct Selection tool, hold Command+Option/Ctrl+Alt to invoke the Convert Direction Point function, and drag. Use the same process to convert a smooth point to corner, but just click on the point instead of dragging.
These shapes can be used individually, such as in this web page for a stone carving and cutting company (Figure 2).

Figure 2. Web page featuring example of frame created by point transformation
To create the shape, I simply curved the top point of a triangle. I designed this shape because it looks cut, carved, and polished, which sums up the company’s services, and because it looks like a side table (hinting at their furniture products), an abstract boulder, and a sun on the horizon (suggesting the time-intensive process of smoothing stone).
These easily modified shapes can also be used to build patterns through repetition, rotation, or reflection. For the cover of a children’s reading activity kit (Figure 3), I moved two corners of a rectangle downwards to create a parallelogram that, when reflected vertically, looks like open book covers.

Figure 3. Activity kit cover featuring pattern created by point transformation
Apply Pathfinder Operations to Frames
You can also use Pathfinder operations on frames to yield interesting and useful results. In Figure 4, I combined basic rectangle, ellipse, and polygon frames to create new frames, shown in gray.
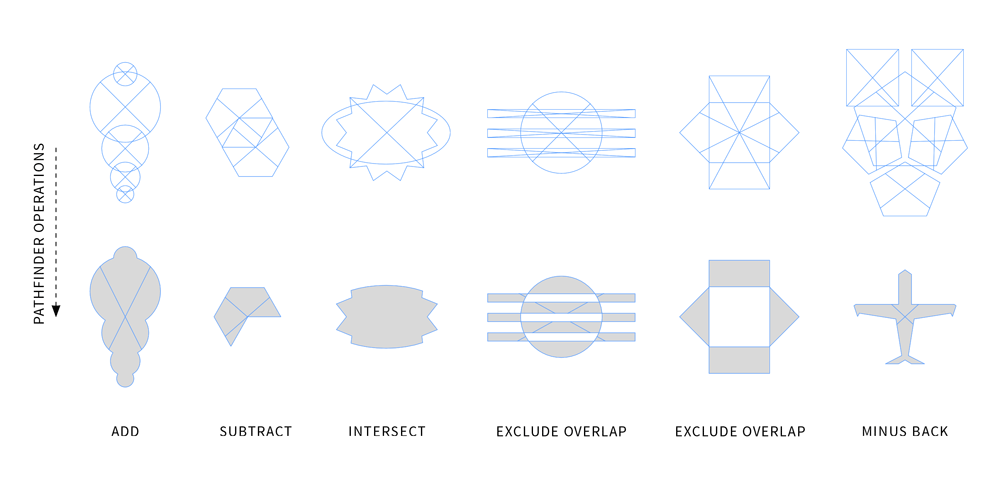
Figure 4. Frames created by Pathfinder operations (from left): Add, Subtract, Intersect, Exclude Overlap, and Minus Back
I created the Christmas ornament shape (Figure 5) for a cookie recipe book by modifying a large ellipse and adding a rectangle and circle to it. An inner shadow creates a die-cut 3D effect, which reinforces the subject of cookie cutting.

Figure 5. Book cover design featuring frame created with Pathfinder operations
Customized frames can also be used to create accent graphics. I applied the Exclude Overlap operation to a circle overlapped by two rectangles to create a symbol for a weavers’ cooperative (Figure 6).

Figure 6. Website featuring graphics created with Pathfinder operations
The shape resembles a ball of yarn and knitting needles, circular looms, and threads, as well as sunrises (a motif in The Odyssey, a story central to this cooperative’s mission). The negative space created in the circle is like an equal sign, symbolizing the cooperative’s support for women’s rights. In the splash image, the graphic highlights the text, and below, it is used to hold photographic imagery.
Make Frames to Frame Things
Frames can contain simple images and text, but you can also use them to frame arrangements of objects. Figure 7 contains an excerpt from a branding guidelines book showing how a shape can contain imagery and be placed over other images to highlight particular objects or phrases.
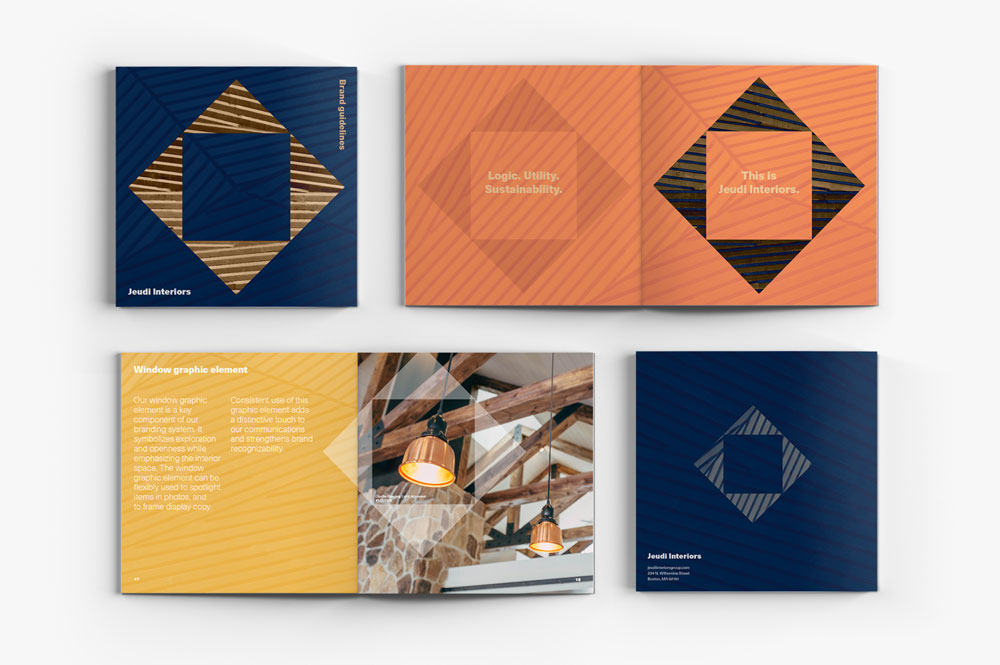
Figure 7. Branding guidebook excerpt (cover, inner front cover, interior spread, and back cover) featuring a frame that can both contain content and frame other content on the page
For the interior design firm, I chose a window-like frame shape to symbolize exploration and openness while emphasizing the interior space. To create this frame, I rotated one square 90 degrees on top of a larger square and subtracted it with the Pathfinder.
Go Freeform with the Pen Tool
There are times when regular shapes just won’t do the trick, and you need to create something with random curves and angles. When this is the case, you can start by dragging out a frame and then modifying its shape with the Pen tool. Set new anchor points, and tinker with the control handles.
In Figure 8, I’ve modified rectangle frames and filled them with sayings by the ancient Chinese philosopher Confucius, after whom the tea company is named. The effect looks at once like mountains and layers of ripped paper.
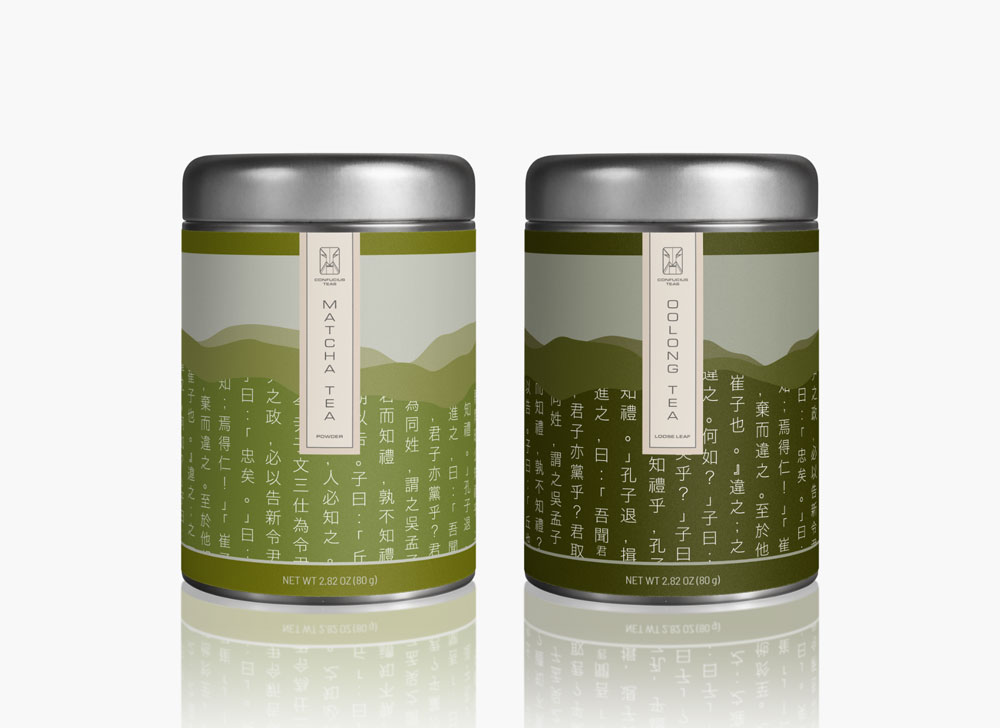
Figure 8. Tea packaging featuring frames created freeform with the Pen tool
Similarly, you can use frames as background accents for content, such as the freeform shapes behind the headshots in this email announcement (Figure 9). The organization is for career-pivoting professionals, so I chose blobby shapes to reflect flexible, fluid mindsets and shape-shifting in progress.

Figure 9. Email featuring frames created freeform with the Pen tool
Arrange Multiple Frames on a Grid
By arranging frames on a grid, you can create a variety of mosaic-like layouts. And to take it a step further, you can assemble collage effects by modifying the frames with the Pen tool to make irregular shapes. For a collection of poetry books (Figure 10), I chose this layout method to mirror how the books contain a selection of poems, rather than the complete works of each poet. I placed snippets of poetry within the frames, as well as photos and solid color fills.
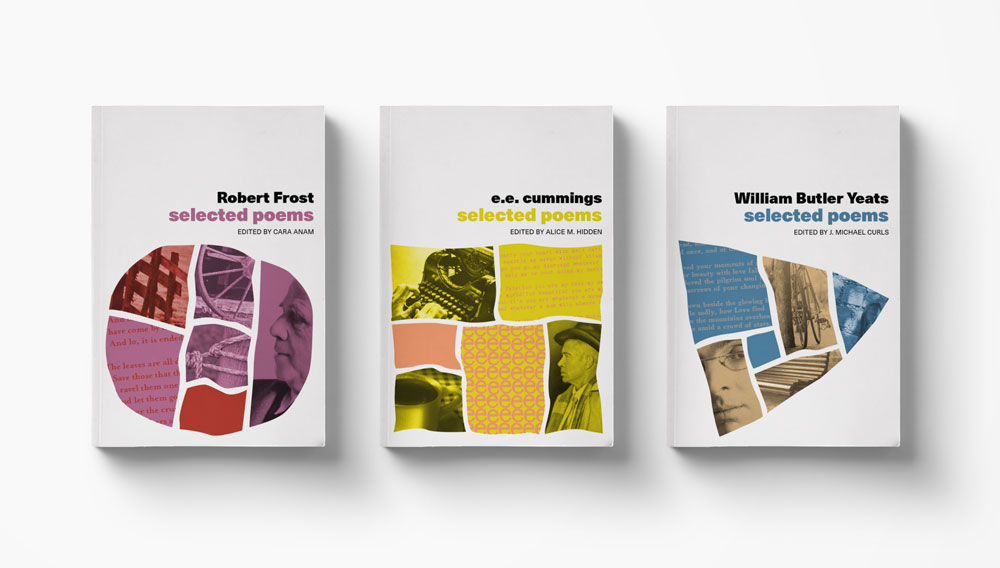
Figure 10. Book collection featuring frames created freeform with the Pen tool and arranged on a grid
Frames with Flair
Frames are easy to modify in InDesign, and can be designed to reinforce the themes and messages of your content. Whether you play with individual points, Pathfinder operations, or go freeform, you’ll rapidly expand your possibilities for creative expression. What might you create with a fresh take on frames?
Commenting is easier and faster when you're logged in!

Recommended for you

CreativePro Magazine Issue 1 Now Available
Issue 1 has articles on designing book covers, typographic rhythm, Illustrator t...

InDesigner: Florida Cajun Zydeco Update!
Addison Lalier shares how one man turned his passion for live music into a livel...

InDesign Magazine Issue 75: The Ultimate Guide to Kerning
We’re happy to announce that InDesign Magazine Issue 75 (July, 2015) is now avai...