


This CreativePro tip for viewing Illustrator artwork as outlines was sent to Tip of the Week email subscribers on May 3, 2017.
Sign up now and every week you’ll get a new tip, plus roundups of new articles and exclusive deals sent right to your inbox!
Just scroll down to the bottom of this page, enter your name and email address, and click Submit! We’ll take care of the rest. Now, on with the tip!
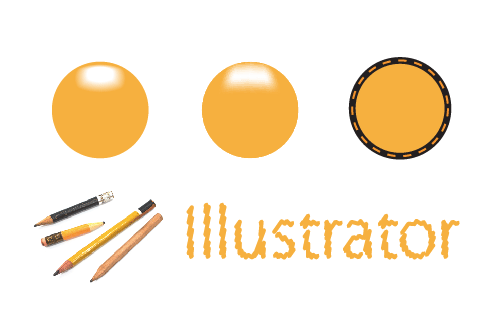
If you’ve used Adobe illustrator for any amount of time, you know that you can view artwork in either Preview mode (where you see all strokes, fills, effects, etc):
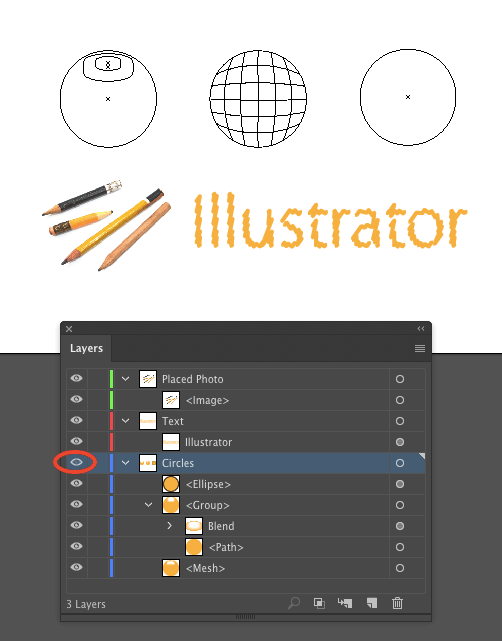
Or Outline mode (where you see just vector paths):

And you probably know the keyboard shortcut for toggling between modes, Command+Y (Mac) or Ctrl+Y (Windows). But you might not know that Illustrator also offers the flexibility to see individual layers or just placed artwork in Preview mode, as well as the ability to see artwork in both modes simultaneously.
To see a single layer in Preview or Outline mode, hold the Command key (Mac) or Ctrl key (Windows) and click the layer’s eye icon in the Layers panel.
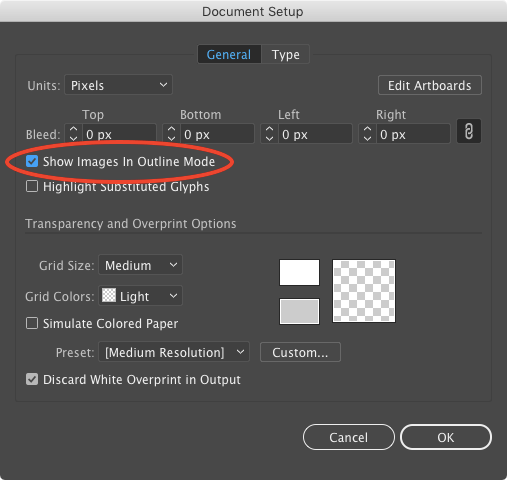
To see placed images in Outline mode, choose File > Document Setup, and select the option to Show Images In Outline Mode.

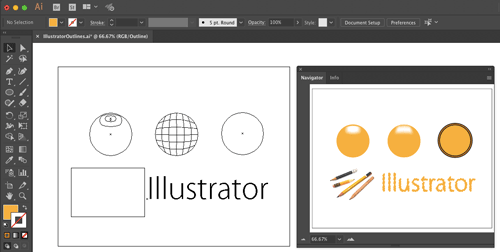
To view artwork in Preview mode and Outline mode simultaneously, choose Window > New Window. Then, press the Arrange Documents button on the right side of the Application Bar and arrange the windows so you can see both.

Or view the artwork in Outline mode and open the Navigator panel, which always shows artwork in Preview mode.
Note that there is a default preference in the Navigator panel menu which makes dashed lines display as solid lines, but you can turn this off if seeing the dashes is important to you.
This article was last modified on July 29, 2022
This article was first published on May 10, 2017
Commenting is easier and faster when you're logged in!

Recommended for you

How to Increase Image Dimensions and Maintain Quality in Photoshop
Learn best practices for increasing dimensions of an image while maintaining as...

Celebrating a Decade of Camera Raw
It’s time to dig in the fridge for a slice of leftover cake and wish a happy bel...

Creating Tilt-Shift Effects in Photoshop
The Tilt-Shift effect makes aerial views of landscapes look like model villages....