
Re-Visions
Deciding that the tower structure was too small, I linked the three tower layers in the Layers palette, then used Free Transform (Command-T/ CTRL-T) this time to stretch just the tower (see figure 10). So that I could continue to act on these layers as a unit, I then created a Layer Set (which looks like a folder within the layers palette) by choosing New Set From Linked from the Layers palette pop-up menu. After adding more detailing (in a new topmost layer within the Layer Set), I then created a Layer Mask for the entire Layer Set to control how the tower layers as a group interacted with layers below.

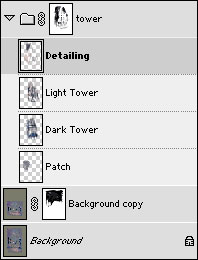 Figure 10: Stretching the tower by itself and adding a layer mask to control how it interacts with other layers (top shows the image, bottom shows the Layers palette)
I wanted the tower to jump out from the haze, so I tried different filters and settled on applying an Emboss filter to just the tower. Since filters can only be applied to single layers, I needed to make a flat copy of the tower to apply a filter to it. I used Edit> Select All (Command-A/Control-A) — after hiding the layers below the tower — then made a flat copy of the tower layers with Edit> Copy Merged. With the “merged copy” on the clipboard, using the Paste command (Edit> Paste, or Command-V/ CTRL-V) places a flat version of the tower into a new layer. I then applied the emboss filter to this flat tower layer (see figures 11).
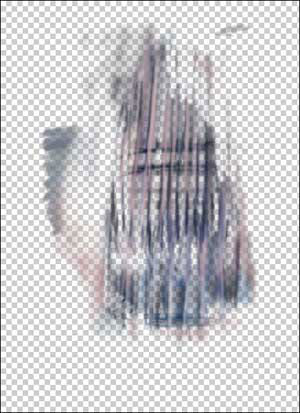
 Figure 11: Making a flat copy of the tower layers (top) then applying the Emboss filter to it (bottom)
After enhancing the emboss effect by applying various blending modes to duplicates of the embossed tower layer, I placed all these new layers within a “tower embossed” Layer Set. Since the embossing effect resulted in the tower on top visually separating from the rest of the image below, I decided that the tower needed to be woven more fully within the entire image. To do this I duplicated the original image layer with the smaller figures and moved this duplicate layer above the tower to form the foreground. Since I ended up creating a number of layers to develop the foreground (using primarily the Paintbrush and Clone Stamp tool) I created a Layer Set with its own Layer Mask for the new group of foreground layers.
By the time the image was complete I’d duplicated the entire foreground Layer Set (from the Layers palette pop-up) and moved it below the tower, added a layer for my copyright and signature, more layers for touchups and Adjustment layers for color corrections (see figures 12). By keeping my Layers palette organized I was able to work fluidly, in an almost a sculptural way, adding and reworking elements within my image.

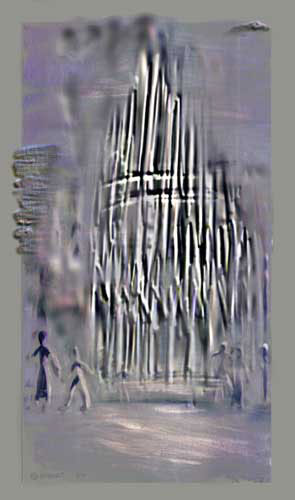 Figure 12: Creating more layers and layer sets including those for signature and copyright information (top) that results in the final image (bottom)
This article was last modified on January 3, 2023
This article was first published on September 10, 2002
Commenting is easier and faster when you're logged in!

Recommended for you
How to Make a Rubber Stamp Effect in Photoshop
You can turn just about any artwork, logo, or text into a rubber stamp by follow...

3D Printing With Photoshop CC
Adobe has been building increasingly sophisticated 3D modeling tools into Photos...
Essential Tips for Cropping Images in Photoshop
Whether it’s done to make images fit a specific space, or to make them tell a ce...