
Getting Started
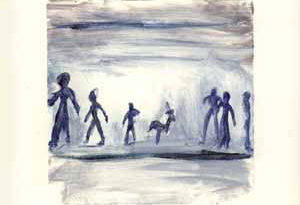
I’d been haunted by the cathedral-like ruin of the WTC that remained standing in those first weeks, and I wanted to integrate that tower structure into the scanned monotype. Since the ruin required a more vertical orientation than the horizontal starting image, I needed to elongate the starting image in order to fit the ruin into the composition. After choosing a color from the starting image as the Background color (holding Option/ ALT when clicking with the Eyedropper), I then expanded the canvas size (Image> Canvas Size) to give me more room to work (see figure 5).
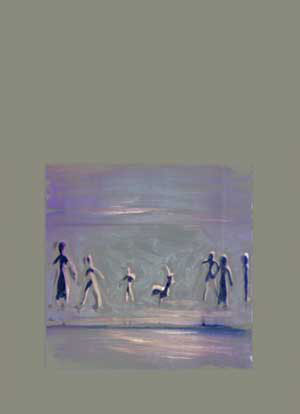 Figure 5: After enlarging the canvas
Since I never work on the “original” image layer, I next duplicated the layer containing the original image (by dragging the layer over the New Layer icon in the Layers palette), before using Edit> Free Transform (Command-T/ CTRL-T) to stretch the duplicate taller (see figure 6).
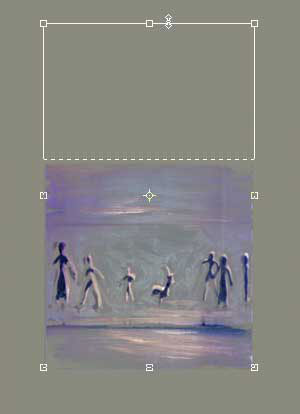
 Figure 6: Using the Free Transform tool (top) to stretch the image taller (bottom)
Though the background was now the right proportion, the figures had become large and distorted. So to place the original figures back into this stretched scene, I began by moving the original starting image layer on top of the stretched one. Then I attached a Layer Mask to this top version by clicking the Layer Mask icon. Working into the Layer Mask with the Paintbrush I allowed the smaller figures on top to be visible, while only the top portions of the stretched image showed from beneath (see figure 7). To control whether you’re working on a layer or its mask, click on the appropriate thumbnail in the Layers palette. When working into a Layer Mask, black masks out the image layer, white allows the image layer to show through, and grays provide semi-transparent transitions.
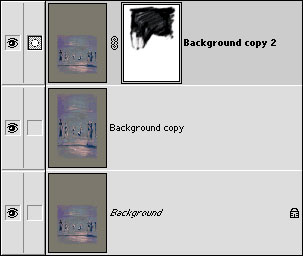 Figure 7: Applying a layer mask to make the smaller figures visible against the stretched background
To introduce the WTC’s cathedral-like ruin into the image, I created a new layer on top (clicking the New Layer icon) and painted into that new layer. To create a latticework above the shadowy layer of the initial structure I’d drawn, I created a new layer on top and drew with lighter colors. To continue working on the various aspects of the tower, I would click on the appropriate layer, and paint. In this way I could weave elements on top of, and beneath the tower (see figure 8).

 Figure 8: Painting into layers above the initial image to bring in the cathedral ruin (top) and then adding lighter colors for emphasis on layers above (bottom)
In yet another layer below this one I used the Clone Stamp tool (with the “Use All Layers” option enabled) to cover over and “patch” some of the areas below where the stretched figures still showed through. I also renamed some of the layers (by double-clicking the layer name) and used Layer> Merge Down (Command-E/ CTRL-E) to replace the original background layer with the stretched version (see figure 9).
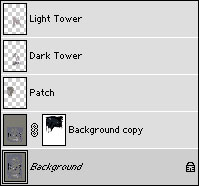 Figure 9: The Layers palette showing (from bottom to top) the stretched background, the original image with a Layer Mask, and the first layers of the tower
This article was last modified on January 3, 2023
This article was first published on September 10, 2002
Commenting is easier and faster when you're logged in!

Recommended for you


Scanning Around With Gene: Part 2 of That '70s Type!
Part 1 of That ’70s Type! Setting type is like re-decorating your home: yo...
CreativePro Tip of the Week: Opening Files as Layers in a Photoshop Document
This CreativePro Tip of the Week on opening files as layers in a Photoshop docum...