How to Create Seamless Textures in Photoshop
Learn the simple solution for making any texture seamless.

Whether you’re wrapping textures around 3D objects or simply filling a background, it’s likely you’ll need to fill a larger space than your original texture block will allow. The problem is how to avoid the obvious joins where the texture repeats. Here’s a simple solution that you can use to make any texture seamless.
Step 1: The starting texture
Choose your texture, and crop it so that it fits the Photoshop window – you don’t want any of it to hang off the canvas. If you have your Crop Tool set so that it doesn’t delete pixels, which is standard, then after you’ve cropped Select All and then make a new layer from the selection. This will limit the new layer to just what’s visible in the window. 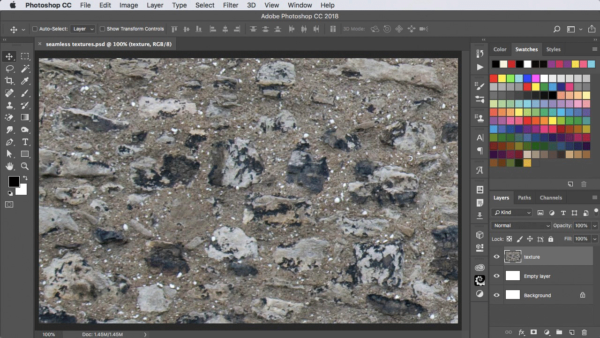
Step 2: Offset the texture
Drag the texture layer to the bottom left, so the corner of the texture is now more or less in the middle. You don’t have to do this precisely. 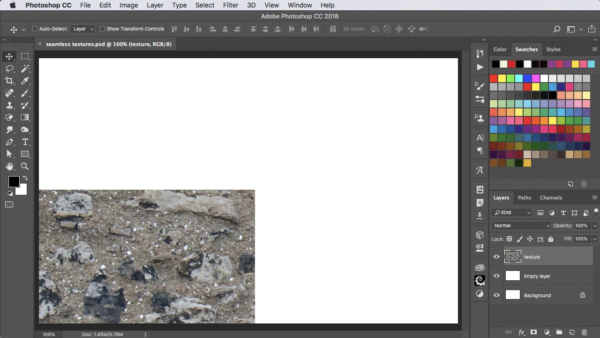
Step 3: Repeat the texture
Hold Option/Alt as you drag the texture up with the Move Tool to make a copy, holding Shift so it moves exactly vertically, until the bottom of the repeated texture meets the top of the existing one. Then use Command/Ctrl+E to merge these two layers together. 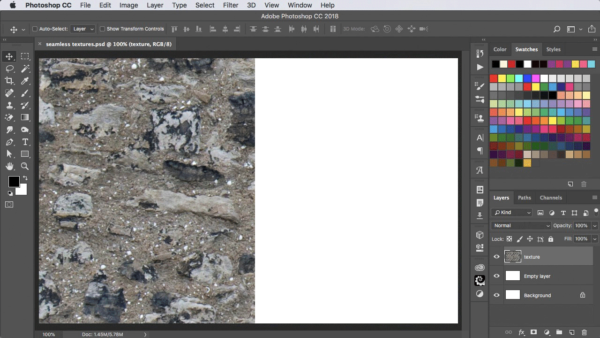
Step 4: Repeat again
Now drag the layer to the right, again holding Option/Alt and Shift to make a copy. Merge down once again. You’ll now have offset the original texture so that the edges are in the middle.
The joins are obvious here – but you know that where the texture goes off the top, it seamlessly repeats on the bottom, and the same for left and right. 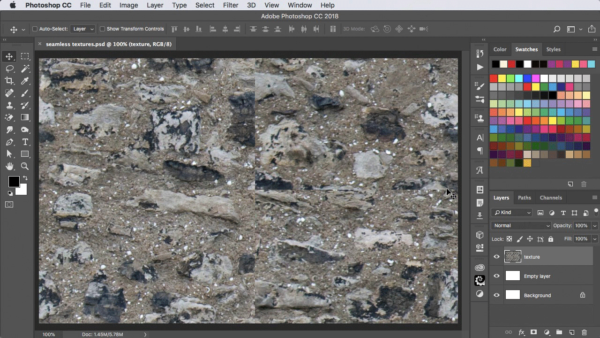
Step 5: Patch the joins
The easiest way to begin is to use the Spot Healing Tool, dragged vertically down the centre and horizontally across. This will be a great start, although you’re not there yet. 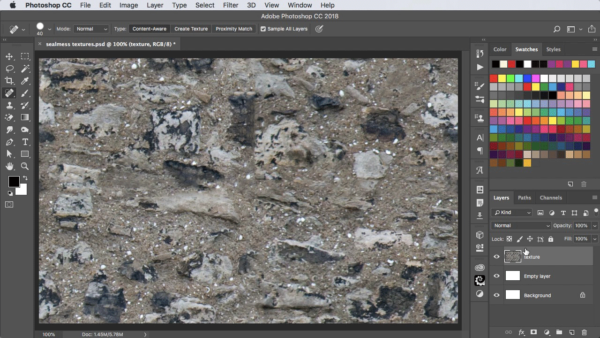
Step 6: Fix the errors
After using the Spot Healing Tool you’ll probably be left with some unwieldy patches – such as the black stone at the top of this image, which looks too cut-off on the right. Switch to the Clone Tool, and use it to sample clear patches of background to cover up any anomalies. 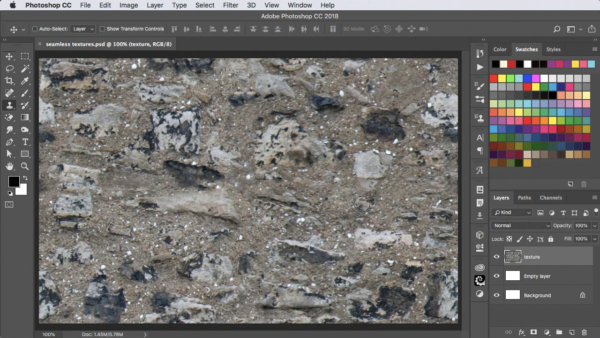
Step 7: Save the texture
Select All, then go to Edit > Define Pattern. Give the new pattern a name, and click OK. You’ll now be able to use it in any of your Photoshop work. 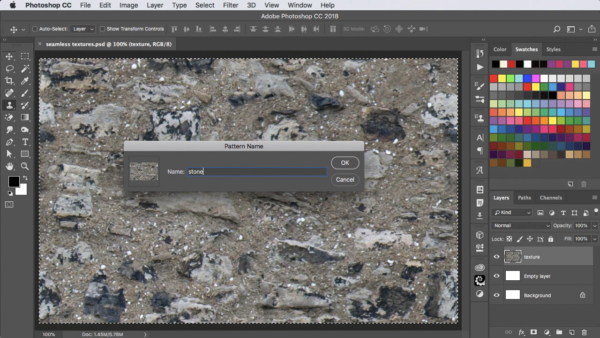
Step 8: Try it out
The easiest way to test the new texture is to make a new layer, filled with any flat color, and choose Layer > Layer Style > Pattern Overlay. The new texture will be the last one in the list. Once it fills the layer, move the dialog out of the way, and you’ll be able to drag it around to check that it really is seamless. You can reduce the scale as well, if you like, to check the repeats. 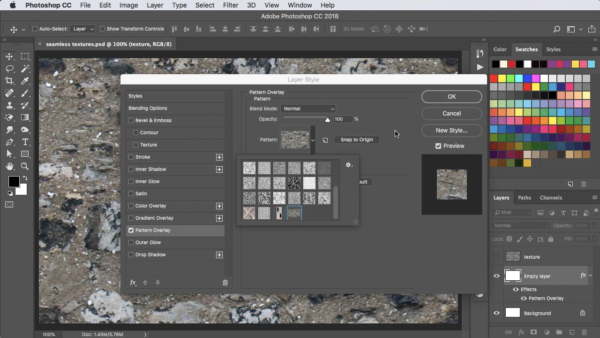
Watch the Video
Check out the video version of this tutorial below.
Commenting is easier and faster when you're logged in!
Recommended for you

Working With Dynamic Symbols in Adobe Illustrator
Symbols have always been a powerful tool in Adobe Illustrator. With symbols, you...

Modeling a 3D Bracelet with Photoshop
Photoshop’s 3D modelling environment has matured to the stage that with CS6 Exte...
Set Them Free!
The other day I was working in Adobe InDesign, trying to reproduce a 1970s-era w...


