
Rounded text is great for adding a soft, human look to text, and is a good solution if you want to create a logo for, say, a child’s toy or a chocolate bar. It’s also ideal for making neon-effect lettering, since that’s a material that cannot be created with sharp corners.
But although there are several rounded fonts commercially available, you may not find one that exactly suits the job in hand. Fortunately, it’s relatively easy to create your own rounded text, using any starting font you like.
Step 1: Choose your font
You can use just about any font you like, although sans serif will tend to work best. Here, I’ve started with Futura Bold, which has the advantage of more or less uniform stroke weight. After you’ve set your text, turn it into outlines so it’s editable (use Type > Create Outlines).
Step 2: Select the corners
Even in a font as regular as Futura, the verticals and horizontals have different weights. So start by selecting all the corners at the tops and bottoms of the purely vertical strokes, using the Direct Selection Tool. The easiest way to do this is to drag from outside the shape over the corners you want to include, holding the Shift key as you select each pair to add more corners to your selection.
When you select the corners using the Direct Selection Tool, a tiny dot will appear just inside the corner. These are the handles you’ll use to round them off.

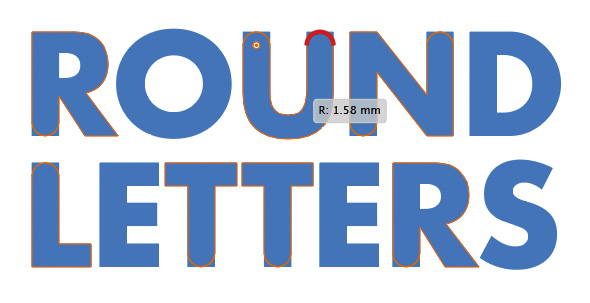
Step 3: Start rounding
Grab any one of the dots, and drag it – as you do so, you’ll see all the corners starting to round off. When one or more of the rounded corners turns red, it’s a sign that it has reached its maximum rounding; each of the selected strokes will now terminate in a perfect semicircle.
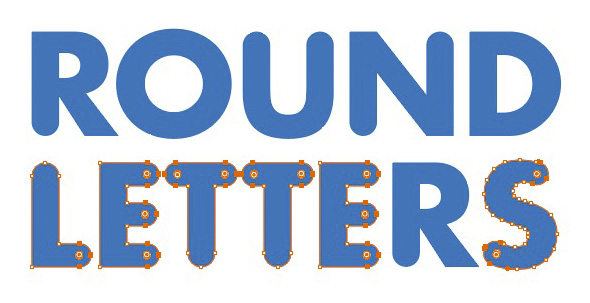
Step 4: Round the horizontals
Select the ends of the horizontal strokes in the same way as before – on the letters L, E and T. You can also select the ends of the letter S, as these are the same width. And just as before, drag the control dots to round off the letters.
Step 5: Round the larger corners
Select the large corners of the letters R, N, D, S and L. When you drag the control dots on these, it’s possible to make the rounding far too large; but if you also select the corners at the terminals of the diagonal stroke on the R, you’ll limit the total rounding to just what those diagonals can take. Here, you can see how one of the tails of the R has turned red, indicating maximum rounding.
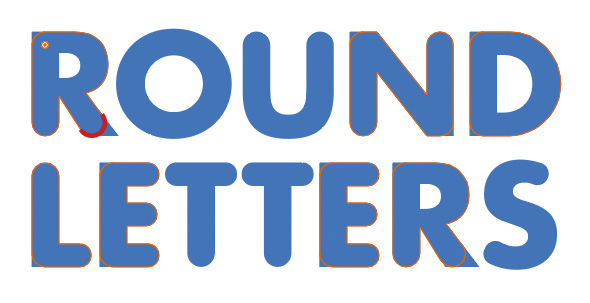
Step 6: Round the inners
Next, select the inner corners of all the letters – you don’t want to leave any sharp corners behind. When you drag the control dots to round these, you’ll probably find that you won’t be able to drag very far; that’s because letters such as D have a complex series of anchor points inside the counter, and you can never drag a rounded corner past an adjacent anchor.

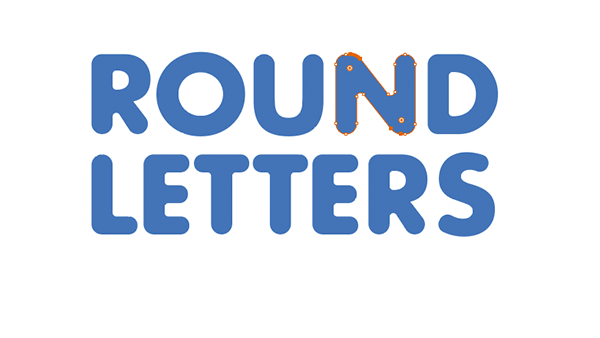
Step 7: The tricky N
Rounding the two remaining corners on the N is a little awkward, because of the shape produced. You just have to do this by eye, rounding until it looks right – don’t drag too far, or the diagonal stroke will look all wrong.

Step 8: Tidy up
The rounding process is likely to produce some anomalies. For instance, the tail on the R is now too short; and the diagonal stroke on the N is too thin. To fix the R, select the three anchor points at the end of the tail and nudge them right a little way, then grab the join between the vertical and the diagonal and nudge it down.
For the N, grab the points where the verticals meet the diagonal, and nudge them respectively up and down to make the stroke a little thicker.

Step 9: Be creative
You don’t have to round all the corners, of course – experiment with just rounding some of them. Here, I’ve rounded just the top left and bottom right corners of the letters, to produce a unique and distinctive appearance.

This article was last modified on January 8, 2018
This article was first published on January 8, 2018
Commenting is easier and faster when you're logged in!

Recommended for you
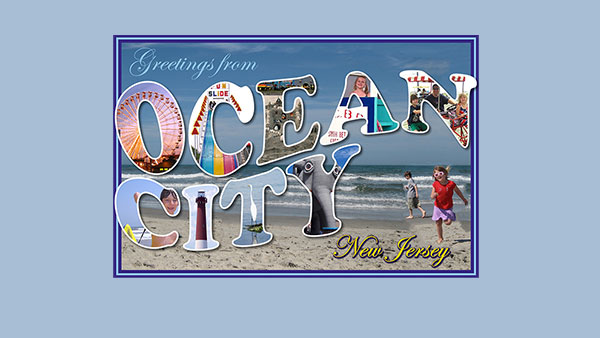
Creating a Postcard in Photoshop
The Project: to make a fun postcard image from a beach vacation in the iconic...
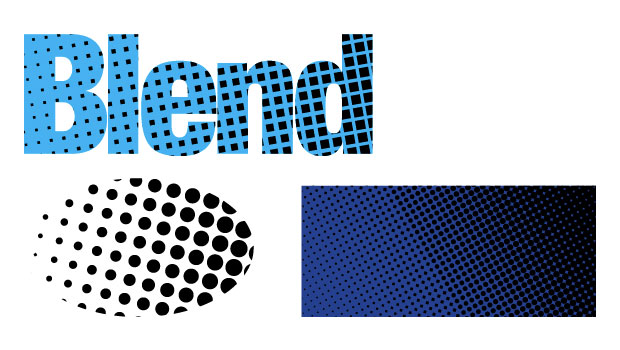
10 Free Vector Patterns, Volume 3
You may have seen my 20 free vector patterns and the follow-up 20 free line...

How to Prepare Raster Images for Use with Illustrator Brushes
In the process of testing Illustrator features released last June in the Creativ...