
Creating Hexagonal Patterns and Pattern Brushes in Illustrator
Use these advanced techniques to put hexagonal patterns and pattern brushes to work for you.

This article appears in Issue 9 of CreativePro Magazine.
Patterns (designs composed of regularly repeating graphic elements) have always intrigued me, especially those on wallpaper. I remember as a child spending hours figuring out how they were drawn.
Years later, as a college student, I opened the Adobe Illustrator file of the background used in the design of a major credit card. From the final product of this pattern, I learned to create these designs in Illustrator.
This knowledge opened up a world of possibilities in my career, and I’ve made good money on projects that have involved only patterns.
If you’re new to using patterns, my colleague Ari Weinstein has described in a CreativePro post how they work, how they are made, and how they are manipulated in Illustrator. Here, I’ll share a couple of techniques I use in my designs: how to generate organic hexagonal patterns, and how to create patterns to use in brushes.
Hexagonal Patterns
Figure 1 shows roughly how hexagonal patterns work. What is drawn on sides 1, 2, and 3 should be repeated on the opposite side at 180 degrees.
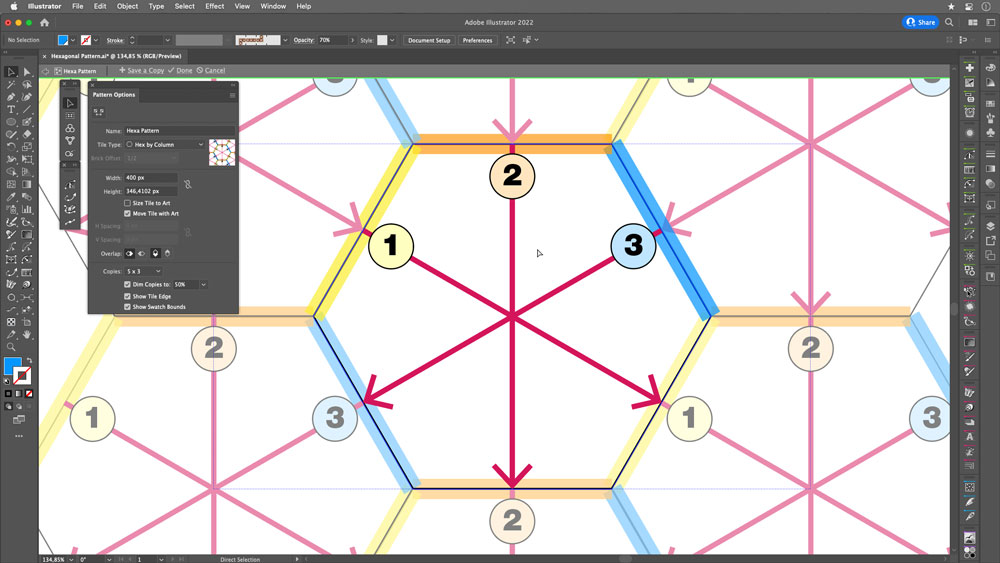
FIGURE 1. How hexagonal patterns work: Design elements repeat on opposite sides of a hexagon, meaning that three distinct design regions can repeat infinitely in any direction.
Here, I’ll show you how to make hexagonal patterns (from scratch) with a guide hexagon, using the Blob Brush to give the art a more organic vibe.
Start with a hexagon: Create a new file, then draw a regular hexagon using the Polygon tool. (In Figure 2, I used a 200 px radius.) Note the height of the resulting shape, which you’ll need when defining your pattern. In Figure 3, it’s 346.4102 px.

FIGURE 2. Start with your hexagon and save the measurement of its radius.

FIGURE 3. The height of your hexagon
Activate the pattern generator: Select the hexagon, then go to Object > Pattern > Make.
Modify the panel values: Start by naming your pattern something meaningful, and select Hex by Column as your Tile Type. For the height, use the width of the shape you started with in step 1 (346.4102 px), as shown in Figure 4.

FIGURE 4. Pattern Options panel
Create settings for your pattern: Select the Blob Brush tool (Shift+B), then double click to bring up the Blob Brush tool Options dialog box, as shown in Figure 5.

FIGURE 5. Blob Brush Tool Options dialog box
Start drawing on side 1: Notice that Illustrator correctly duplicates your object throughout the pattern, doing the math for you along the way (Figure 6).
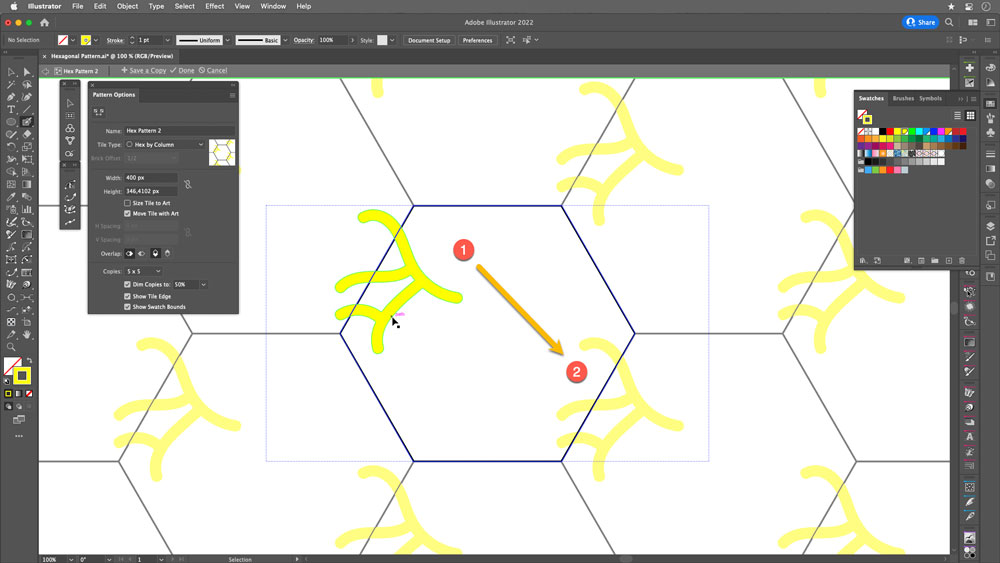
FIGURE 6. Drawing in the hexagon: side 1
Continue drawing on sides 2 and 3: Ensure that the paths do not intersect (Figures 7 and 8).
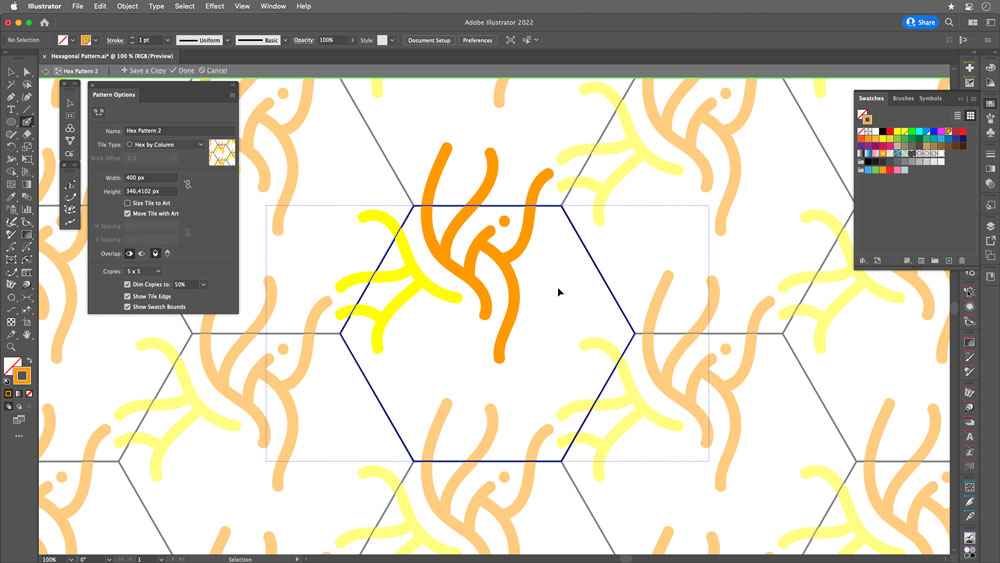
FIGURE 7. Drawing in the hexagon: side 2
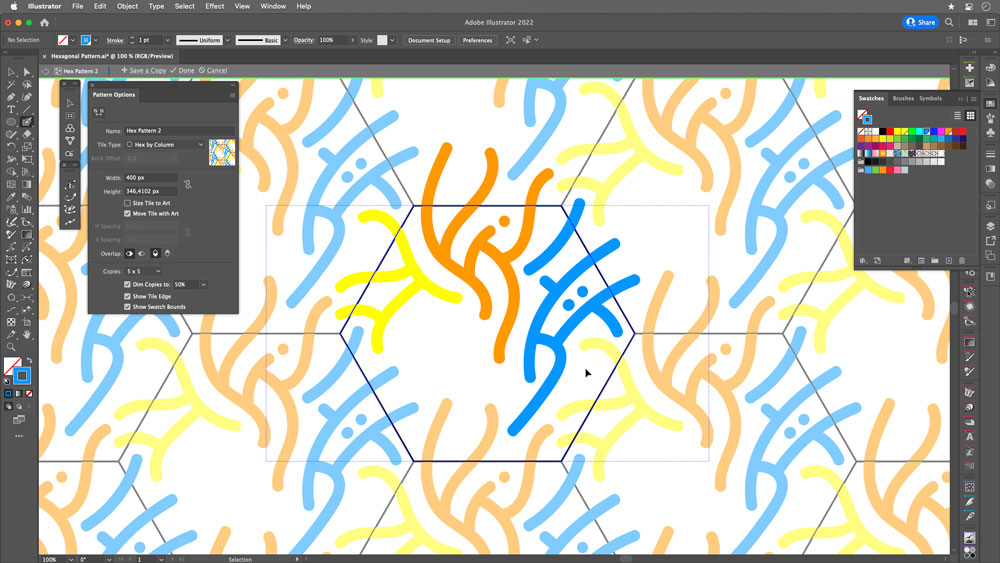
FIGURE 8. Drawing in the hexagon: side 3
Clean up: Delete the original hexagon. Save the pattern, and apply it to check its effectiveness (Figures 9 and 10).

FIGURE 9. Once your pattern is defined, select and delete the original hexagon.
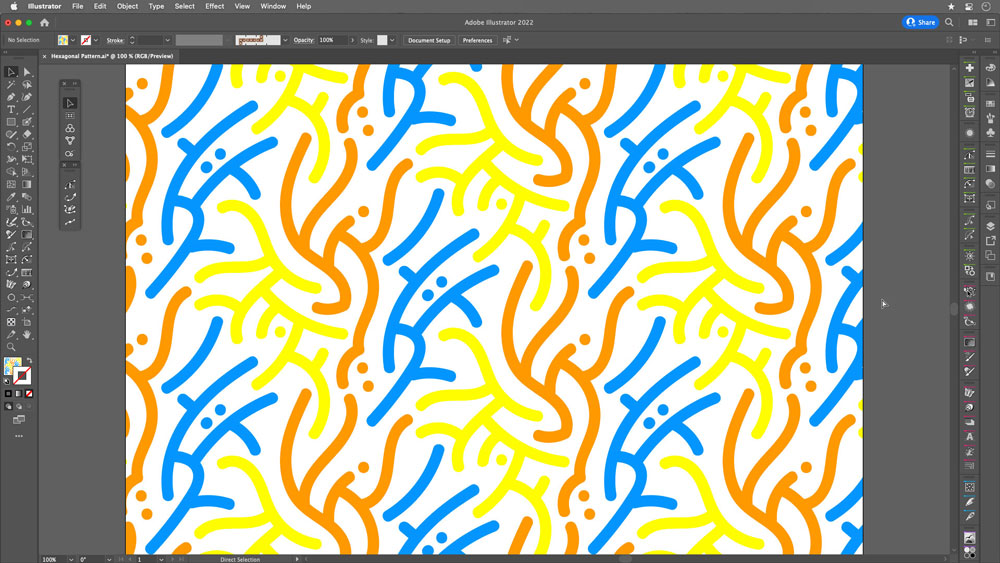
FIGURE 10. The pattern is applied to a rectangle.
Go beyond the pattern
You have a pattern! Now you can use it as the basis for a similar version.
Apply your pattern to a new object, then go to Object > Pattern > Save a Copy. Paint the paths black in this copy, complete some empty spaces, and save (Figure 11).
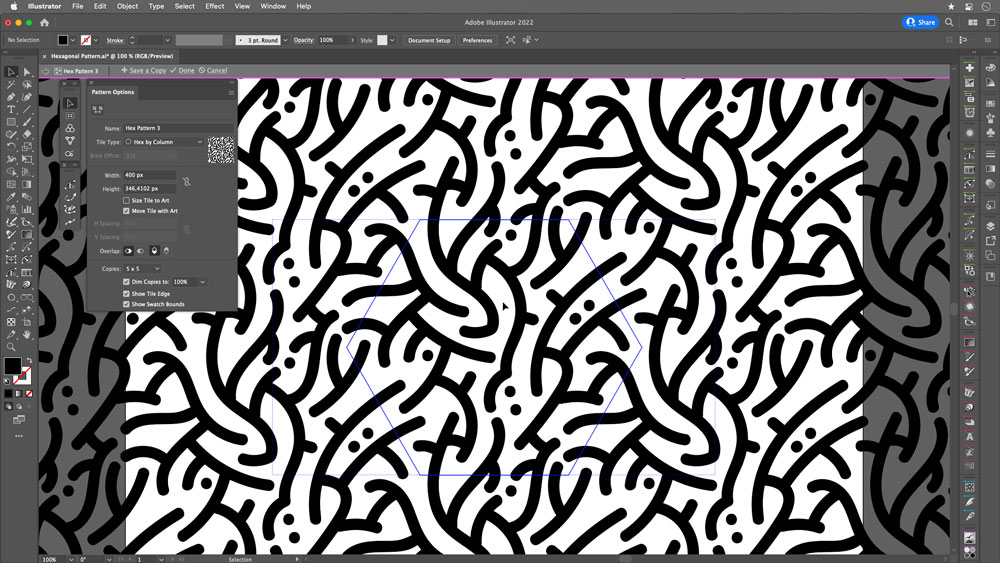
FIGURE 11. Duplicate and edit your pattern to create a new variant, one with more complex objects than the original.
In Figure 12, you can see how I applied this pattern to a hoodie, combining it with another background and playing with mixing and opacity modes.
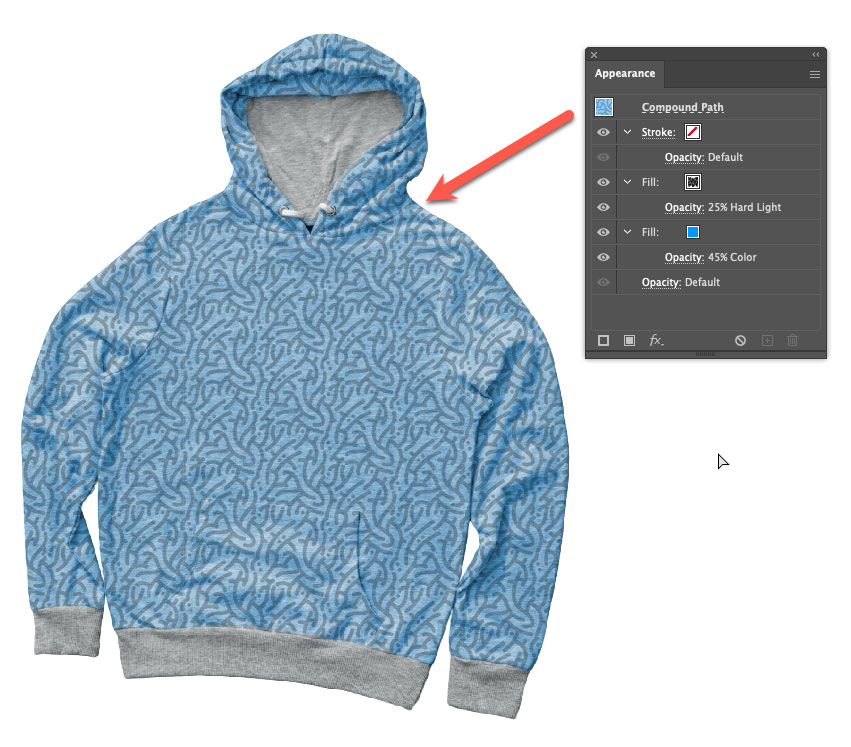
FIGURE 12. A hoodie using the example pattern
Sketch as sketch can
Although on some occasions I use my Wacom tablet and Adobe Fresco, I almost exclusively—like, 95% of the time!—start my pattern designs with pencil and paper.
For me, sketching by hand on paper is the crucial first step in the process of developing pattern artwork. Whether you’ll end up in Illustrator making small, simple strokes or a large, intricate design, sketching manually at the outset allows you to develop a concept faster and better.
Sketching can help you address design challenges and tackle solutions most immediately. It strengthens your creative capabilities in a different way. We all could use the opportunity to get away from technology—even for a moment.
I have some sheets with grids that I print as needed. I then easily pull these sketches into Illustrator by taking a photo with my phone and placing it. This practice allows me to combine the power and efficiency of Illustrator with the time-honored traditions of drawing by hand.
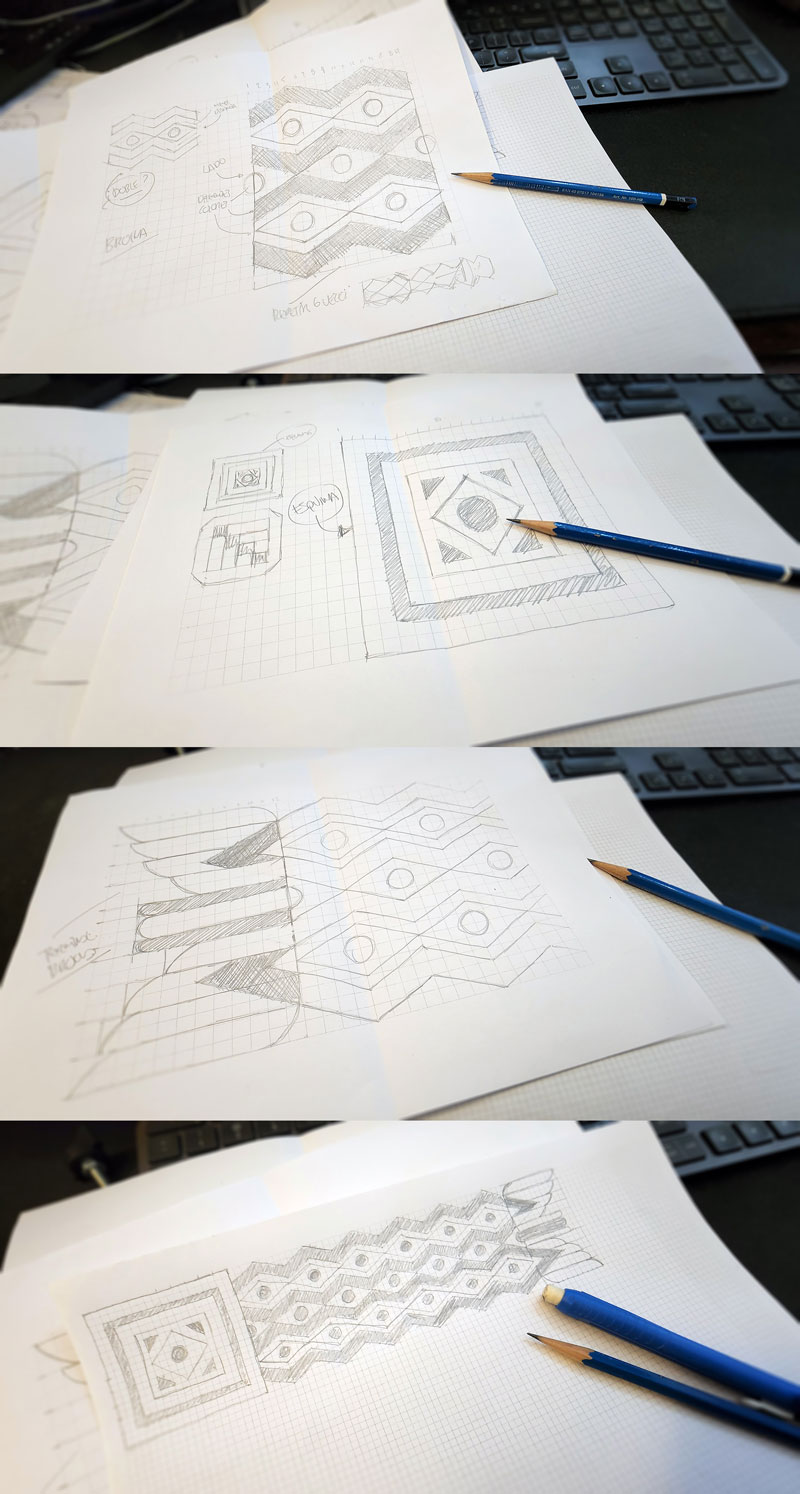
The author works out the basics of the design elements of a pattern brush the time-honored way: on paper, using sheets with grids that he can print as needed. He then digitizes them with snapshots on his phone and imports them into Illustrator documents, where he uses his sketches as a guide in drawing the vector art used to define the brushes.
Use Patterns in Brushes
Now, let’s look at an example of pattern brushes, a powerful graphic resource that allows you to create intricate and complex shapes in your designs. These require special attention because they are based on a specific set of the tiles (a complete set of the repeating elements) that form them.
To form a pattern brush, you need five tiles: the side tile, the outer corner tile, the start tile, the inner corner tile, and the end tile (Figure 13).
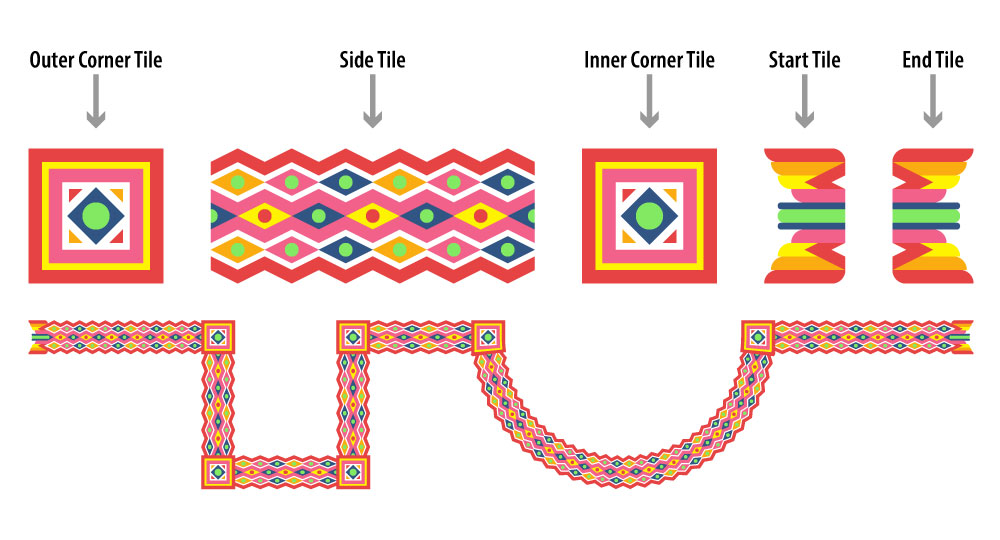
FIGURE 13. Pattern brush tiles interact to create intricate art applied to strokes, corners, and endpoints of various Illustrator objects and paths, open or closed.
In our example, we will draw only the first three of these tiles; the other two will be copies of their counterparts.
Start with a sketch: First things first—I wholeheartedly recommend sketching your art by hand before you do anything with Illustrator! (See “Sketch as Sketch Can” above.)
Create the side tile: Adjust the grid parameters in a new 1,000 px × 1,000 px document. Open the Guides & Grid area of the Preferences dialog box. Set Gridline Every to 100 px and Subdivisions to 20, as shown in Figure 14.
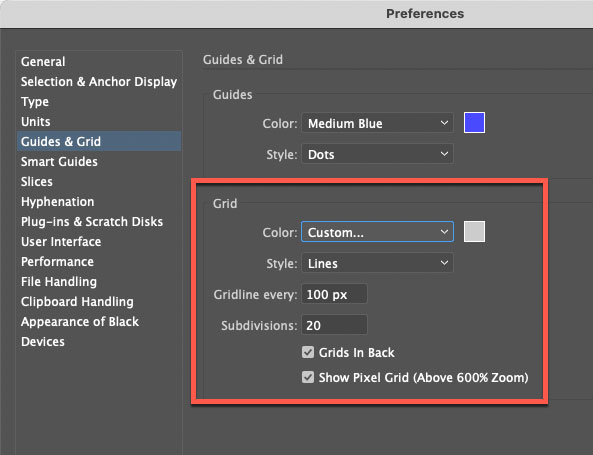
FIGURE 14. To adjust Grid area of the preferences, go to the Guides & Grid area of Illustrator’s Preferences dialog box.
Draw: Turn on the Snap to Grid option (View > Snap to Grid), and start drawing with the pen. The module measures 100 px high × 240 px wide (Figure 15).
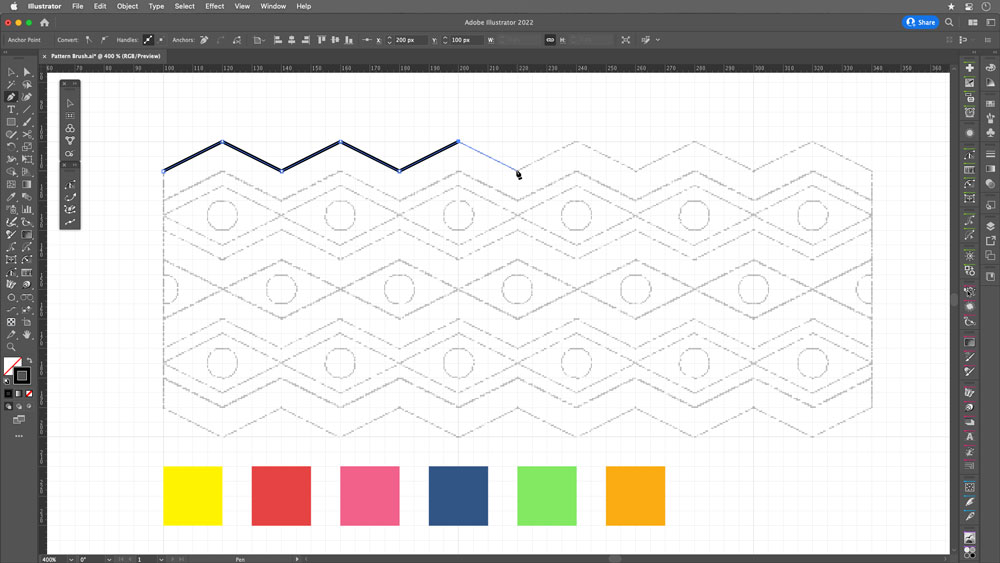
FIGURE 15. With your sketch as a guide and using the grid, draw with the pen.
Build with objects: Create essential elements, then copy and reflect them (Figure 16).
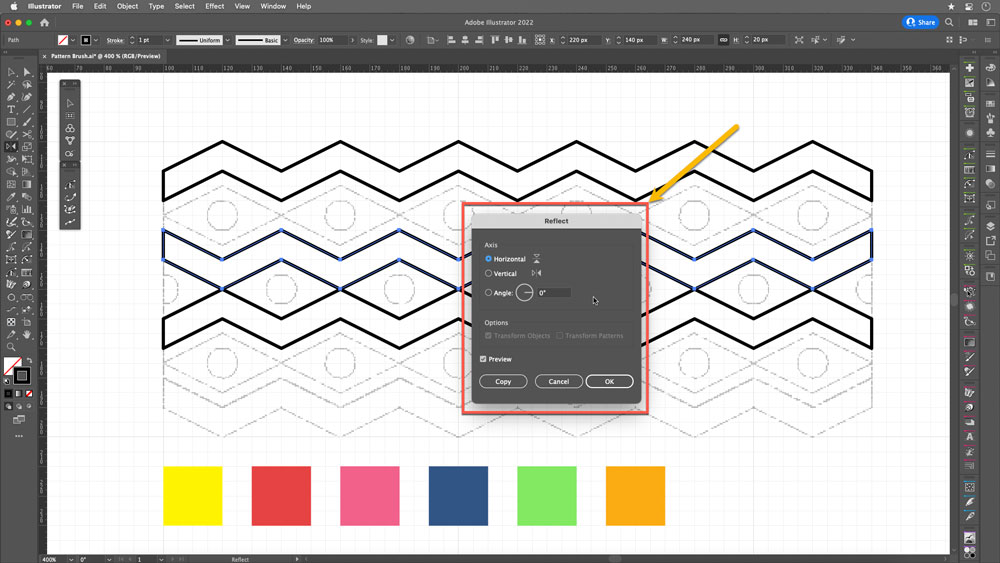
FIGURE 16. Use the Reflect tool to mirror your objects with precision.
Color: Apply colors to the fills to your taste (Figure 17).
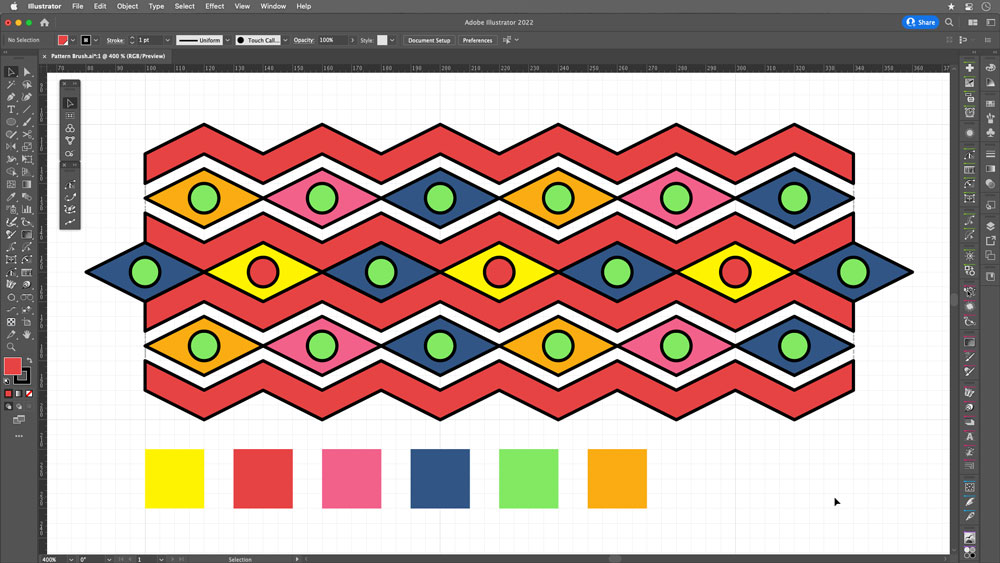
FIGURE 17. Apply color to the objects.
Clean up: Remove the black strokes and trim the rhombuses and circles of the ends by drawing a rectangle on top of the shapes, then selecting the three objects (rhombus, circle, and rectangle). With the Shape Builder tool, activate the option to subtract (press Option on macOS or Alt on Windows) and move the cursor over the part to delete (Figure 18). To avoid transparent parts, place a white object behind everything (Figure 19).
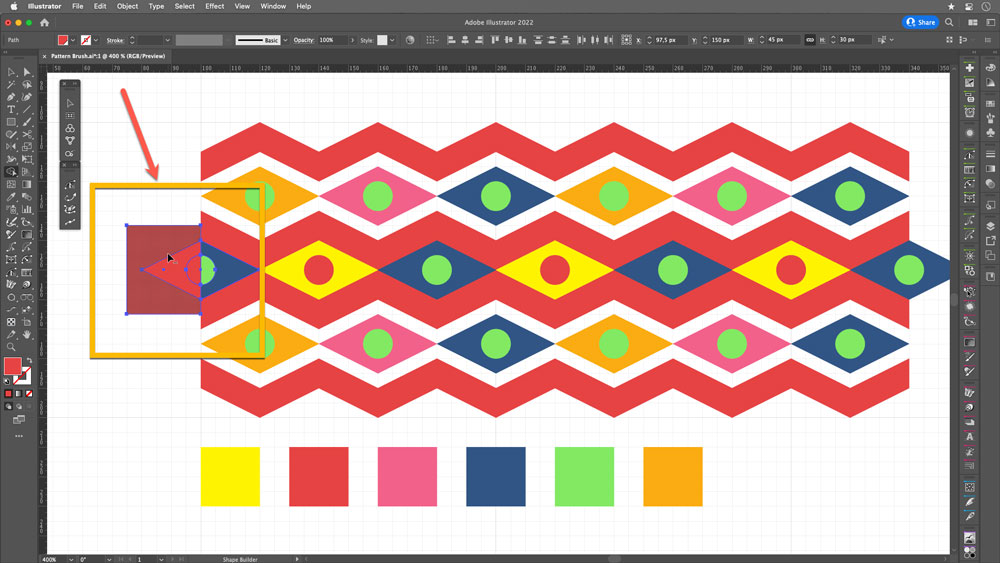
FIGURE 18. Use the Shape Builder tool to delete portions of objects that overlap the edge of the grid.
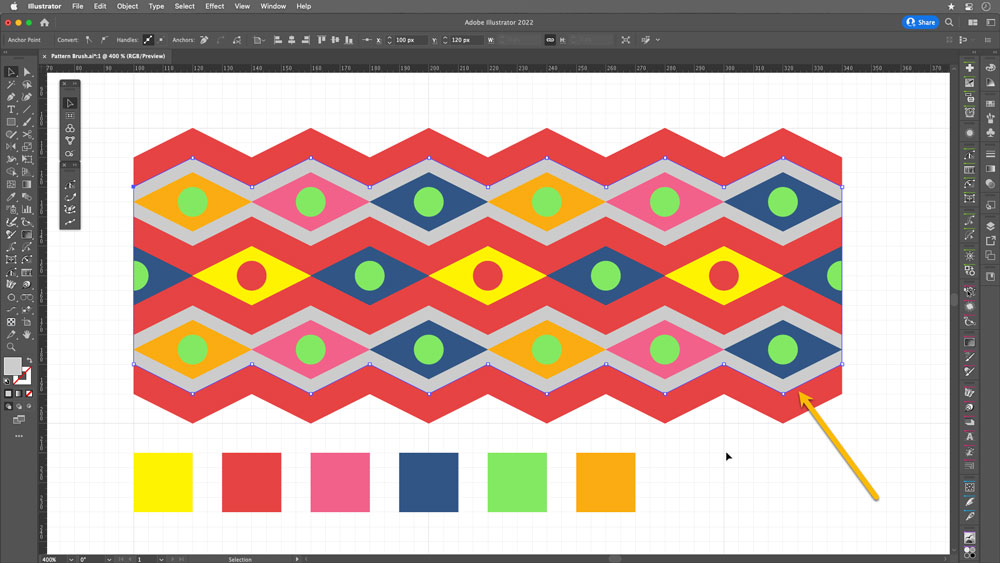
FIGURE 19. The area shown here in gray (for illustrative purposes) ended up as white.
Create your new pattern brush: With the selected objects, open the Brushes panel. Click on the New Brush button (1), choose the Pattern Brush option (2), and name the brush (3). By default, the Side Tile is the one created (4) (Figure 20). Notice that the outer corner tile also appears, but in this case, it is because Illustrator has automatically generated that corner (Figure 21).
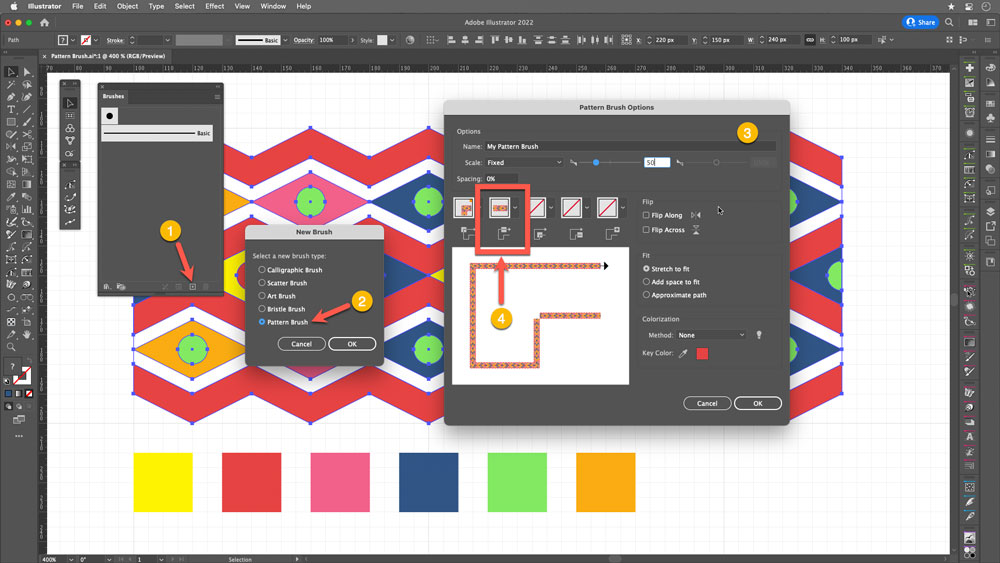
FIGURE 20. Pattern Brush Options window
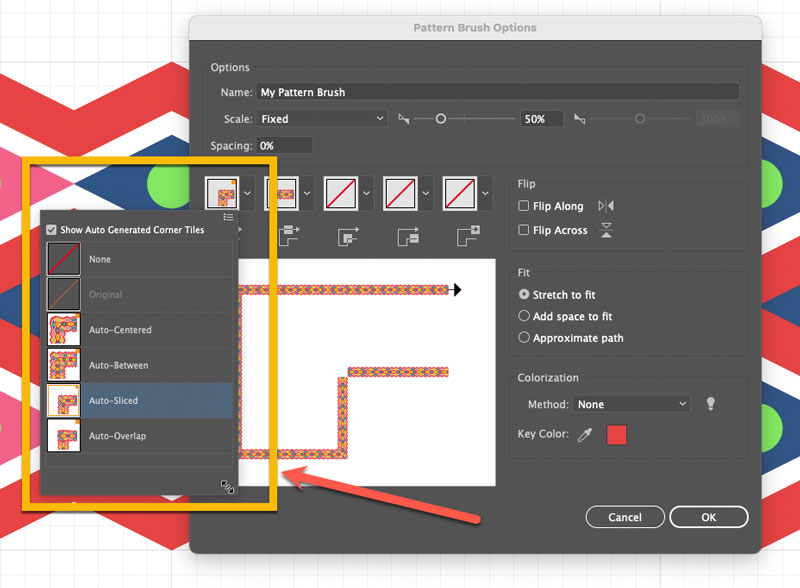
FIGURE 21. Illustrator will try to help by automatically creating corner options for pattern brushes, but in this example we will create our own.
Draw the outer corner tile: For this example, though, we will create the corners. To do so, use the grid as a base. Use the Rectangle tool, the Circle tool, and the Pen tool for the triangles (Figure 22).
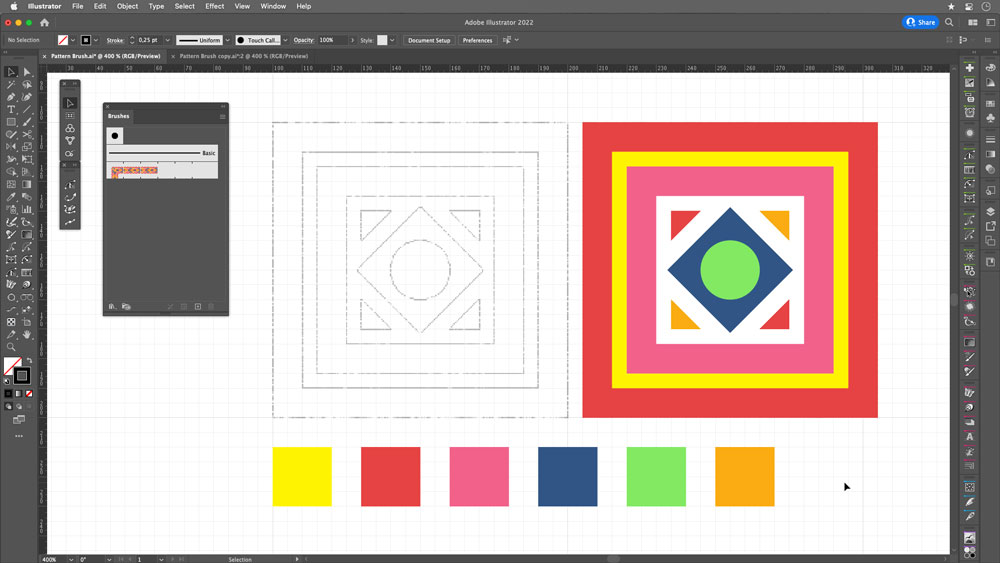
FIGURE 22. Draw the outer corner tile using standard rectangles.
Add to brush definition: Select the Corner Tile (Figure 23) and press Opt/Alt while dragging it to the position of outer corner tile in the Brushes panel (1); this replaces the auto-generated corner (2). Click OK to accept the change (3).

Create the inner corner tile: Repeat the procedure using the same object (Figure 24).
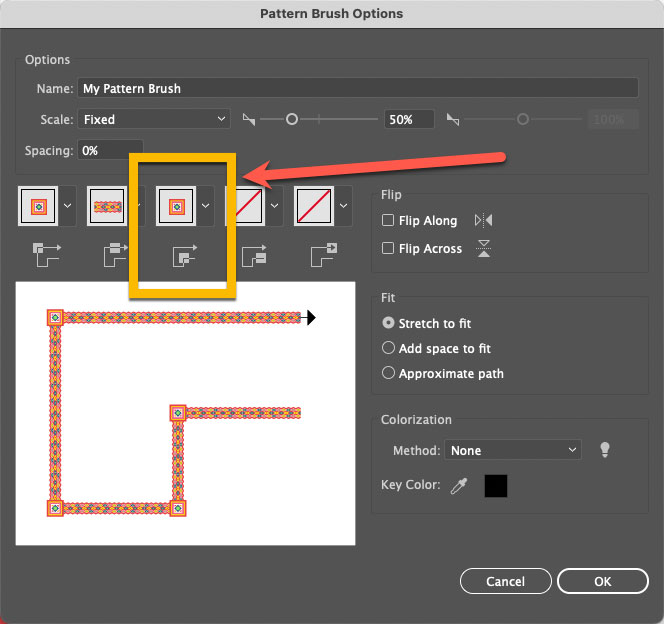
FIGURE 24. Inner corner tile replacement
Draw the start tile: Use rectangles to create the upper part. Then, with the Pen tool, draw the inner triangle (Figure 25).
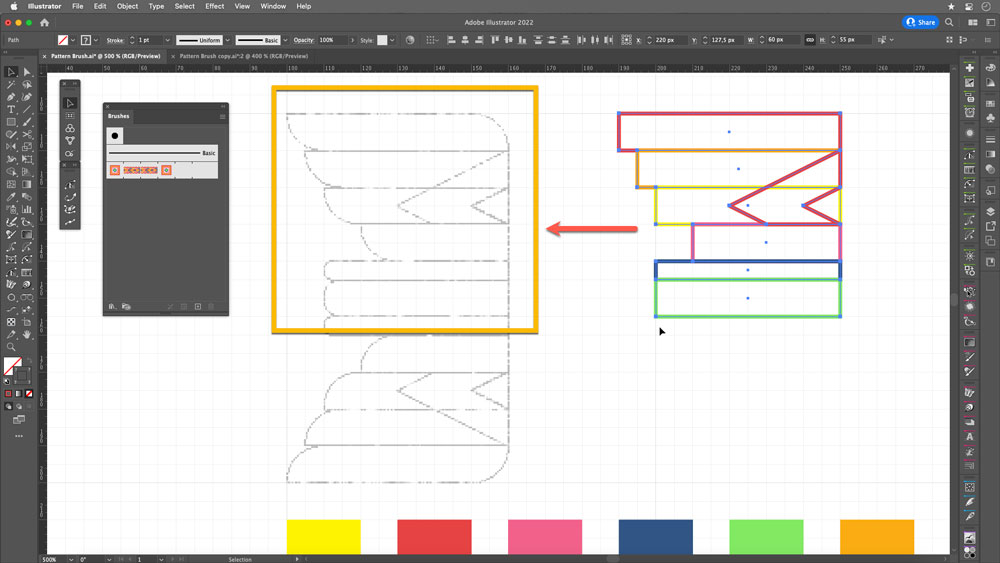
FIGURE 25. Draw the pattern parts with rectangles and the Pen tool.
Round the corners to match the sketch with the Direct Selection tool. (Figure 26).
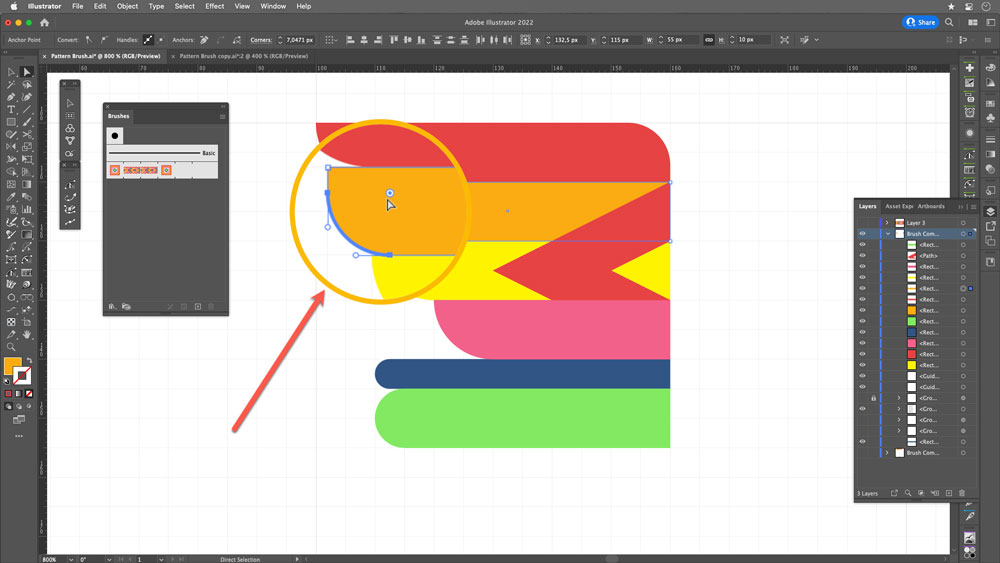
FIGURE 26. Round individual corners to match the sketch.
Select the top of the object, use the Reflect tool, and make a copy—this will be the start tile (Figure 27).
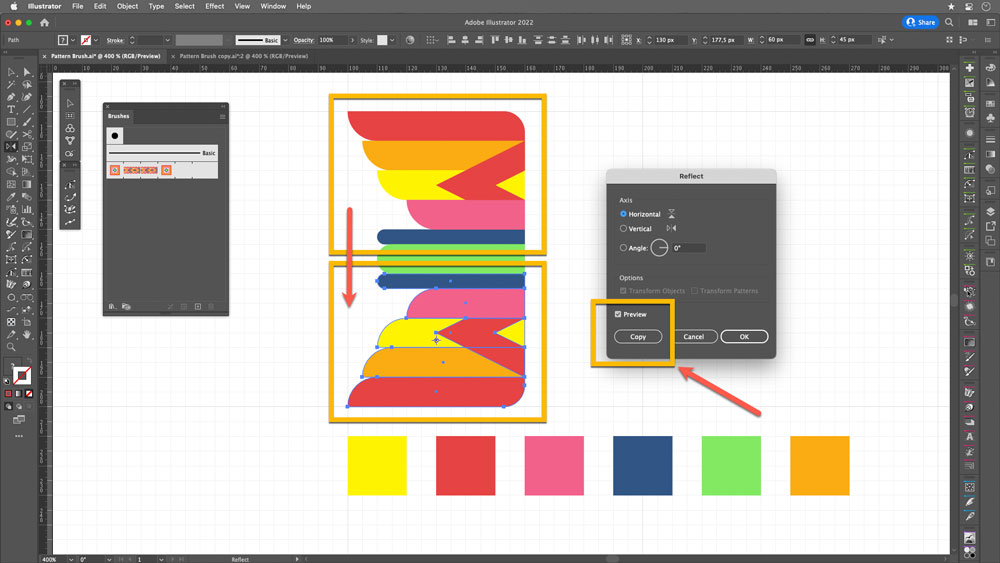
FIGURE 27. Reflect and copy the top objects.
Create the end tile: Copy the complete module and reflect it horizontally to obtain the end tile (Figure 28).
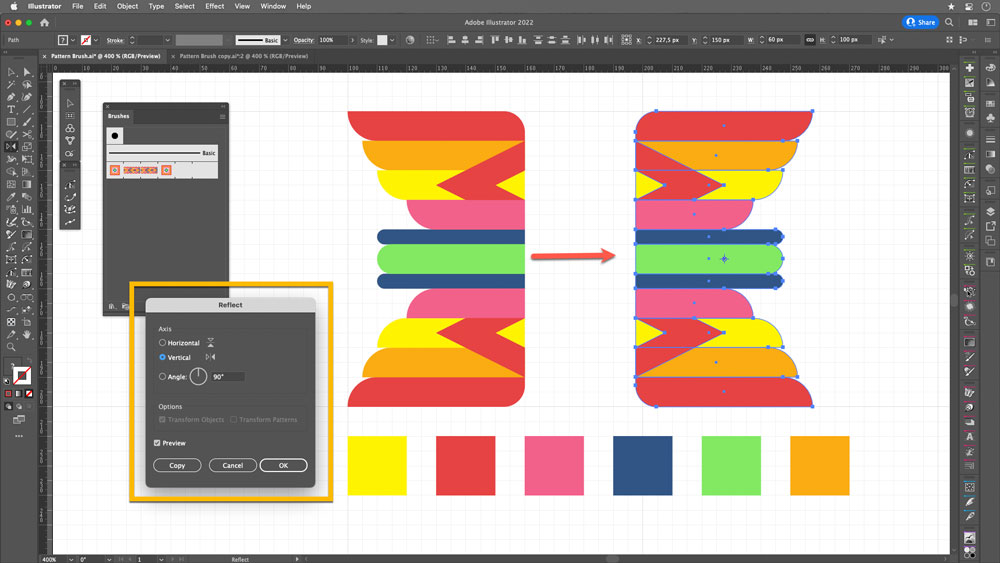
FIGURE 28. Duplicate and flip the object horizontally.
Add to brush definition: Again, while pressing Alt/Opt, drag your tiles to their respective positions: start tile (1), end tile (2) (Figure 29).
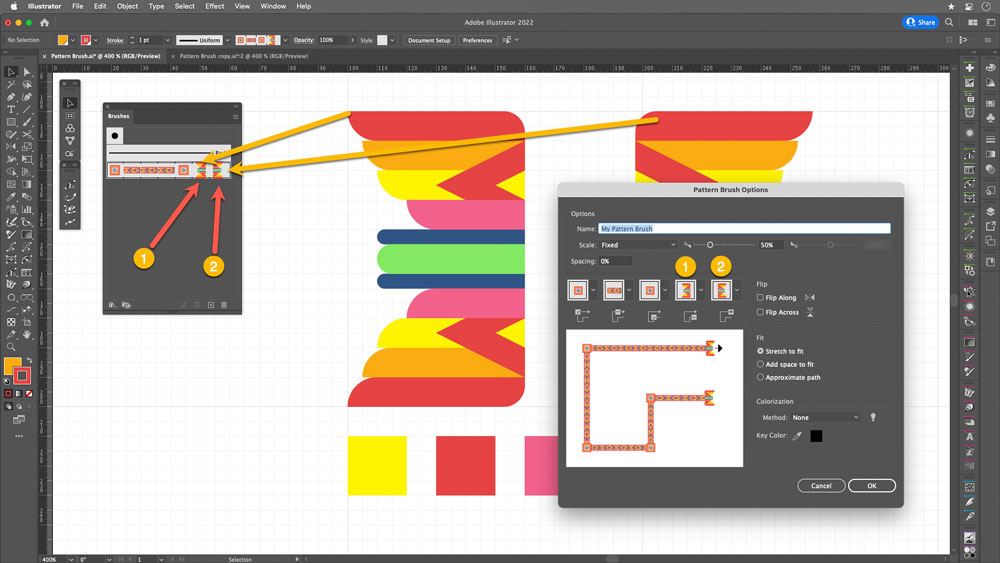
FIGURE 29. Put the start and end tiles into their respective positions in the Brushes panel.
And now, as you can see in Figure 30, you can use your new pattern brush on closed and open shapes, polygons, stars, variable width strokes—so many objects! The sky’s the limit.
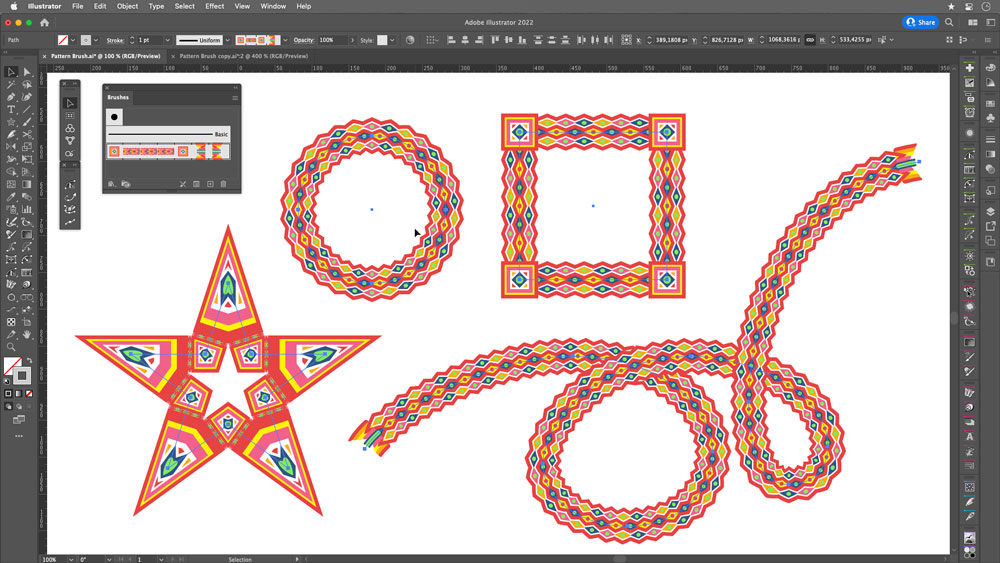
FIGURE 30. You can apply use a pattern brush to apply your pattern to different shapes and objects. Have fun!
Commenting is easier and faster when you're logged in!

Recommended for you

Masking Artwork in Illustrator
Create clipping and opacity masks to fill your artwork with anything

How to Create a Color Group with Object Mosaic in Illustrator
Using color groups is a great way to organize your swatches in Adobe Illustrator...

Learning about 3M VAS: A CreativePro Conversation
CreativePro Network CEO David Blatner chats with 3M's Sean Springer about the ne...