

In my previous post I discussed how to create a self-running list in a presentation. The reason I called it self-running was because you could not control when each bullet would appear on the slide. If you don’t want to stick with the default option of having bullets animate quickly after each another, you can change when they appear by altering their event (or trigger) that causes the animation to begin. You can change the event in the animation panel drop down menu. When you choose another event, be careful because on page load will still be selected. You will need to go back and remove on page load to keep just one event on your animation.

On Page Load
The default event is on page load. This means that when the page loads, the animation plays immediately. You can control the order or delay of the animations by using the timing panel. Use on page load when you want any elements to animate or appear without any user action.

On Page Click
My favorite event for lists of information is on page click. You just need to click your mouse for each element to animate. I find this the easiest and most natural way to give a presentation. Don’t forget to put a background on your page. If you leave the background transparent, the page clicks will not work. If you want to have a white background, just make a frame the size of the page on the master and change its fill to paper.
Update: Another method pointed out by Mr. Blatner is to change the SWF export options to include the page background to paper color instead of transparent.

On Click (Self)
Another interesting event is on click self. When you apply this event to an animation, you must click on the actual object in order for the animation to start. A downside of this is if your object is going to be appearing on the page, you will have to click in the invisible location that it is going to arrive. If your objects are leaving the page you can see exactly what you are going to be clicking on.
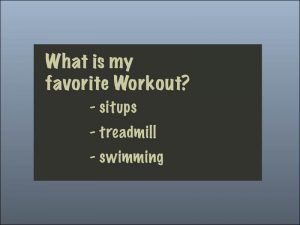
I created a slide asking a question that used the on click self event. When you click on the answer, it will fade away to show what is underneath. Each guess is in a frame the same color as the background to conceal the answer underneath.
On Rollover (Self)
The event on rollover self happens when you move your cursor over the object. This can be used to create a similar effect as on click self, but it can be a little less accurate if you are not careful with your mouse.

I find the rollover self event’s interactivity interesting. In the example below I created it a large grid of boxes and added the animation fade out and hide after animated. Underneath those squares I repeated the process with a different color. This creates a pseudo pixel based drawing effect. As you mouse over the page, the squares disappear and allow you to see new squares underneath. Move over the squares a second time and to create another color.
![]()
On Button Event
The on button event is a little more complicated than the previous events because it involves another object, a button. This event uses a button to trigger the animation. A button can have a variety of events that trigger an animation including: roll over, roll off, on-click, and on-release.
There are two different ways to connect a button to an animation.
- Select the animation and click the button graphic
 in the animation panel and click on a button that you want it connected to
 - Select a button and choose the action “animation”
A button can access any animation of the spread and can use any of these actions:
- Play
- Pause
- Resume
- Stop
- Stop All
- Reverse
Be careful of adding too many buttons to your presentation. If your slides become too complex, it may be difficult for you to give the presentation and even harder for someone else to figure out how your presentation works.

This article was last modified on December 17, 2022
This article was first published on October 24, 2010
Commenting is easier and faster when you're logged in!

Recommended for you

one, two, three… to return or not to return…
Why would you not want to use blank lines in your layout?
Updating Linked Text without losing scaling
A trick that lets you scale linked text so that it updates without losing the sc...

Copy Vectors from Illustrator to InDesign (or vice versa)
Why copy-and-paste of vector outlines between Illustrator and InDesign sometimes...