Create InDesign CS5 Panels with Configurator 2.0
Configurator from Adobe Labs was just updated to work with InDesign as well as Photoshop. Use it to create your own InDesign CS5 panels with drag and drop simplicity.

When CS4 came out, Adobe released an extra utility called Configurator that let you create your own panels in Photoshop CS4. I confess, I didn’t pay much attention to the news — probably because I don’t live and breathe Photoshop every day. I stay in the same 4 or 5 panels for 95% of my Photoshop work, and never saw a need to build a custom one.
But hey now — Adobe just released Configurator 2.0, a free AIR utility that creates panels compatible with Photoshop CS5 OR InDesign CS5! Now it’s got my attention. I downloaded the Configurator 2.0 software from the Adobe Labs site, and the sparse and kind of outdated (barely updated for InDesign) PDF documentation, and gave it a whirl.
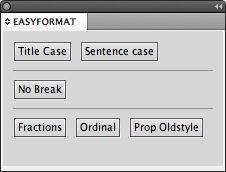
Look at what I came up with in about 15 minutes of noodling! It’s plain, I know, but it’s lovable. I call it the EasyFormat panel, because it has the text formatting commands I find myself always having to dig into submenus to find. Now I can just keep the small panel open in a corner of my screen and click a button to apply any of these pain-to-locate commands to a text selection.
The top two buttons, Title Case and Sentence case, are the ones I need most often from Type > Change Case submenu. The No Break command … obvious. And the bottom three buttons are the Open Type options I use most frequently: (convert selection to) Open Type fraction, Ordinal, and Proportional Oldstyle (numbers).
That’s all. I didn’t really develop it for anyone else but me, but if you want to use it, download instrux are at the end of this article.
That’s the point of Configurator. You can use it to create custom panels for what you need in your workflow. My panel was plain and simple, just a proof of concept, really, to see how it works. But you can create some really powerful panels with Configurator for InDesign CS5, complete with tabbed panels, dropdown menus, have it load scripts, open web pages, play movies, it’s really incredible! (I can’t wait to see what my fellow contributors come up with … I’m talking to you, Mike Rankin. LOL)
Using Configurator to Create Your InDesign Panel
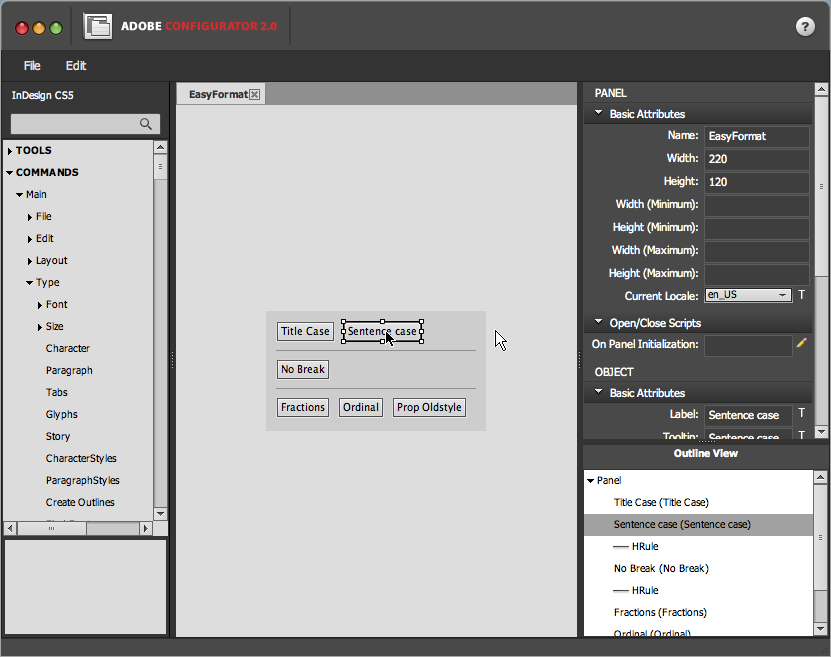
Configurator 2.0 looks kind of like Bridge. The list of Tools, Commands, Widgets, Actions/Scripts, and Containers you can trick out your panel with are in the left section. The attributes of your panel are on the right. In the middle is the panel editing pane itself. You just double-click elements you want in your panel from the list at the left to make them appear on your panel. Then you drag the element into position with your mouse, as I’m doing here to the Sentence case button (click the image to enlarge it).
On the right, you can see that you set the size of the panel, and if you’ve got an element selected, you can set some attributes for the element. For commands, you can enter the label text that appears to the user (it doesn’t have to match the menu command), and a tool tip. In my EasyFormat panel I took the opportunity to make the tooltips really explicit:
Saving and Sharing Panels
When you save panels in Configurator, they’re saved as .gpc files (don’t ask me, that’s what they are). These are not suitable for using in InDesign, just for editing in Configurator. In order to test it out, you need to export the panel from the File > Export menu in Configurator. You’ll be prompted to select the Plugins > Panels subfolder in your InDesign CS5 application folder, and Configurator exports the panel to that location.
To share the panel with other users, you need to compress the files belonging to your panel. There are two ways to do this.
- You can .zip (compress) your panels’s parent folder (the one called EasyFormat above), and tell your users to put the unzipped folder and contents in their own InDesign CS5 > Plugins > Panels folder. Download EasyFormat as a .zip file
-or- - You can double-click that .mxi file you see in the screenshot above, which opens CS5’s new Extension Manager. The Extension Manager will automatically create a “.zxp” file, which is a compressed archive of your panel that is “Extension Manager-aware.” Meaning, when your recipients double-click on the .zxp file, CS5’s Extension Manager should start up and automatically expand it into the right folder in InDesign CS5. (I haven’t tried this myself yet.) Download EasyFormat as a .zxp file and tell me how it goes!
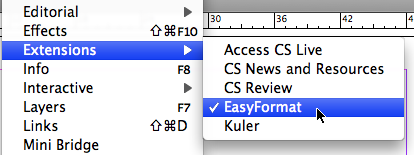
However it is that you get your custom panel installed, you’ll find it in the Window > Extensions menu in InDesign CS5.
It’s pretty nifty to see your own panel appear in InDesign! Of course, after you’ve confirmed it works, you should put it in the dock or keep it open in a corner of your screen, and then save it as a custom workspace so it’s always at the ready.
I’d love to see examples of the panels you come up with with Configurator 2.0 for InDesign CS5. Describe and link to them in the comments below, or you could attach the .zip or .zxp to an email and send it to amarie [at] indesignsecrets.com and I’ll write about it here, if that’s okay with you.
This article was last modified on January 18, 2023
This article was first published on May 23, 2010
Commenting is easier and faster when you're logged in!
Recommended for you

My Previous Gem
InDesign CS5 introduces many little gems that make a big difference, such as thi...

Hidden Gems: The Layers Panel in CS5
You can now let go of your Illustrator envy: CS5's Layers panel really rocks!

This Week in InDesign Articles, Number 49
Letterpress, InDesign Tips, and more, in this roundup of recent interesting news...


