
Building Your CD-Based Portfolio
Photoshop: Prepare Portfolio Images
In this step, you’ll edit the image files and establish image size and resolution. You’ll also turn on Color Management and save files with embedded ICC profiles.
Prepare the images for placement in InDesign. Instead of the usual 72- or 96-ppi (pixels per inch) image resolution setting that would typically be used for on-screen presentations, I recommend using 144 or 192 ppi or higher. Since my presentation is stored and run from a CD and mailed to some prospective clients, it might be viewed on different-sized displays at various resolutions. What’s more, Adobe Acrobat has a Preferences option that allows a final, saved presentation to be opened in a “full screen” view without the usual Acrobat Menu, Toolbar, and page navigation aids, and we’ll be using this option. However, the software scales up pages (125 percent or more) to fill the screen on larger, high-resolution displays. When this occurs, the extra image resolution is important: At 72- or 96 ppi, the enlarged pixels are noticeable.
After testing, I eventually settled on the lowest Epson inkjet image resolution standard of 240 ppi. In addition to allowing pages to be printed, this also allows viewers to use Acrobat keyboard commands to Zoom in on the details of an image, if desired. However, using such higher resolutions may mean that recipients will need more memory available to run the final Acrobat file. Also, when run directly from the CD, larger image files may load more slowly and changing pages may take a little longer. Find a balance that makes you comfortable.
The images can be saved either in TIFF or Photoshop file format for eventual placement in InDesign. They also can be compressed as JPEG files at this point, but you retain more editing flexibility if you use Acrobat to compress and embed all the linked files later in the production process.
Again, assuming you’re using ICC color and a calibrated display, you’ll want to establish Photoshop Color Settings that embed profiles in your images. I open files into the Adobe RGB (1998) working color space and allow Adobe to embed this profile into my saved image files.
InDesign: Page/Screen Layout
Back in InDesign, import the prepared Photoshop files into the layout grid, and write any copy or import any text files that will be needed. For some presentations and portfolios, I also add biographical, company information or resume pages at the end of the document. Use InDesign’s various type controls to add captions, title slides, etc., where needed. (Alternatively, title slides can be designed in Photoshop, especially now that the Text tool has been markedly improved in version 6.0.)
The InDesign/Acrobat combination does not support timeline editing, keyframes, or other multimedia niceties, but it does allow viewers to play movies and sounds when an icon is clicked. For now, plan ahead and leave a space for an appropriate button or QuickTime Movie Poster icon to be added later (in Acrobat). Don’t forget to write instructions for using this in the form of a caption in the InDesign document. And do lobby Adobe to add more audio playback functionality to Acrobat.
I also left spaces at the bottom left and right corners so that interactive page navigation buttons can be added later (using Acrobat).
Once the presentation is complete, InDesign allows you to directly export pages as PDF files, thereby avoiding the use of Acrobat Distiller. To do this:
- From the main InDesign menu, select File: Export
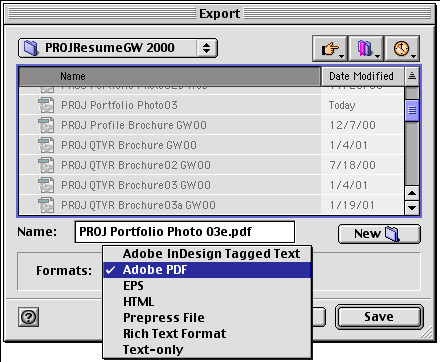
Figure 3: Adobe InDesign Export dialog box. - The Export dialog box appears. Select Adobe PDF from the Formats popup menu. Save the file into a different folder.
- The Export PDF dialog box appears for you to establish PDF, Compression, Page and Page Marks, and Security options. Use the following settings:PDF POPUP MENU OPTIONS
SUBSET FONTS BELOW: 100%
COLOR: Leave Unchanged; check Include ICC Profiles box.
IMPORTED GRAPHICS: High Resolution; check Crop Image Data
OPTIONS: Check Generate Thumbnails, Optimize PDF. Don’t check View PDF after Exporting, since it opens the PDF file in Acrobat Reader and you’ll want to open and view it using the full version of Acrobat for further editing.COMPRESSION POPUP MENU OPTIONS
COLOR BITMAP IMAGES: No Sampling Change and 240 DPI
COMPRESSION & QUALITY: JPEG and Maximum or HighGRAYSCALE BITMAP IMAGES: No Sampling Change and 240 DPI
COMPRESSION & QUALITY: JPEG and Maximum or HighMONOCHROME BITMAP IMAGES: No Sampling Change and 1200 DPI
Also, Check the Compression and Line Art box.
PAGES AND PAGE MARKS
Check All Pages only. Leave all other settings at defaults (unchecked).SECURITY
Check the Use Security Features box, but leave all other settings at the default (unchecked settings). After the file is edited in Acrobat, you’ll be able to save it with the appropriate Security features checked.
Figure 4: Adobe InDesign’s PDF Export Settings dialog box. - Click the Export button. When finished, launch Adobe Acrobat 4.01 or later (not Reader or Acrobat Distiller).
This article was last modified on January 18, 2023
This article was first published on April 9, 2001
Commenting is easier and faster when you're logged in!

Recommended for you

PageProof Launches Powerful Proofing Add-in for Microsoft Office
With the launch of the PageProof add-in for Microsoft Office, reviewing and appr...
Color Management How-To: Understanding Computer Color
This story is taken from “Real World Color Management” (Peachpit Pre...

Easy Ways to Capture and Share Colors
Being able to create and use the same colors throughout the Adobe apps is one of...