
Building Navigation Menus for Interactive Documents
Bob Levine shows how to build animated navigations menus for interactive documents.
This article appears in Issue 108 of InDesign Magazine.
Q: I’m really enjoying the interactive features in InDesign and using them with Publish Online. I’m trying to figure out how to add a navigation menu that I can display and hide with a tap or mouse click. Can you point me in the right direction?
A: Yes I can. But building menus requires a bit of planning to get it right, so, before we begin, let’s think about the “scope” of the project. For the kind of menu you want:
- The menu needs to start out off screen.
- The menu needs to appear from the bottom of the window with the click/tap of a button.
- It must contain links to each page in the document.
- It needs to appear on every page.
- We need to be able to close it by reversing the animation with the click/tap of a button.
Also, note that while we’re expecting this to work for a Publish Online document, it should also work in an FXL (fixed-layout EPUB). It won’t, however, work in PDF, because it relies on features that don’t currently work in PDF, such as animations.
Got all that? Good. Let’s get to work! This kind of navigation would work well in the hipster brewery project that I’ll use as an example.
Before I do anything else, whenever I’m working on a project where animations come from the bottom of the page, I like to give myself a little extra room on the pasteboard. By default, the pasteboard margin is rather small (72px) on the bottom of the page, so I’m going to expand that quite a bit, by increasing the vertical margin to 500px. This can be done in Guides & Pasteboard preferences (Figure 1).
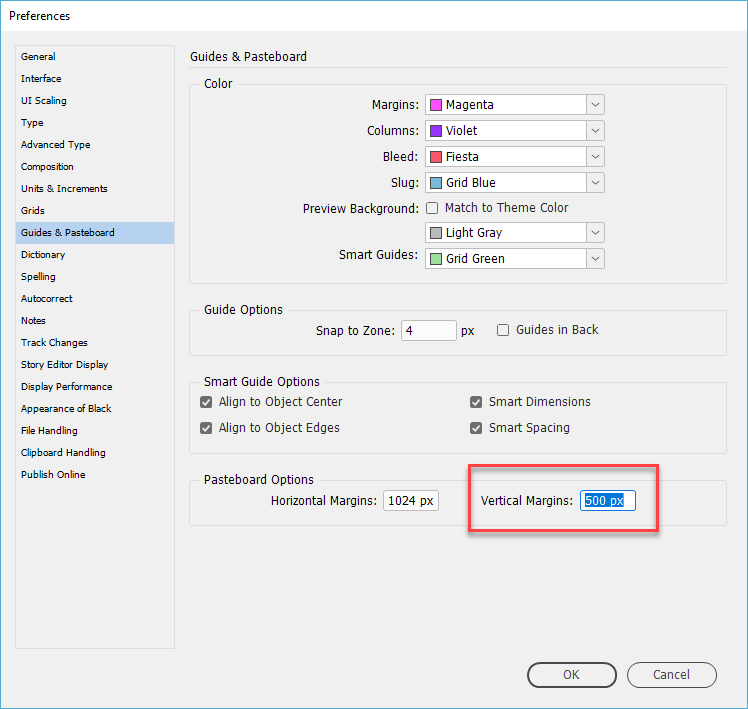
Figure 1
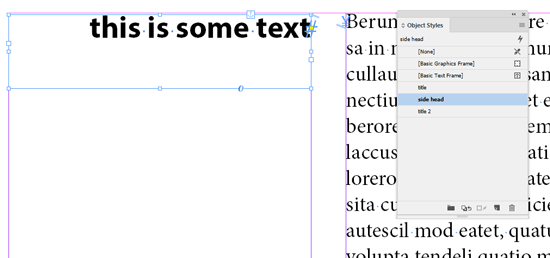
I’ll draw a text frame on the first page, style the text, and then move it into the position I want it to end up at after appearing on the page (Figure 2).
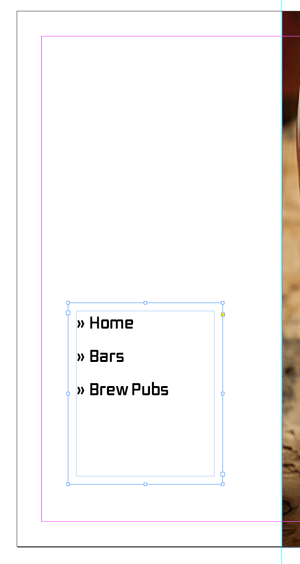
Figure 2
To add the navigation, we’ll take advantage of InDesign’s hyperlinks feature. We want “Home” to go to page 1, “Bars” to page 2, and “Brew Pubs” to page 3.
Select a line of text, right-click, and choose Hyperlinks > New Hyperlink from the contextual menu (Figure 3).
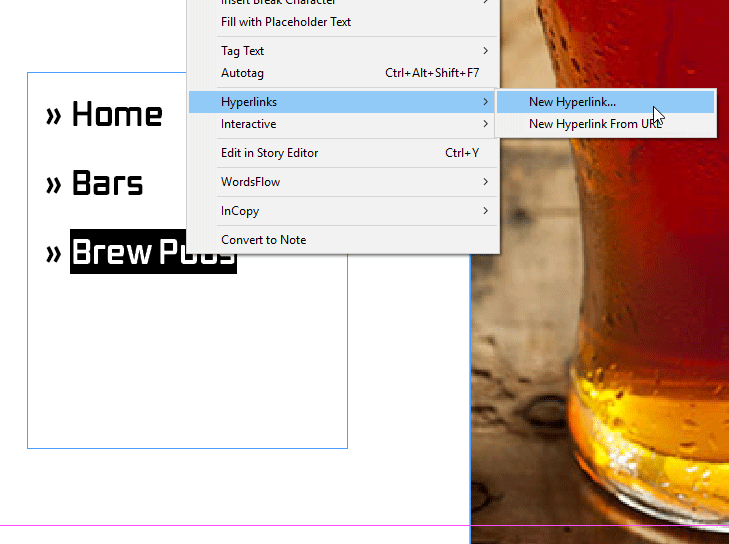
Figure 3
The New Hyperlink dialog box will appear (Figure 4).

Figure 4
Let’s set the options for the hyperlink.
We’re working on the Brew Pub text and want to link to a page. From the Link To dropdown menu, choose Page. Once that’s done, the appropriate options for choosing the page will be available.
As the old saying goes: lather, rinse, repeat: add the hyperlinks for the other pages in the menu; your Hyperlinks panel should look similar to mine (Figure 5).

Figure 5
Of course, you need this navigation menu on every page. While you can copy and paste it to each page, it’s going to be far easier to manage a single copy of the menu on a master page. I’ve been working on a live page (I find it easier to visualize the location that way), so I’ll cut it to the clipboard, navigate to the master page, and choose Edit > Paste in Place.
The next step is going to seem a bit backward, so bear with me; I promise you’ll see why I’m doing this. We’re going to add some artwork that will act as a button to close the menu. I’ll draw a triangle here, but you can use whatever works for your design. Once it’s in position, group it with the text frame (Figure 6).

Figure 6
We need to set the animation for this group so that when the button is tapped, the group will slide in from the bottom of the page. If it’s not already open, open the Animation panel, and reveal the Properties portion of the panel (Figure 7).
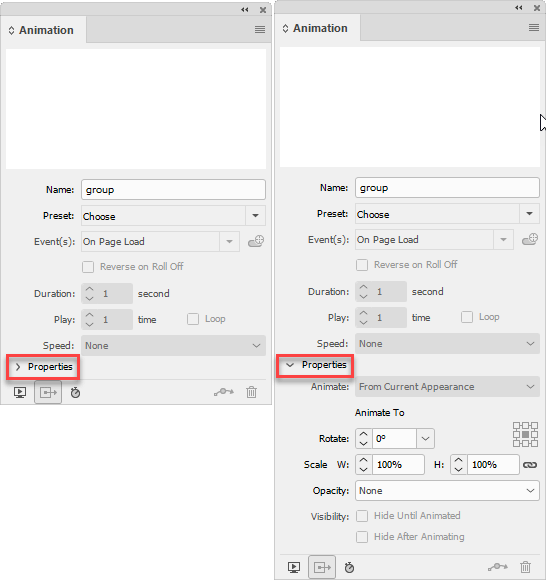
Figure 7
The first task is to choose an animation preset. We’ll go with Fly In from Bottom. Once created, the motion path for the animation will be visible and the applicable options will be selectable.
We’ll need to adjust the motion path, but first we should check the rest of the settings. By default, Fly In from Bottom animates To Current Location, with Fade In also a part of the animation. I’m leaving those alone. I’ll also leave the Duration and Play Time at their 1-second defaults.
Because I don’t want this menu to be visible until it’s needed, I’ll enable Hide Until Animated. I’ll also leave Hide After Animating deselected. Finally, let’s rename this group to “navigation” at the top of the Animation panel (Figure 8).

Figure 8
Back to the motion path. It appears to be too short, but we can check exactly where the animation will start from by clicking the Show Animation Proxy button at the bottom of the Animation panel (Figure 9).

Figure 9
The gray area that appears shows us that it’s going to start a bit too high on the page—we want it to be entirely off on the pasteboard. Let’s adjust it. Click the motion path to select it. The proxy will disappear, but you’ll be able to lengthen the motion path. You may have to experiment to get it right, but keep in mind that since it will be hidden until it animates, it doesn’t need to be perfect. Tip: I’ve found it easier to do this by switching to the Direct Selection tool, clicking the bottom anchor point, and using the arrow keys on my keyboard to lengthen the path (Figure 10).
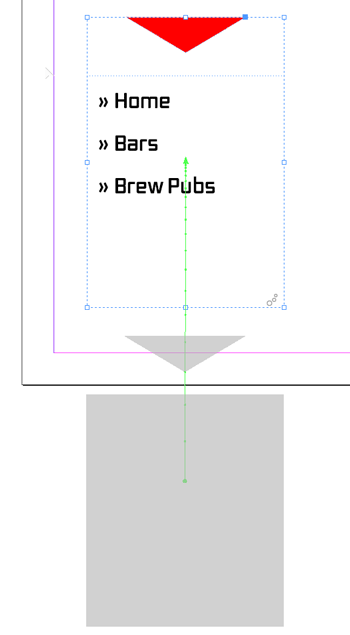
Figure 10
With everything in place, we’ll need a button to trigger the animation. We’ll use the Buttons and Forms panel for this step (Window > Interactive > Buttons and Forms). I’m going to draw out a triangle pointing upward, and while it’s still selected, I’ll convert it to a button. You can name it “Menu” or something that describes its purpose (Figure 11).
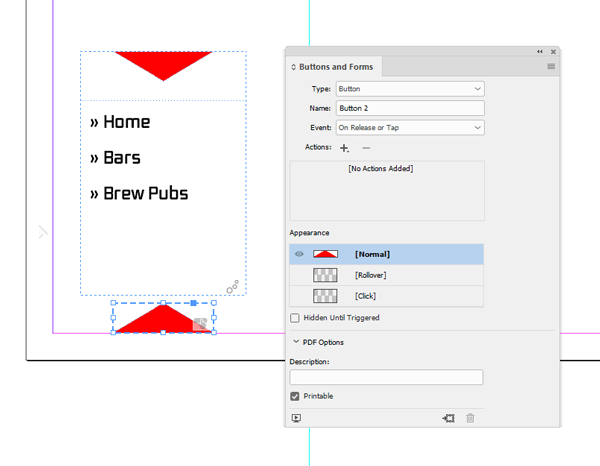
Figure 11
We want this button to open the menu, and then disappear. The first step is to add an action to trigger the animation. Click the Add Action button (the plus sign), and choose Animation from the dropdown menu (Figure 12).
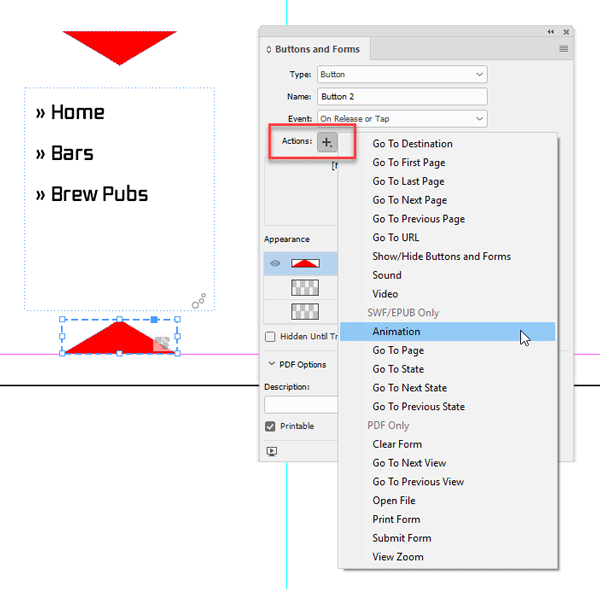
Figure 12
We don’t need this “Menu” button visible once the menu is open, so let’s add a Show/Hide Buttons and Forms action to the button itself and hide it. Click the visibility icon until you see the eye with a line through it (Figure 13).
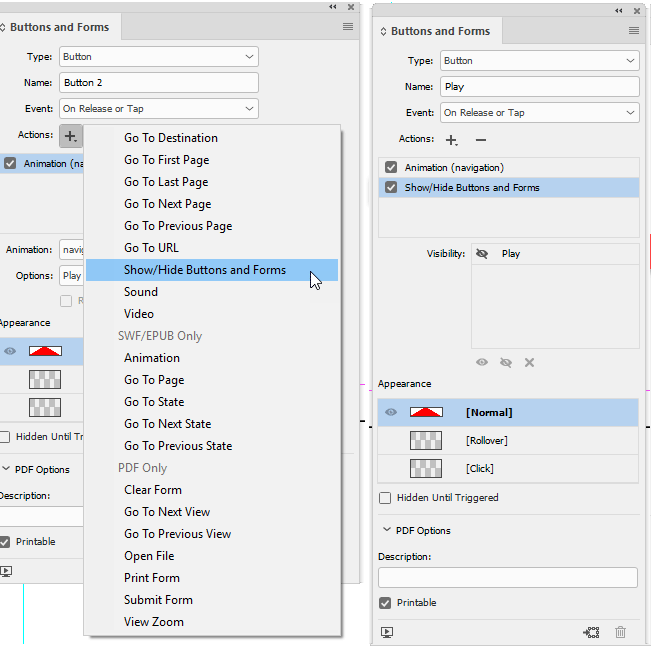
Figure 13
Now that we have a button that hides itself and then plays the animation (to show the navigation menu), we just need to make a small tweak to the animation itself. Whenever a new animation is created, it will, by default, play on page load. Let’s disable that, and make sure that the animation will play only using the button. When you open the Event(s) dropdown menu, you’ll see that On Page Load and On Button Event are both selected. Click on On Page Load to disable it (Figure 14).
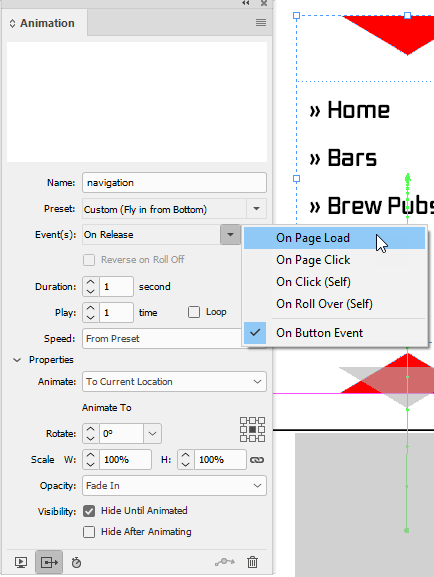
Figure 14
OK, just one more step and we’ll be ready to go: we need a way to hide the menu and display the original button.
We’ve already created the artwork for the hide button. It’s part of a group, but by double-clicking I can select it and convert it to a button. We’ll add two actions for this button. The first is to hide the navigation. We’ll do that by adding an animation action but instead of Play, we’ll choose Reverse from the Options dropdown menu (Figure 15). Note: This is the only way in InDesign to reverse an animation.
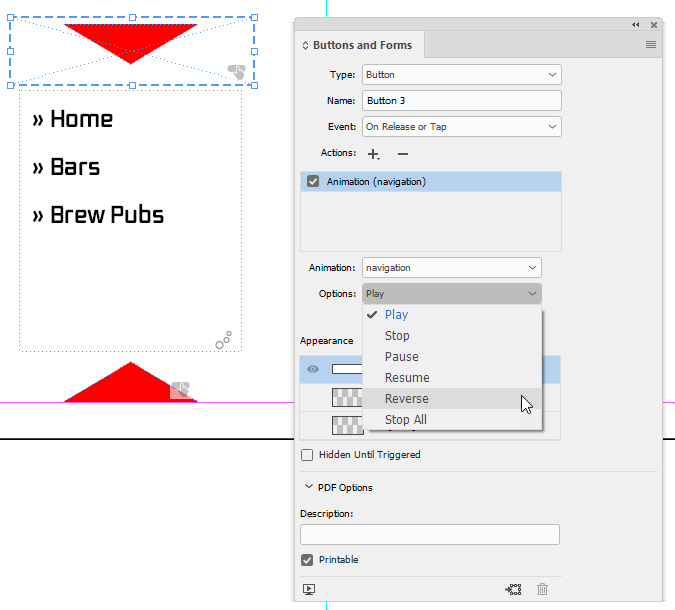
Figure 15
We’ll rename this button to “Hide” and then, to finish off the effect, we’ll display the “Menu” button by adding a Show/Hide Buttons and Forms action. Click on visibility icon until the eyeball is showing. Because the Hide button is not visible at any time, we can ignore it in our button setting (shown by the x in the visibility pane).
Your Buttons and Forms panel should look like Figure 16 with the Hide button selected.
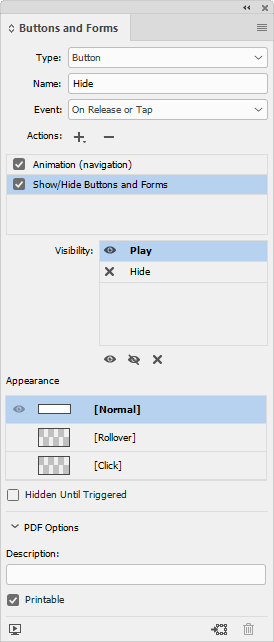
Figure 16
While this probably seems like a lot of steps, it actually goes pretty quickly once you get the hang of it.
Commenting is easier and faster when you're logged in!

Recommended for you
InQuestion: Making Sideheads
Q: I’ve been tasked with laying out a document that uses side heads. I’ve figure...

InFocus: Resources for Book Design and Production
Cool stuff for InDesign users to help with book design and production, including...

100 Free InDesign Scripts
Free for the taking: a heaping helping of features that make InDesign better, fa...