
Brand Management with Adobe Express
The struggle to keep your clients on brand is over.


This article appears in Issue 39 of CreativePro Magazine.
Nowadays, designers are used to hearing that we must create content faster than ever. Innovations from artificial intelligence have further pushed this notion even further, sending the expectations of bosses and clients through the roof. And for designers who carefully craft brand identities, marketing campaigns, or any branded content, the pressure is on. We are tasked with delivering quality results quickly and keeping things organized while staying on brand.
But what happens after you hand off the files? Can the client maintain the brand consistency—especially when they don’t use the pro tools you are used to? Yes! All they need is Adobe Express. You can keep using your favorite pro tools to create brand assets, then compile them in brand kits and projects that clients can manage themselves in Adobe Express.
For several years, I’ve been using Adobe Express to set up clients for success so they can manage their brand assets and create marketing content with ease and confidence! This article will show you how to make the most of this easy-to-use app for your marketing content and clients. We will go through the process of how to create a brand suite, for your clients from setting up a brand kit, using linked assets from Creative Cloud Libraries, designing branded templates, animating content, and sharing it with your client.
Adobe Express is included with your Adobe Creative Cloud plan, and you can encourage your clients to get a standalone Premium subscription to it. Although Adobe does offer a free version of Adobe Express, it doesn’t include premium features like brand kits. If clients are hesitant to try something new, you can assure them that a single-user or even team subscription to Adobe Express is more economical than Canva. Once you (and your clients) get started, you can access files on desktop and mobile devices. I’ll use the desktop version in the examples that follow.
Set Up Your Brand Kit
As designers, we are wired to know when to adhere to brand standards. Our clients, however, may not be as diligent—especially when they are busy running a business. By setting up a brand kit in Adobe Express, you will help your clients retain brand consistency by providing a centralized location for them to access their assets, such as the logo colors, fonts, colors, and templates. Not only will it make finding these assets easier, having a brand kit ensures that clients (or the team) won’t be tempted to change logo colors or fonts—making your hard work look disconnected. Even better, setting up a brand kit is easy.
After you design a brand identity for your client, the next step is to add your assets to a brand kit. Open Adobe Express, and click Brands on the far left of the homepage (Figure 1).
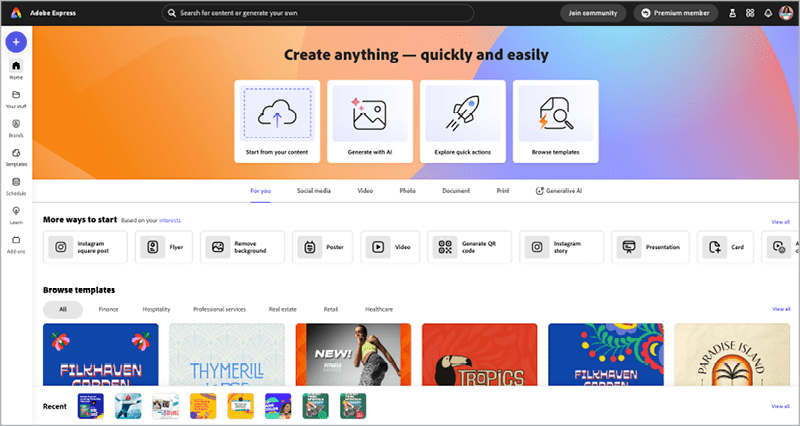
Figure 1. The Adobe Express homepage
On the next page, click Create Brand to start creating your brand kit (Figure 2).
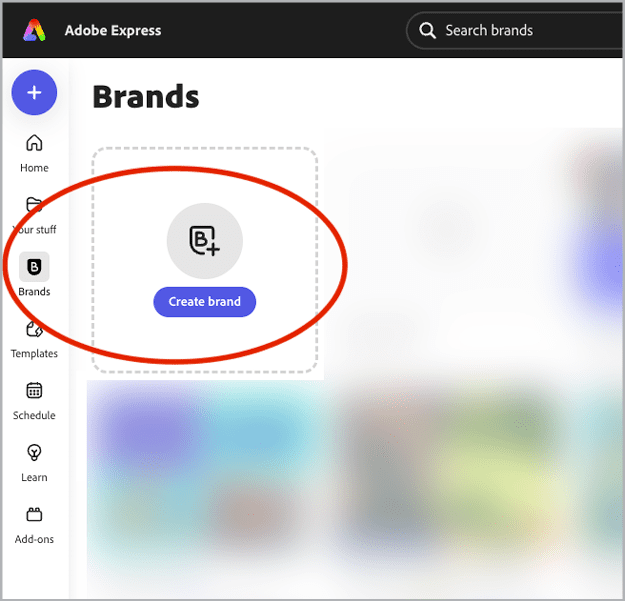
Figure 2. The Brands page
Now, you can upload your assets (Figure 3). A prompt shows you what types of files you can create: logos, color swatches and palettes, fonts, and templates (more on these in a bit). One of the best things about using Adobe Express is that you can include Illustrator and Photoshop files in your brand kit.
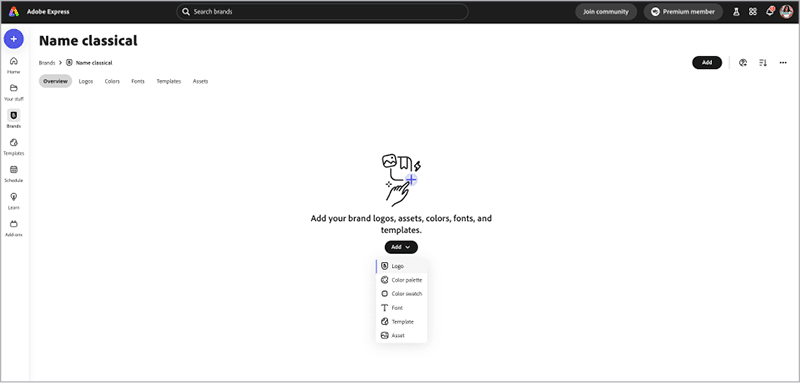
Figure 3. The brand kit setup page
Pro Tip: If you ever need to update a logo image, click the More Options icon (three dots) next to the current image, choose Replace Logo, and upload the new file (Figure 4). This will automatically update all your Adobe Express designs.
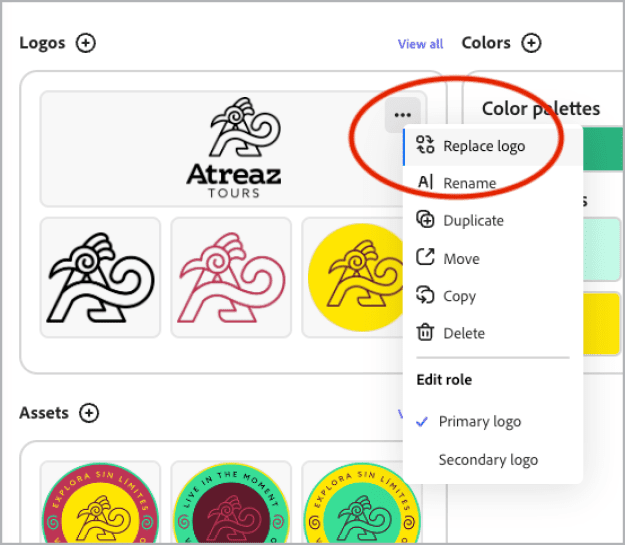
Figure 4. You can easily update assets in your brand kit.
Once you set up your brand kit, it will look similar to Figure 5.
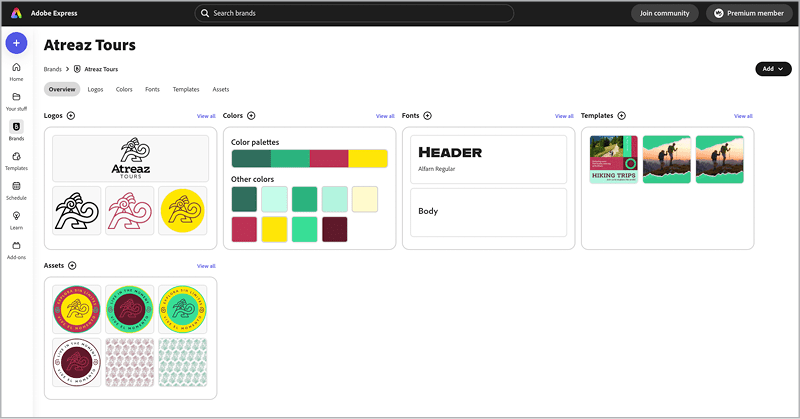
Figure 5. A completed brand kit setup
You can also make brand management more seamless by clicking the More Options icon to mark each asset as a primary or secondary role (Figure 6). This can be helpful to indicate which is your main logo and which is an alternate.
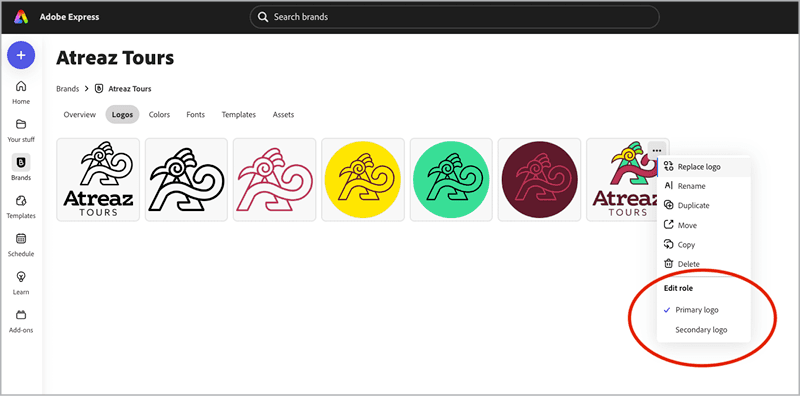
Figure 6. Specify primary and secondary logo roles for your assets.
Create a Project
If you collaborate with a team or create several branded collateral pieces for your clients, I suggest you use projects in Adobe Express—one of its best features for collaboration and brand management. You can include brand kits, Creative Cloud Libraries, branded templates, and designs all in one place.
To create a project, click Your Stuff, then click Projects, and finally, click New Project. In the dialog box that opens, give your project a name, select a folder color for it, then click Create (Figure 7).

Figure 7. Create Project
Now, you can add any brand kits or Creative Cloud Libraries to this project. You can start from scratch by clicking the Create button (top-right menu) and adding folders, a brand kit, libraries, or a new design file (Figure 8). Once you make your selection, you can start uploading your assets.

Figure 8. Add to Project Options
Or, you can use existing brand kits and libraries and add them to your project. I recommend this step as it allows you to organize the brand more strategically. To do so, go to Your Stuff, click Libraries, and find the one you want to add. Click the More Options icon for that library and choose Move To (Figure 9).
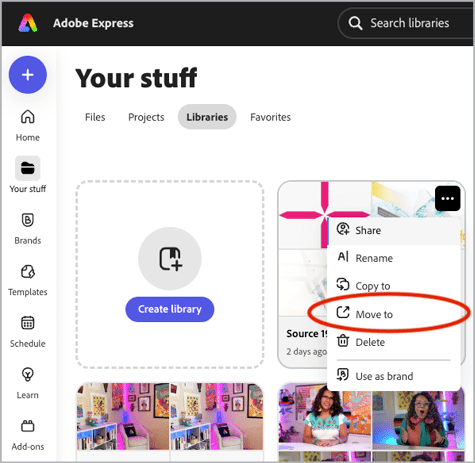
Figure 9. Moving files into a project is easy.
In the dialog box that opens, select the name of the project you just created (Figure 10). To add an existing brand kit, follow the same steps but instead of clicking Libraries, go to Your Stuff and click Brands to select the brand kit you want to add.
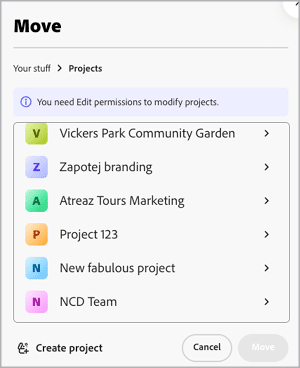
Figure 10. Choose a project folder to move to.
Pro Tip: You can also create libraries inside Illustrator, Photoshop, and InDesign. They will show up below all your libraries in Adobe Express as everything is synced to the cloud. More on this in the next section.
Create Branded Templates
Adobe Express offers you an opportunity to go beyond designing a logo! You can leverage Express to create a brand suite for your clients by designing templates for them so they can continue to promote their products or services. Not only will this offer you additional income revenue, you will also empower your clients with additional brand assets that they can access in one easy-to-use app.
Before you get started, I highly recommend making a list of the types of content your clients will use for their marketing and using that as your guide for the types of templates you can make. For instance, they may need designs for social media cover images, email headers, customer reviews, sales promotions, infographics, and presentation decks. Let’s use the Atreaz Tours brand as an example. We know the client will need designs for sales, infographics, and presentation decks, so let’s make some branded options for them.
If you design templates in Illustrator or InDesign, you can upload those files (or a PDF of something you designed in another platform) to Adobe Express. To do so, click the purple cross on the homepage, choose Import From Other Apps (Figure 11), and upload your file (Figure 12). Once the file is uploaded, you can edit it in Adobe Express.
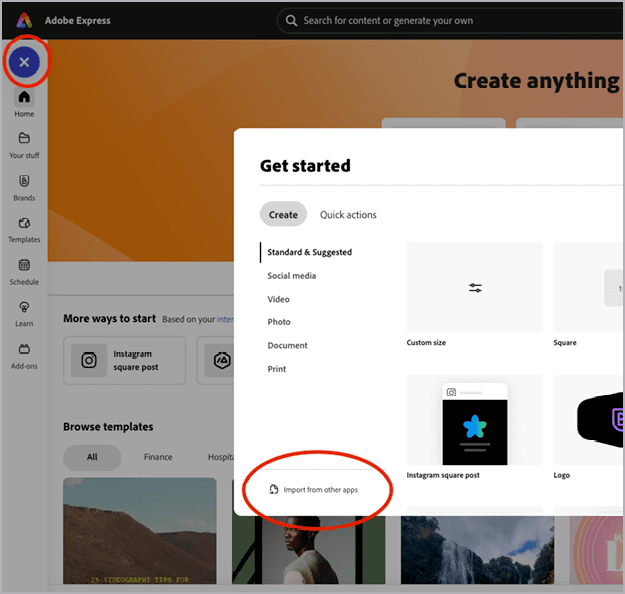
Figure 11. Start from content
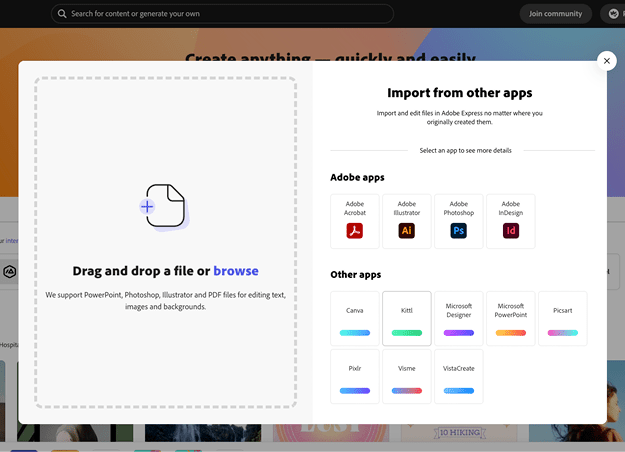
Figure 12. Upload content
The other options are to create a template from scratch or to customize one of the templates available from Adobe Express. We know Atreaz Tours will need a sales template, so let’s search for one to modify and adapt to their brand. To find a template, click Templates on the homepage (Figure 13).
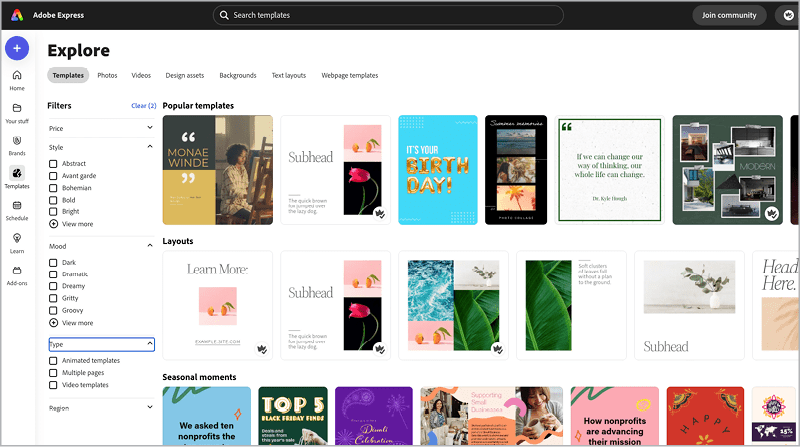
Figure 13. Templates page
When you find a good option, select Customize Template to start editing (Figure 14).
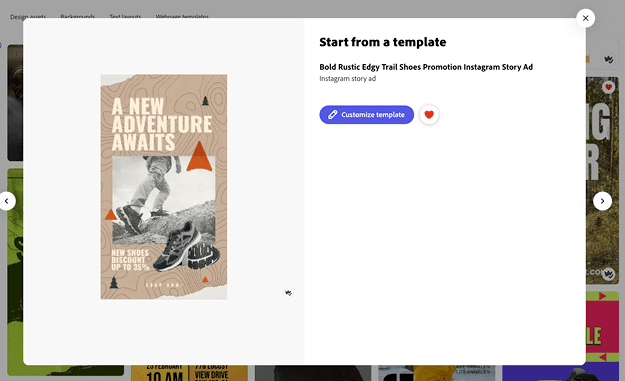
Figure 14. Customize a template.
Once the file is open, you can adjust the size to the dimensions you need. The Resize feature can be an incredible tool as it offers presets for the dimensions required by various social media platforms. Plus, Adobe Express will automatically resize content for multiple sizes and keep them in one file—saving you a lot of time (Figure 15).

Figure 15. Resize the template.
Because we already set up a brand kit for Atreaz Tours, updating this template design to match the brand’s fonts, colors, and logos is very easy: Click Brands (left menu), select the brand you want to use, then click the gear icon at the top right of that brand kit. Toggle all the options you want to use, including all the pages in that file (Figure 16). Then you can make additional edits to the design.

Figure 16. Apply a brand kit.
Use linked Illustrator and Photoshop files
When you know you need to update Illustrator or Photoshop files, you can save a lot of time by using these as linked assets in Adobe Express. Suppose, we want to offer clients a T-shirt mockup from a Photoshop file and a badge you designed in Illustrator. Because you plan to update these regularly, you can add the Photoshop and Illustrator files inside a Creative Cloud Library. To start, make a library inside Illustrator (Figure 17), and drag the badge design to it. Repeat the same process for the Photoshop file. Now, add the Photoshop file and Illustrator file to Adobe Express by adding the assets from the newly created library. To find your libraries, go to the menu on the left, click Your Stuff, then click Libraries, and find the library.
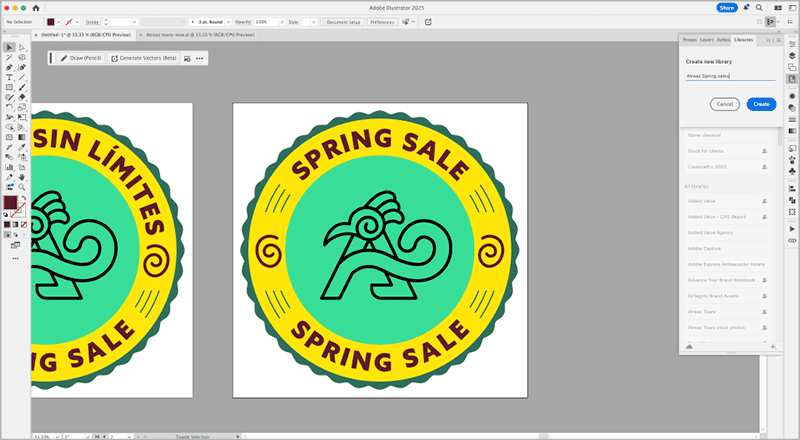
Figure 17. Illustrator library
Here is where Adobe Express and linked assets work like magic. Let’s say, after adding the badge to the design we decide to modify it to fit the sales percentage inside the circle. To do this, go back to Illustrator, open the badge from the library files, and make the edits. Next, save the Illustrator file, and head back to Adobe Express. Anytime you update a linked asset, Adobe Express displays a message towards the bottom of the page letting you know the asset has been updated (Figure 18). Click the Update button, and Adobe Express will automatically update all pages or designs that use that linked asset.
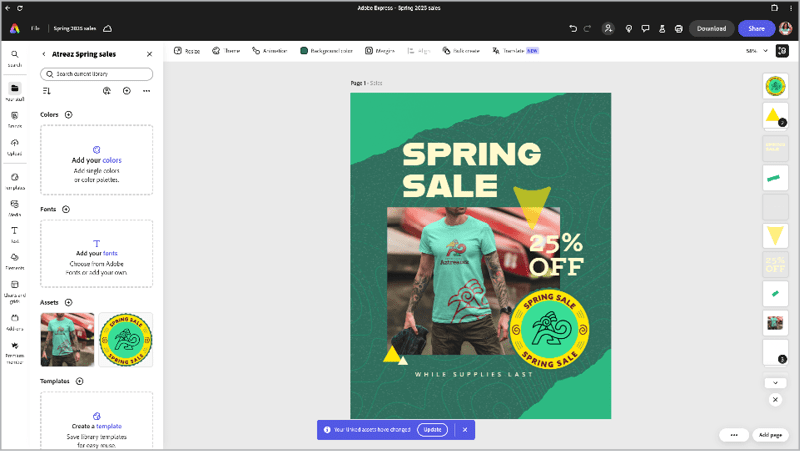
Figure 18. Library assets can be quickly updated across all linked elements.
The last step is to convert your design into a template so your clients can easily reuse it. With templates, clients won’t have to worry about losing the original design you made because a new design file is created every time you use it.
To create a template, go to the top-right menu area, click the Share button, and choose Make A Template from the menu. A new window will pop up asking you to name the template and add a note for your client on how to use it (Figure 19). Make sure you select the brand kit, under the Save To option, and then click Save Template. Now anytime your client wants to create a sales post, they can find this template under the template area of their brand kit.
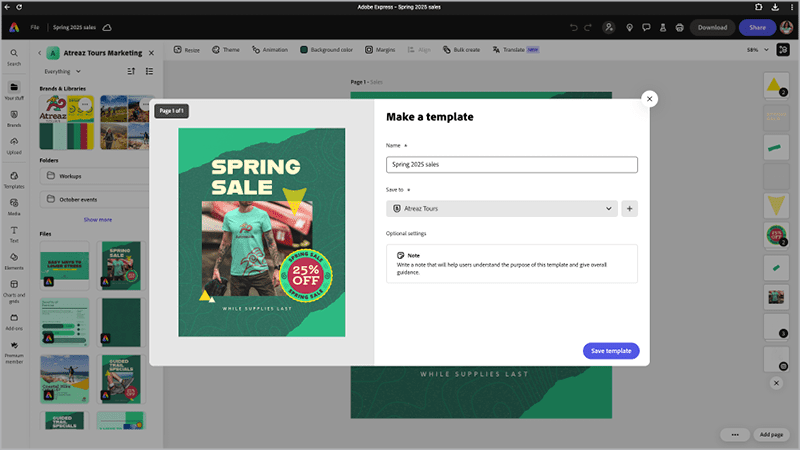
Figure 19. Save a template.
Recolor graphics with brand kits
When working with templates, you can leverage Adobe Express to recolor graphics in that design. Let’s use a different template for this example. With the new template open, repeat the steps in Figure 16, select Recolor Graphics (Figure 20) this time, and then click Apply Brand (Figure 21).
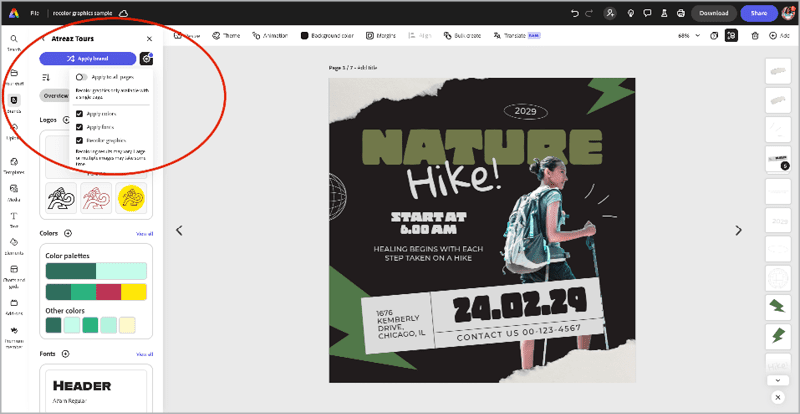
Figure 20. Choose the aspects of a brand you want to apply to a design…
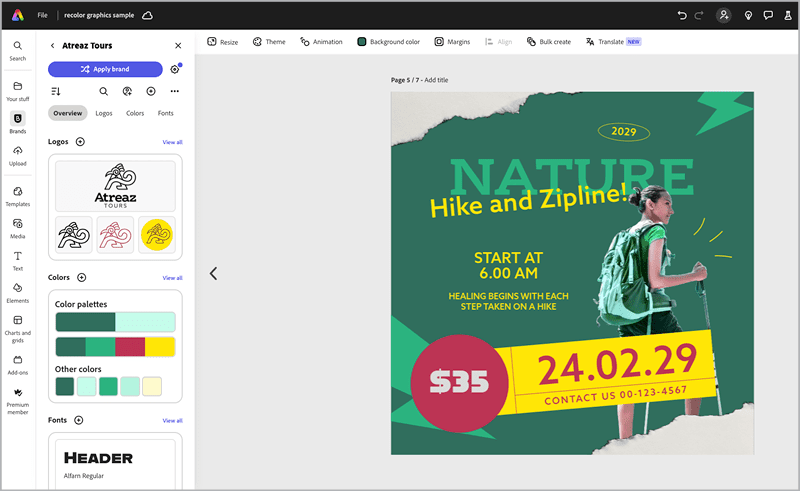
Figure 21. …and Adobe Express does the work for you.
Pro Tip: When you select Recolor Graphics, Adobe Express will use AI to recolor the graphics in your design to match your brand colors. If you want to recolor graphics, make sure that the images you want to recolor are not grouped with anything else, otherwise you can’t select the recolor graphics section. (Figure 22). At this time, Adobe Express lets you recolor graphics for only one page at a time, so if you want to recolor graphics on several pages, you’ll need to recolor each page, one by one.
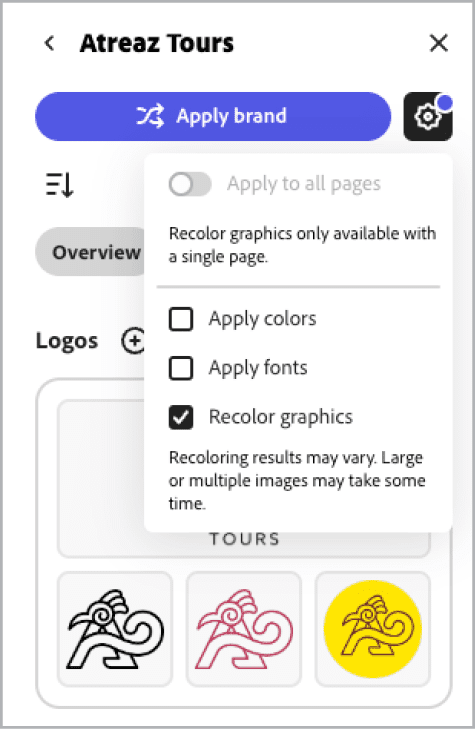
Figure 22. Recolor graphics works only for single pages.
Design easy infographics
Infographics are a powerful marketing tool, especially when you want to make data easier to understand. So, let’s make a quick infographic for Atreaz Tours, using one of the templates in Adobe Express. Repeat the process outlined earlier: Find a template, apply the brand kit, and make design modifications. Once you select a chart to edit, a menu will pop up on the left area (Figure 23) offering several options to customize, such as Chart Type, Fill, Value, Fonts, and Opacity.
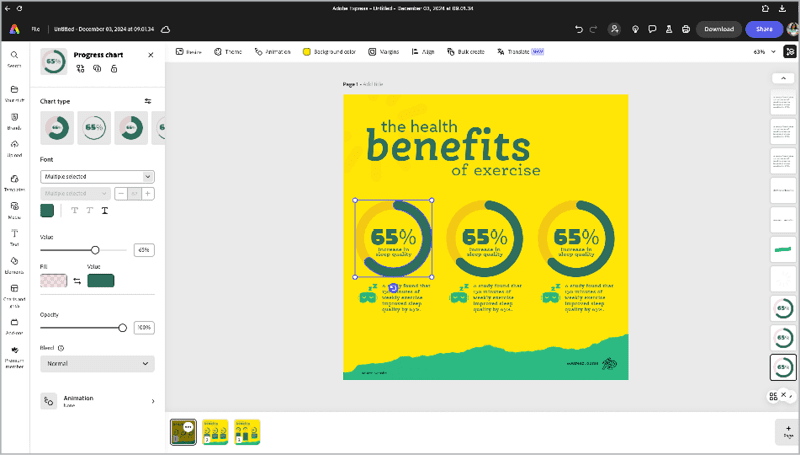
Figure 23. Adobe Express offers many ways to customize infographics.
For the finishing touches you can use some icons to support the data points. To add an icon, click Elements (leftmost menu), type your text in the Search field, and select one of the icons shown (Figure 24).
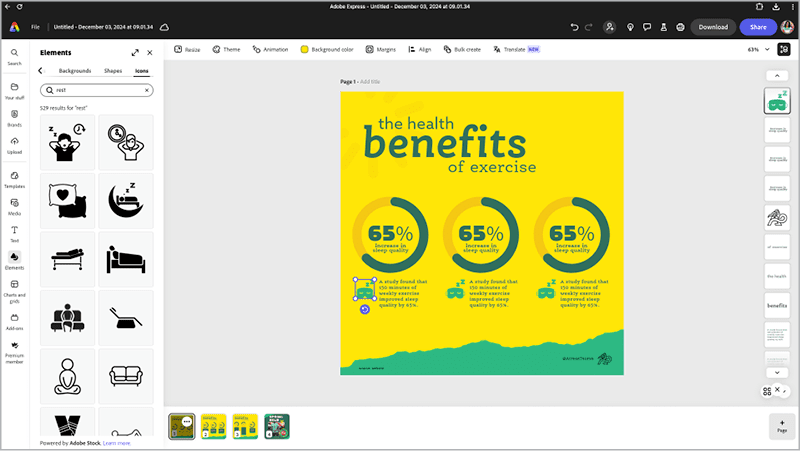
Figure 24. Add icons to your infographic.
Your editing doesn’t stop there. With Adobe Express, you can also easily create animated content, including videos, voiceovers, and animations, and even schedule your content across your social media platforms. To start, you can apply a simple animation to the entire design by clicking Animate (top menu), and then selecting an option from the Animate All window (Figure 25). For details on how to make a more customized animation, see my article, “Animate and Schedule Your Content with Adobe Express” in Issue 37.
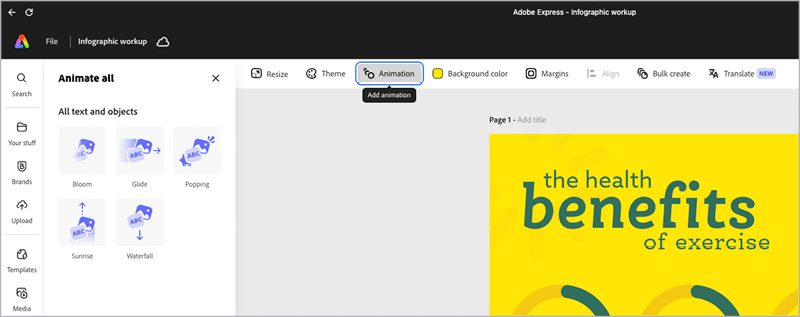
Figure 25. The Animate All window
Ease PowerPoint headaches
PowerPoint can be a great tool for your slide decks, but let’s face it, many people find it overwhelming with too many options. Let’s say your client needs a presentation deck but they don’t want to use PowerPoint and they only have a PDF file. No problem—you can upload that file in Adobe Express! Earlier we covered how you can start templates by uploading external files. Go ahead and upload your PDF, and once it’s done you can start editing.
With Adobe Express, you can create engaging presentations, add transitions between slides, even animate pages, and you don’t have to jump over to another app. Plus, you can present your deck with presenter notes so that your clients can add important speaking points (Figure 26). Once you are done making your edits, make sure to save it as a template.
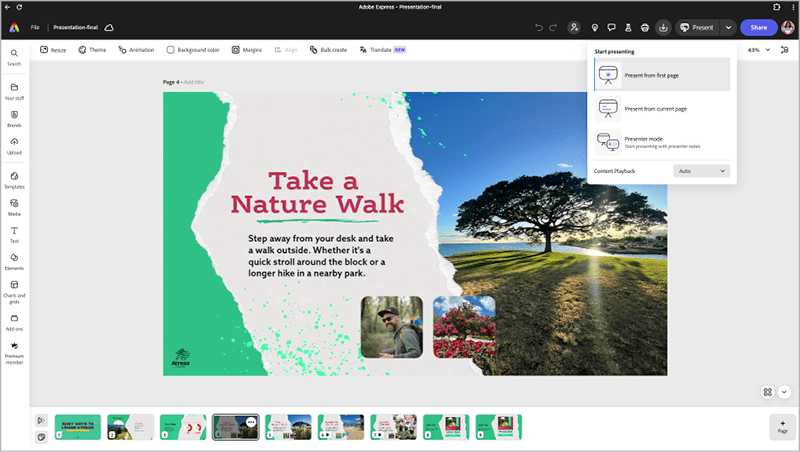
Figure 26. Presenter notes options
Collaborate and Share with Clients
After designing multiple graphics and templates, sharing all of that content used to be tedious. Now, the days of sending countless emails to get revisions done are history. With Adobe Express, you can easily share designs for review and collaboration with the Share button (top right). You can either create a public link or invite specific colleagues using an email. Then, you can toggle what type of access they have: commentator or editor (Figure 27).
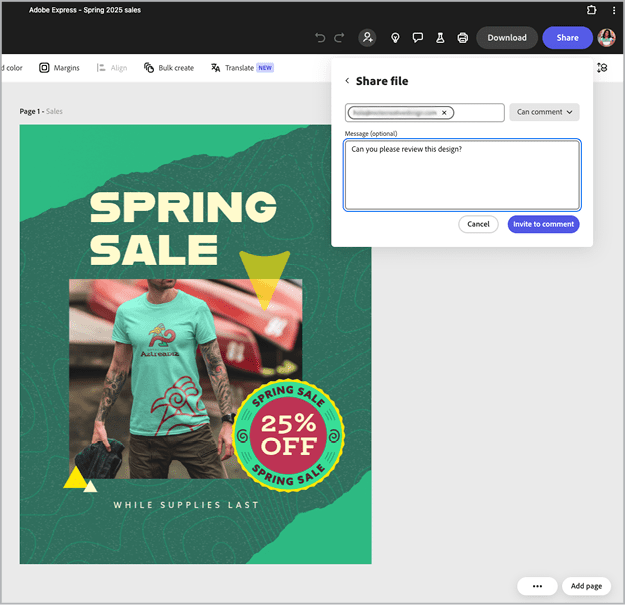
Figure 27. You can share files for review only or enable collaborators to edit them.
Pro Tip: When you organize your designs in projects, you can share them more easily. Instead of sharing several links to various designs, all you need to do is share a single link to that project and select the user’s access.
To share a project, click the project’s More Options icon (top right of the project’s box) and select Share (Figure 28). If you shared the files as a Comment only, make sure to switch it to Can Edit, once your client approves all the designs, so they can start editing their content.
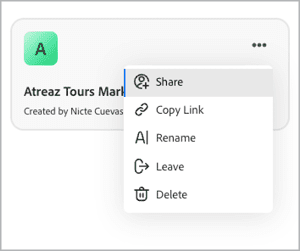
Figure 28. Share a project.
Do More, More Easily
Adobe is constantly improving Express, which means our ability to create branded content will become even easier. Express offers us an opportunity to create content on the go while still using assets from the pro apps we know and love. However, the most significant benefit to Express is that we can use it to empower our clients to manage their marketing content, maintain brand consistency, and reduce production work. After you develop their brand identity, you can create brand kits, templates, and more for your clients. For more insight on leveraging Adobe Express, check out the tutorials on my YouTube channel.
Commenting is easier and faster when you're logged in!

Recommended for you

Before&After: Make Your Design Express Who You Are
An audio retailer designs a card that floats on air.

Rebranding CreativePro
Take a look behind the scenes as we build a new look to better reflect who we ar...

Using Your Own Branding in Canva and Adobe Express
Using your own branded assets is now possible in both Canva and Adobe Express