
Adobe Illustrator has many tools for creating and manipulating artwork, but not that many for arranging objects. Arranger is a free plug-in from Omata Labs, which can be installed from the Creative Cloud dashboard. There are also versions for Photoshop, XD, Adobe Express and Figma, and an InDesign version is in the process of being updated.
Start with Some Objects
You can use any objects with Arranger, and they’re interpreted in the order in which they’re placed in Illustrator, from front to back. Their actual arrangement on the page is irrelevant. Choose Window > Extensions > Arranger to open the panel. 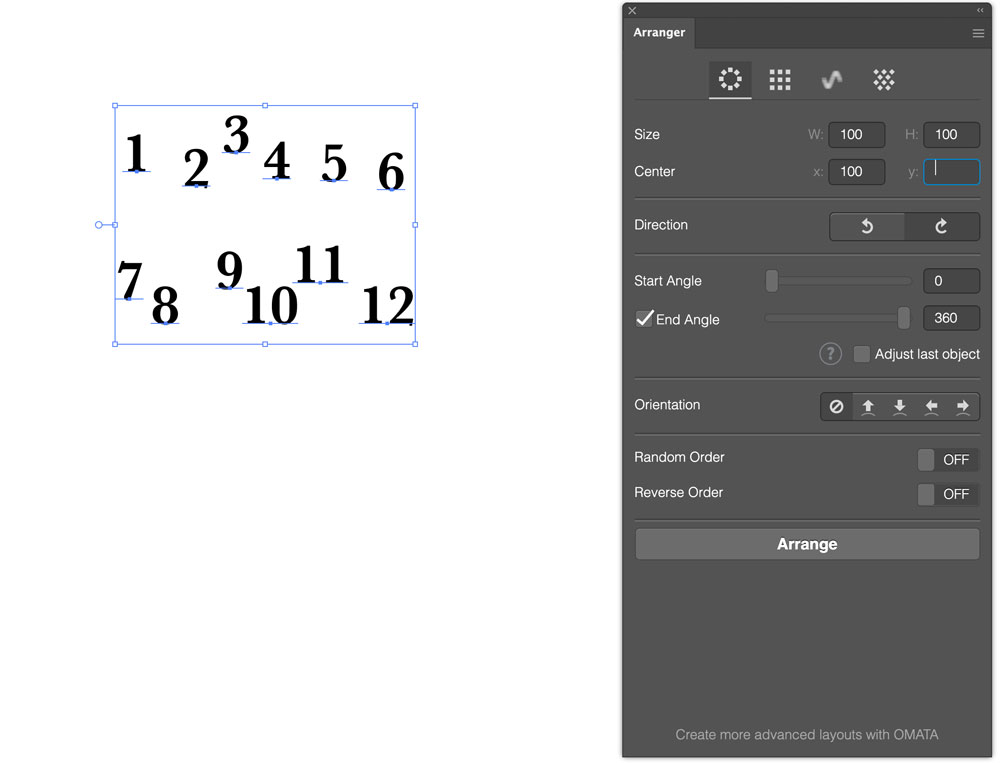
Start Arranging
Arranger has four different modes. In the following example, we’ll start with the Radial arrangement. Select all your objects and click the Arrange button at the bottom of the panel. As expected, Arranger puts all the objects in a circle. In this case, it’s hidden behind the panel, and it’s too big: the numbers are spaced apart more than we’d like. 
Adjust the Settings
You can adjust the size of the circle using the Size controls. Note that this affects only the spacing between them, not the size of the individual objects. You can choose different width and height settings if you want an elliptical layout. Here, I’ve also adjusted the Center settings to move the circle to the side. 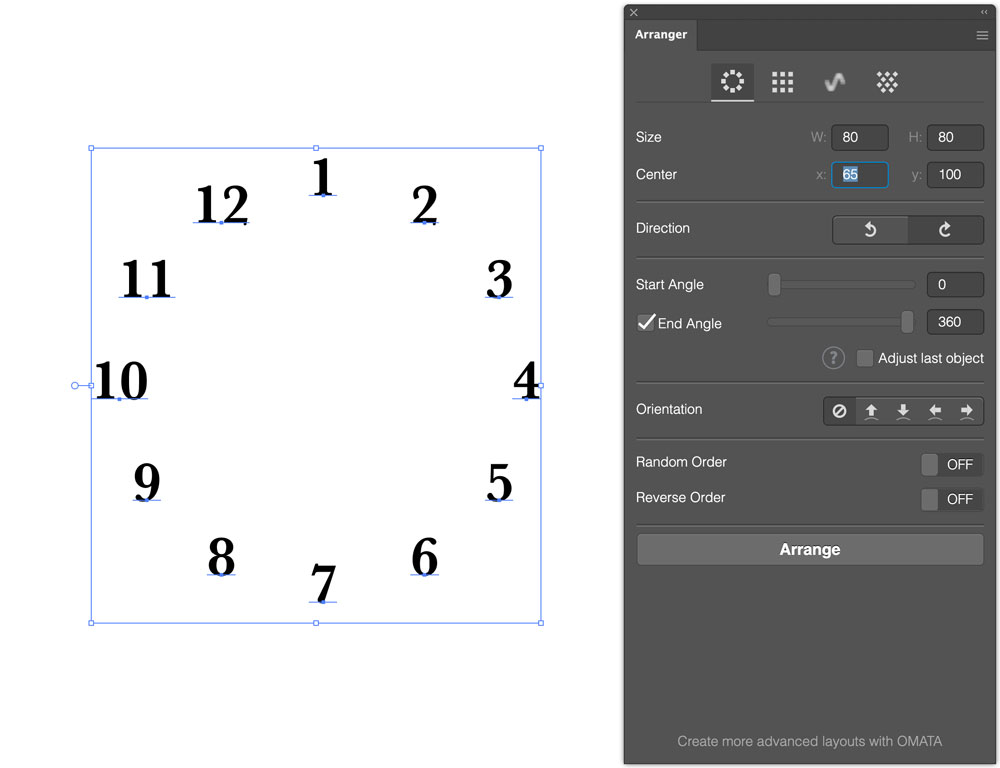
Change the Start Angle
Our numbers are from 1 to 12, but to build a clock face we need the 12 at the top. This is easy to do by changing the Start Angle: 30 degrees is one-twelfth of a circle. 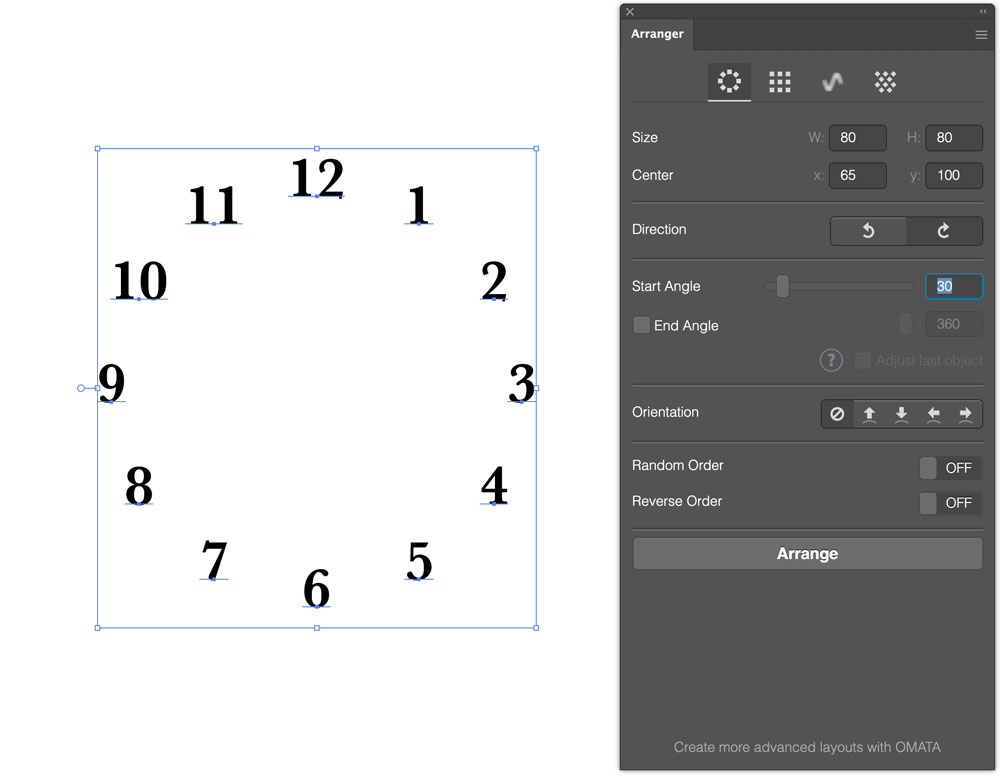
Add Some Ticks
It’s easy to add ticks by first drawing twelve rectangles. Or, to save time, draw one and duplicate it 11 times. 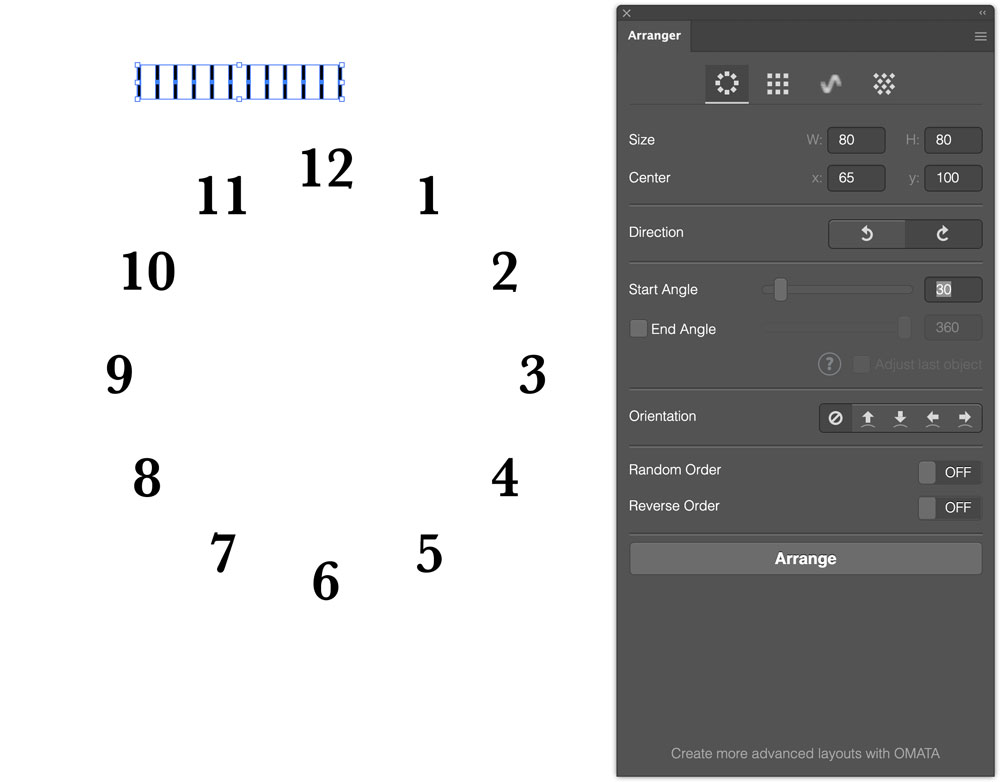
Arrange the Ticks
You can use the same tool to arrange all the ticks in a circle. Here, I’ve reduced the size so that they all fit within the bounds of the number text. But there’s a problem: the numbers were fine when they were all the same way up, but the ticks need to be rotated. 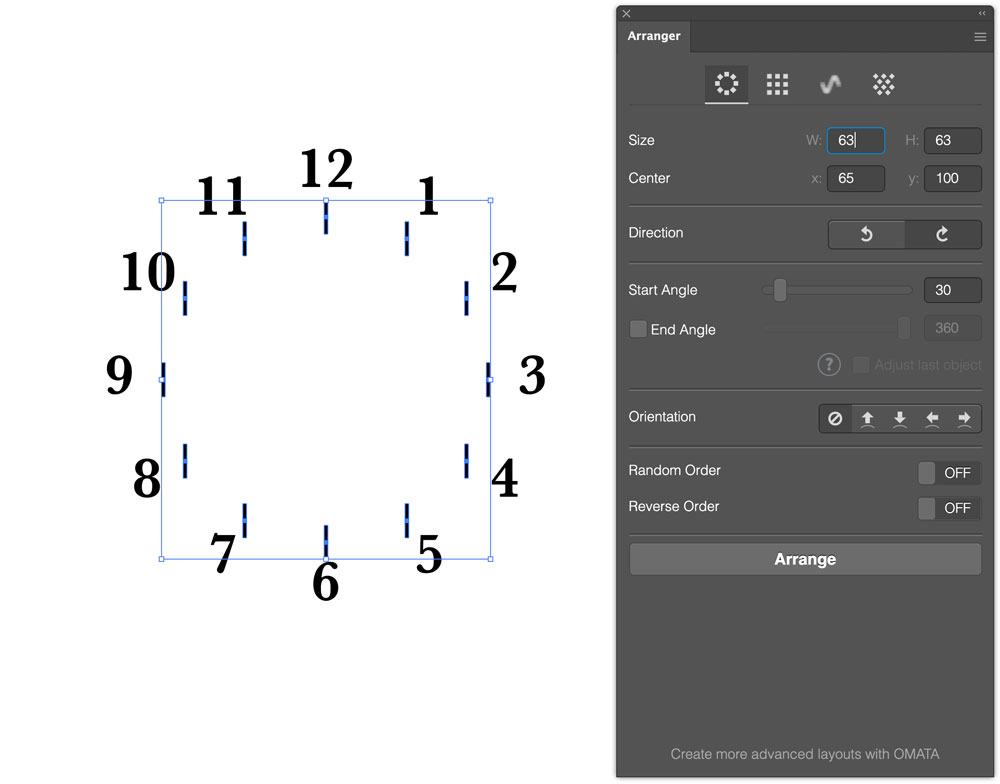
Rotate the Ticks
The Orientation buttons allow you to arrange the selected objects either across the path (as here), or along the path. Because I moved the numbers using the Center control rather than just dragging the array in Illustrator, these ticks appear centered with the numbers. In fact I needed to move them down slightly. You can adjust values in the number fields with your Up/Down cursor keys as well as text input, making it easy to nudge objects like our tick marks into place. 
Add an Arc
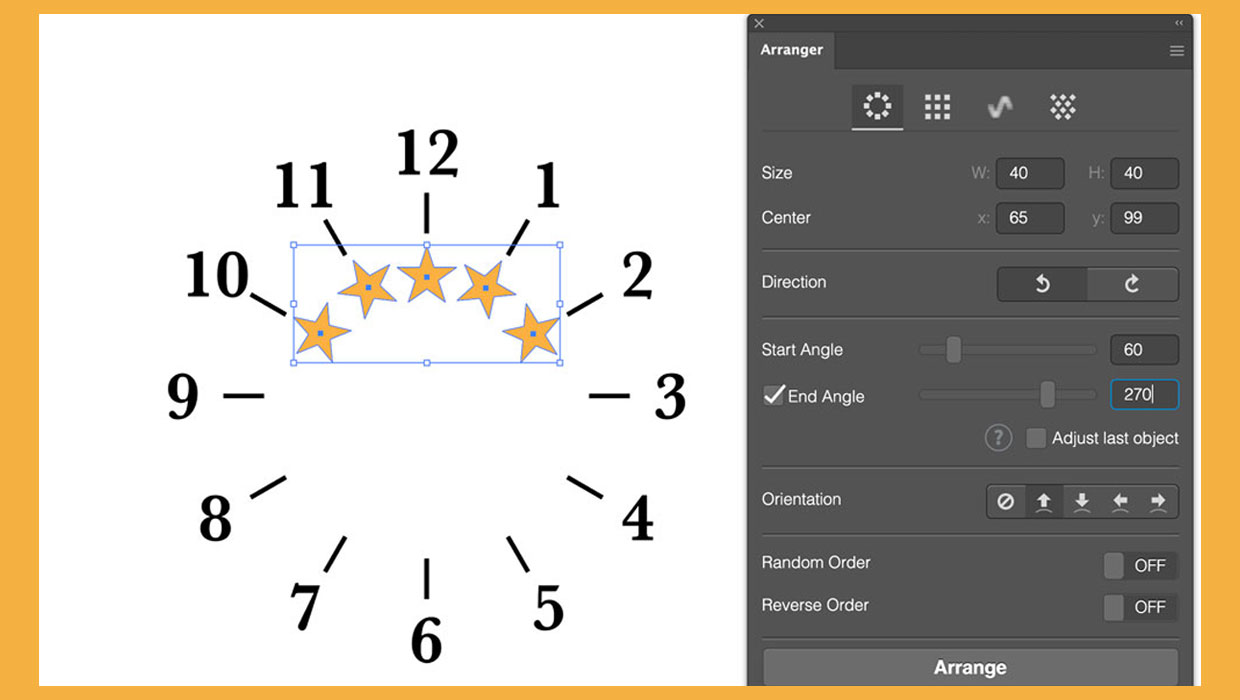
I thought the clock face would look good with an array of stars where the name would go, so I drew five gold stars and used Arranger to set them in an arc. There’s no way to add a negative value to the Start Angle, so instead I set the direction to counterclockwise, set the Start Angle to 60 degrees, and then the End Angle to 270 degrees. Again, using the cursor keys to nudge the values makes the job easier. 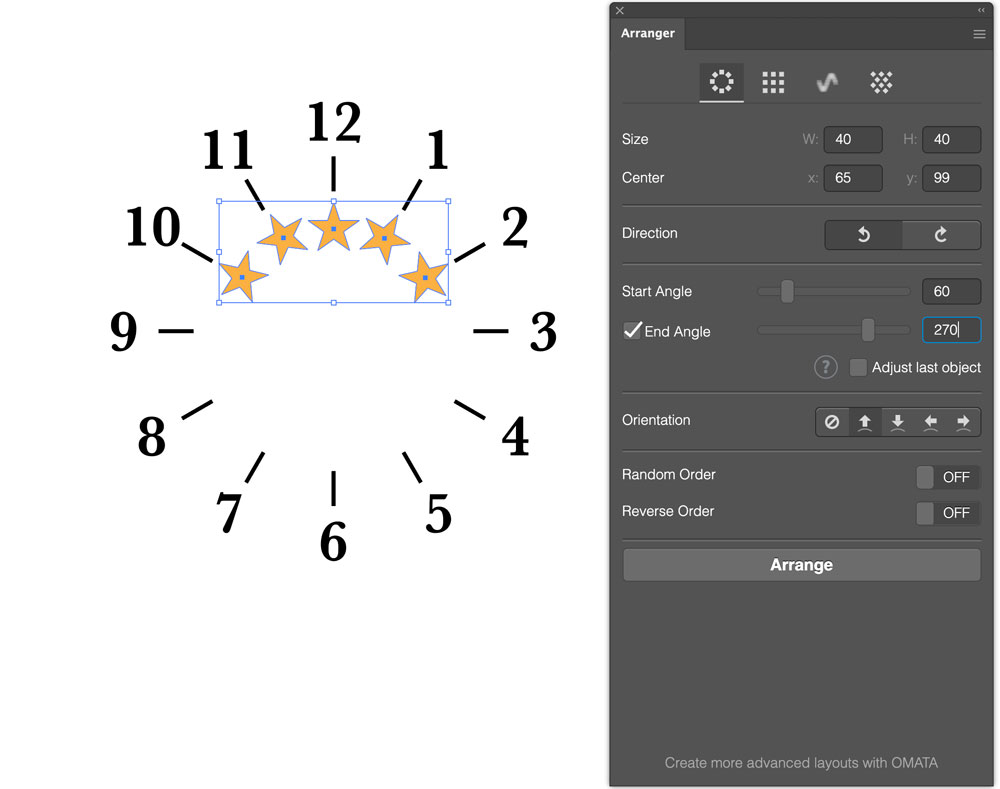
A Different Arrangement
The Grid setting is the second button at the top of the panel. This positions your objects into a regular grid, according to the number of columns you specify. As you change the number of columns, the objects will rearrange themselves on the fly. 
Space the Objects
You can use the Gutter setting to set the distance between the objects. There are separate settings for Width and Height. 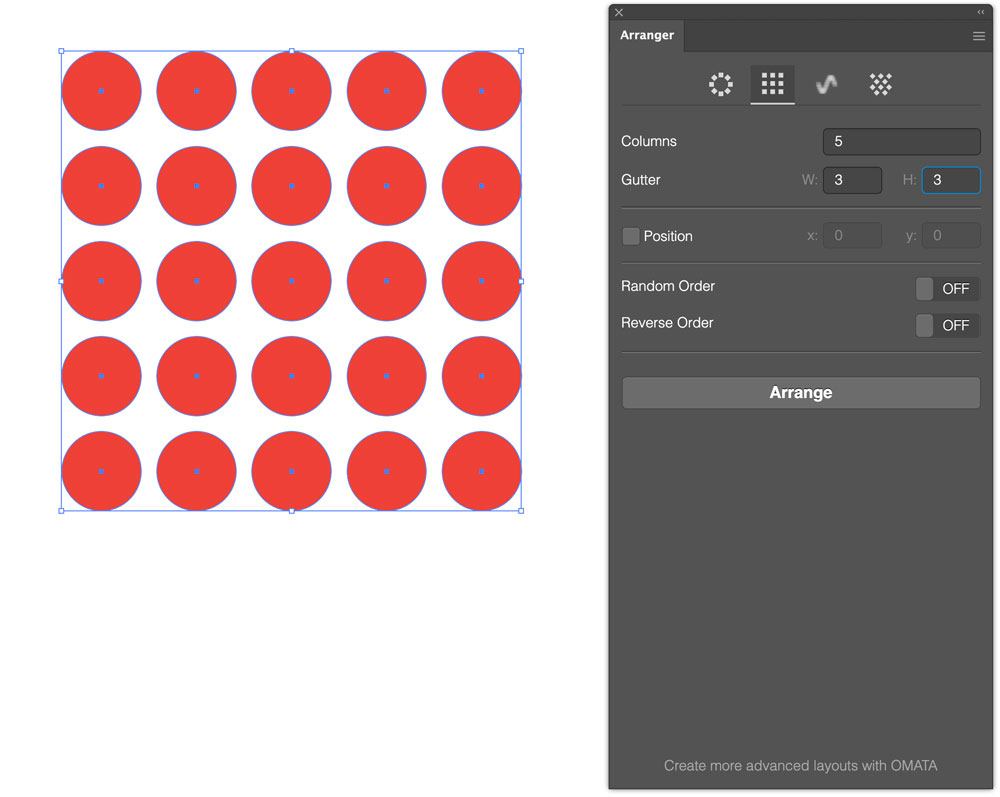
Making Waves
The third option is Wave, which arranges the selected objects along a sine curve. You can set both the Period and the Amplitude, but the spacing is only calculated according to the horizontal distance between centers. With a tall curve such as this, objects at the apex are bunched together more than those in between. 
Making a Honeycomb
The final option is Hexagonal. This is similar to Grid, except that it arranges your objects in alternating rows. You can choose to have them staggered or centered, in which case there will be one fewer object in each alternate row, as is the case here. You can also adjust the vertical and horizontal offsets as well as the spacing for full control, and negative spacing values are allowed (which was how I was able to place the rows so the bounds overlapped). 
Fully Editable
Even after you’ve created your array, the original objects are unchanged. You can rotate them, recolor and scale them, then use the Arrange button again to reapply the arrangement with the same settings. Arranger is a seriously useful tool, and best of all, it’s free. It’s not perfect, but it performs an otherwise tricky task with ease. If you’re an Illustrator user, there’s no reason why you shouldn’t install it straight away.
This article was last modified on April 26, 2025
This article was first published on March 11, 2025
Commenting is easier and faster when you're logged in!

Recommended for you

This Week in InDesign Articles, Number 27
Want more CS5 coverage? Want some good tips for CS3 and CS4? Check out this week...

New ARTS PDF Crackerjack 5.0 makes PDF print production workflows more efficient and profitable
ARTS PDF, the leading developer of PDF tools for PDF professionals, today announ...
Why Am I Seeing Yellow Highlighting on My Text?
A (thankfully) easy solution to an often frustrating InDesign problem!