
Working with Anchored Objects in InDesign
See how to use anchored objects to achieve maximum efficiency with text and graphics that need to stay together.


This article appears in Issue 117 of InDesign Magazine.
When my client says, “I have a few changes,” my heart always skips a beat, as I anticipate how those changes will affect my layout and how much re-work will be involved.
For example, imagine you’re asked to create a directory or catalog with photos or icons next to each product. You finish painstakingly placing each photo next to the text, and then the client does what clients always do: they ask you to add a new product, near the beginning of the list. So every product moves down, but each photo remains where you manually placed it—the entire layout is an instant mess! There has to be a better way. And, in fact, there is.
The solution is to anchor each object to the correct line of text. That way, when text is added (or removed), the objects always travel with the text. Anchored objects are essential tools for directories, pictorial biographies, resumes, catalogs, and anything else where headlines or words have a photo, icon, or other graphic that must remain aligned with specific text.
So what exactly is an anchored object? It is a single frame or group that is “anchored” to a point in a story with a simple drag and drop. The object travels with the text into which it’s anchored. Basically, wherever the text goes, the object follows! An item can be placed inline with the text, so it moves just like a character, or anchored, so it can be freely positioned on the spread in relation to the point where it was anchored in the text. Either way, once you learn how to set them up, you’ll never have that sinking feeling when your client calls for “just one little change.”
Creating an Inline Graphic
First, let’s learn
how to create an inline graphic that will act like a character in the text. Let’s say that you have a small icon that needs to travel next to a word in your story. With the Selection tool, select the icon. Notice the little solid colored square in the top right of the selected frame (it’s the same color as the frame edge, which matches the color of the layer it’s on).
To make this icon an inline graphic, hold down the Shift key, and drag that little square into your text story. Release when the cursor appears after the last letter of the word. The bottom of the icon’s frame sits on the baseline, and the following text scoots over to make room. You’ll see the little square on the frame is replaced by an anchor, letting you know that the icon is now anchored into the text (Figure 1).

Figure 1
Because inline objects act like characters in the text, you can only adjust them vertically from the baseline. To adjust the icon’s vertical placement, click and drag the object up or down using the Selection tool. Alternatively, you can move the icon up or down with more precision by selecting it with the Selection tool and changing the Y Location in the Control panel, tapping the up or down arrow key on the keyboard, or dragging across the anchored item with the Type tool and then applying baseline shift.
TIP: If you need to apply the same baseline shift to many icons in your story, it’s a good idea to make and apply a character style or an object style to each icon (I’ll discuss object styles later on).
Another way to adjust the vertical placement of the icon is to select it with the Selection tool and choose Object > Anchored Object > Options. At the top of the dialog box, you’ll see Position: Inline or Above Line. For Inline, change the Y Offset value to move the graphic up or down (Figure 2). Be sure to also turn the Preview checkbox on, so you can watch the item move.

Figure 2
A Common Place Problem
Have you ever placed a graphic into your layout and then not been able to find it? Or if you do see the image, you can’t select it and move it to a different location on the page? If so, you’ve probably anchored the image into text. If you choose File > Place when you have an active cursor in text, then whatever you’re placing will be added as an inline graphic. If you place a small logo, then you’ll see the logo, but not be able to move it around the page. If you place a large photo, you might create overset text and not be able to see the photo at all. Although this is a valid way to anchor a graphic, I prefer to first place and format the text and the graphic separately, and then drag the blue square into the text, either holding the Shift key to make an inline item or just dragging it to make anchored item.
Creating an Anchored Graphic
Now let’s talk about another type of anchored item, one that is anchored to a line of text, but can be positioned anywhere on the page. In other words, this item can travel with the line of text to which it’s anchored, but it doesn’t have to sit between characters and can even be moved outside the text frame.
To create an anchored object, simply select the item (again, it can be a single object or a group), and drag the little box on the top edge of the frame into the line of text. This time, don’t hold down the Shift key!
When you stop dragging, the object will be anchored to that location, but it probably won’t move from where it was sitting on the page. Once the graphic is anchored, you can reposition it anywhere on the page… and then it will move when the line into which it’s anchored is moved.
Just like inline objects, anchored objects display with a little anchor icon near the upper-right corner.
Where to Drop Anchor
The first time I made a catalog, I didn’t think it really mattered exactly where I anchored the objects, as long as they ended up in the right position on the page. So I anchored all of the product photos in the middle of the product name! But I soon ran into major problems. One day, my client asked me to find a product named “Metal Hook.” I chose Edit > Find/Change and typed in Metal Hook. No results. I typed Metal. No results. Horrible thoughts ran through my head. Did that product get deleted accidentally? Fortunately, I finally found the “missing” product. Why didn’t Find/Change find “Metal Hook”?
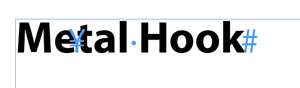
I saw the answer when I turned on Type > Hidden Characters. I had dragged the anchor marker right in the middle of the word Metal. To find that, I would’ve had to search for Me^atal (^a is the Text find metacharacter for an anchored object marker). So I edited the catalog and moved all of the anchors to the end of the name of the product. Why to the end and not the beginning? Because the client was always asking me to re-order the products, so I had to make sure that my selection included the ¥ symbol. If I had put it before the name, there was a chance that I would miss it when I cut and pasted the rest of the text.
Moving an anchored object
To move an anchored object to a new position, just click and drag the little anchor icon to a new location (Figure 3). To move an inline object, make sure to hold the Shift key before you click and drag the little anchor icon to a new location in the text. Alternatively, to move an inline object, you can drag over it with the text cursor and select it (just like any character of text), choose Edit > Cut, reposition your cursor, and then choose Edit > Paste. If Drag And Drop Text Editing is enabled (in Edit > Preferences > Type), you can also simply drag a selected character from place to place—no Shift key required.
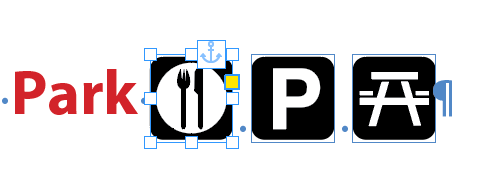
Figure 3
Releasing an anchored object
Sometimes you need to move your anchored object to a new story, or make changes to it and then re-anchor it. Or sometimes you just don’t want it anchored anymore. If it’s anchored (not inline), you can release it from the story by selecting the object with the Selection tool and choosing Object > Anchored Object > Release.
Or, if it’s an inline object, you can select the object with the Selection tool, cut (Command/Ctrl+X), and then paste it (Command/Ctrl+V) back into the layout.
Tip: If you have to release objects a lot, you might want to use the free script referenced in this article on InDesignSecrets.
Working with anchored groups
Remember that InDesign treats a group like a single object. However, if you group objects before anchoring, you don’t need to release the anchor to modify the group—instead, simply double-click on one of the grouped objects to select and modify each item inside the group.
To add another object to the group, you can release the anchor first, make your addition or change, regroup, and then re-anchor. Or, use the Layers panel to drag the additional item into the group. Note that using the Layers panel method can sometimes result in the grouped item moving unexpectedly.
Anchored Object Options
There are three ways to open the Anchored Object Options dialog box:
- Select the object and choose Object > Anchored Object > Options
- Right-click on the object, and then choose Anchored Object > Options
- Hold Option or Alt and click on the little anchor
Finding where objects are anchored
Once you anchor an object into text, it can be hard to see exactly where it’s anchored. Choose Type > Show Hidden Characters to show non-printing characters. This will reveal the anchored object marker, which looks like a Japanese Yen symbol (¥), indicating exactly where the graphic is anchored (Figure 4). Choose View > Extras > Show Text Threads to display a nonprinting line connecting the graphic frame to where it’s anchored in the story. Remember, if you select the little ¥ character with your Type tool and press Delete, you’ll delete the anchored graphic and any text that you have selected.

Figure 4
Another way to tell where an object is anchored is to use the Story Editor (Edit > Edit in Story Editor, or press Command/Ctrl+Y). Anchored objects are easy to spot in the Story Editor!
Inline Logos and Icons
Let’s look at some of the many ways you can use anchored objects in InDesign. One common method involves placing multiple logos in a brochure or ad. They might be sponsors, social media logos, or icons for a legend on a menu. Here’s how to add a set of six logos as inline items to a line of text. Assume that you’d like these logos to be in a specific order, and when you add a new logo or remove one, the others should fill in the gap seamlessly.
1. Once you have all the logos placed and sized on your page (Figure 5), create a new text frame as wide as your page. Type in “Created with” and press Return. The second line is the line into which you’ll drag the logos.

Figure 5
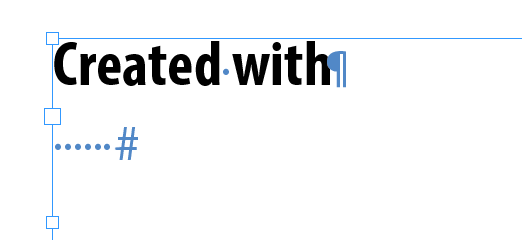
Figure 6

Figure 7

Figure 8
When you need to add a new logo, first place and size the new logo outside of the text frame, and then hold Shift and drag to anchor it into the line of logos to the correct position. This will move the existing logos over to make room for the new one. If you need to remove a logo, select it (either with the Selection tool or the Type tool) and delete. The rest will move to fill in the space.
If you have more logos than will fit on one line, they will wrap to the next line, as if they were each words in a sentence. As I noted earlier, this also makes it easy to rearrange the characters with drag-and-drop text or with copy and paste (Figure 9).
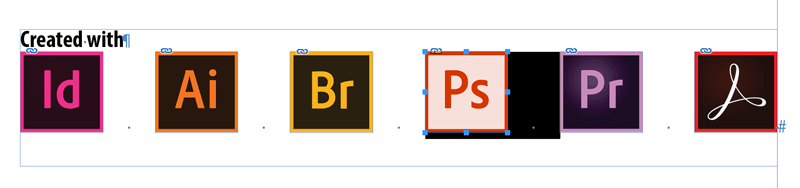
Figure 9
Anchored Photos Oriented to the Spine
Many training manuals are designed with the text in a single wide column, towards the spine, set close to the inside margin. The open margin on the outside is where photos, screenshots, or other diagrams appear. If a screenshot is anchored to text, and the text moves from the left to the right page, the screenshot needs to move as well, and always sit to the outside of the text frame, not specifically the left or the right. Let’s look at how to achieve that.
1. Begin with a story in a tall text frame and a photo in a separate frame. Thread this story from the left page to the right page, in a facing-pages document. Margins should be about 4” on the outsides and .5″ on the insides (Figure 10).

Figure 10
2. Select the photo (or a group of an image and caption) with the Selection tool. Click and hold the little blue square at the top right of the photo frame, and drag the photo into the text on the left page (Figure 11). You can technically drop it anywhere—at the beginning, end, or middle of the line—but check out the sidebar “Where to Drop Anchor” for placement tips.

Figure 11
3. With the Selection tool, drag the photo to hang just to the left of the text frame, on the left page.
Now let’s customize the location using specific values and create and apply an object style to position multiple photos consistently.
4. Select the anchored photo, and choose Object > Anchored Objects > Options (Figure 12a). This dialog box can be a bit confusing at first, so let’s break it down.

Figure 12a
- The top section refers to the anchored object, which we’ll refer to as the photo.
- You can choose one of nine reference points on the photo to use as the measuring point to determine the distance from the photo to the chosen Anchored Position.
- The bottom section refers to the chosen reference point to which the photo is anchored. You can choose to anchor the photo to the Anchor Marker (¥), Column Edge, Text Frame, Page Margin, or Page Edge.
- The X Offset value will calculate the distance from the reference point chosen for the photo to the location chosen in X Relative To. The photo will move left and right when the distance is altered.
- The Y Offset value calculates the distance from the reference point of the photo as well, but the Y Relative To value moves the photo up and down. Again, you can choose what it’s anchored to (text frame, anchor marker, etc.).
5. The photo should move with the text but always remain in the outside margin of the page if text is added or deleted. In the Anchored Object Options, the Relative to Spine option tells the anchored object to switch sides when the text holding it flows to the next page. So the photo will automatically switch from being on the left side of the text frame to hanging from the right side! (Figures 12b and 12c)
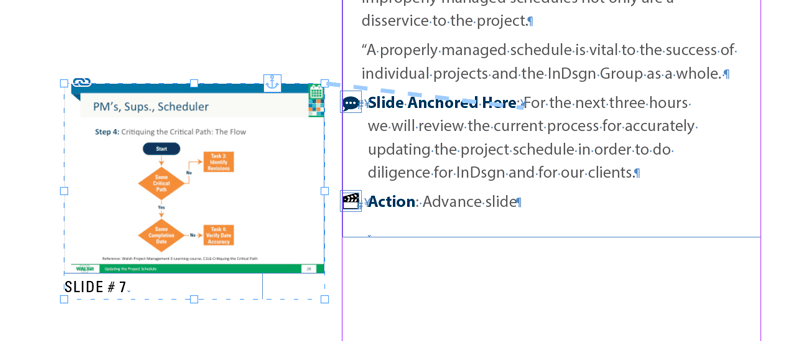
Figure 12b

Figure 12c
6. When Relative to Spine is enabled, the Anchored Object Reference Point will display as a spread. If you choose the top right corner on the left page, the top left corner on the right page will be selected, as its mirror image (Figure 13).
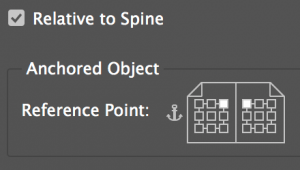
Figure 13
7. The same thing happens with the Anchored Position. If you choose the left side of the text frame on the left page, the right side of the text frame will automatically be chosen on the right page. It’s almost like magic. When you’re done, click OK.
8. At this point, we’ve customized quite a few settings, so it’s a great idea to save them in an object style. Select the anchored object, and choose New Object Style from the Object Style panel menu. Name it, and then apply the style to all photos anchored in the same manner (Figure 14).

Figure 14
I use this trick for training manuals, catalogs, and other documents that need a photo to hang not to the left or right of a text frame, but to the outside or the inside.
Fancy Paragraph Numbers
Let’s make a styled number in a circle to make a list more eye-catching. We will place the text frame so it sits halfway into the story to learn about text wrap with anchored graphics. You can use this trick to anchor anything and have the paragraph wrap around it: a number or letter in a text frame, a photo, logo, any placed image, or even a pull quote. This technique works best with a single column (or threaded text frames, if you need columns), not a text frame with multiple columns.
First, let’s anchor some numbers in a circle.
1. Start by placing the story in a single-column text frame, optionally threaded to the next page (Figure 15).

Figure 15
2. To make the numbered text frames, create a circular text frame, type “1,” center the text vertically and horizontally, and choose a fun font. Fill the frame with color. Duplicate the frame, and type in “2” and “3” (Figure 16).

Figure 16
3. Select the text frame for the number 1. Click the blue anchor square in the top right, and drag to the beginning of the body paragraph (Figure 17).

Figure 17
4. With the Selection tool, drag the number to sit halfway inside of the text frame, and notice how it covers up the text (Figure 18).
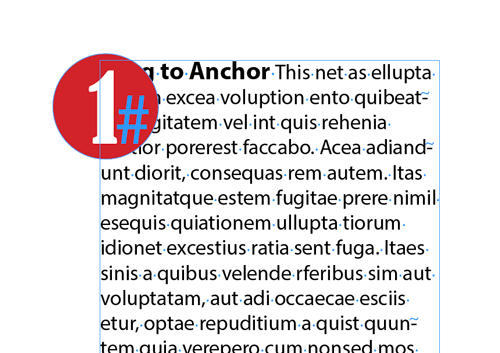
Figure 18
5. Choose Window > Text Wrap, and click the third button at the top to apply text wrap to the number (Figure 19). Notice how the first line of the body text, the one into which you dragged the number, does not honor the text wrap. This is simply a fact of life with text wrap and anchored objects: text on the line that is holding the anchored object will not wrap.
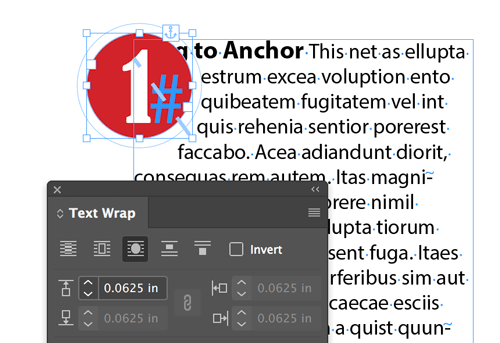
Figure 19
You have two choices here. If you want the first line of the body text to wrap, and you want the number box to be free to be placed halfway inside and outside of the text frame, then you need to click the anchor icon of the number and drag to reposition the number to the line above the line (or paragraph) you want to wrap, even if that means adding a blank paragraph first. Adjust the text wrap offset to push the text away from the number.
If you want the number frame to wrap and remain completely inside the text story frame, then you can switch to an inline anchored graphic, but you’ll have a few issues with the text wrap on the left side of the circle, as it will push the circle away from the edge of the text fame.
6. To put the number precisely in the desired position, open the Anchored Object Options dialog box. For the Anchored Object, choose the top middle point. For the Anchored Position, choose the left side, X Relative To: Text frame. X Offset: 0. This will put the top middle of the number frame exactly on the left side of the text frame.
7. Adjust the Y value to move the frame up and down to make the top middle of the number frame sit exactly where you’d like, below the first line of the paragraph. Y Relative To: Line (Baseline) Y Offset is .125″. Click OK (Figure 20).
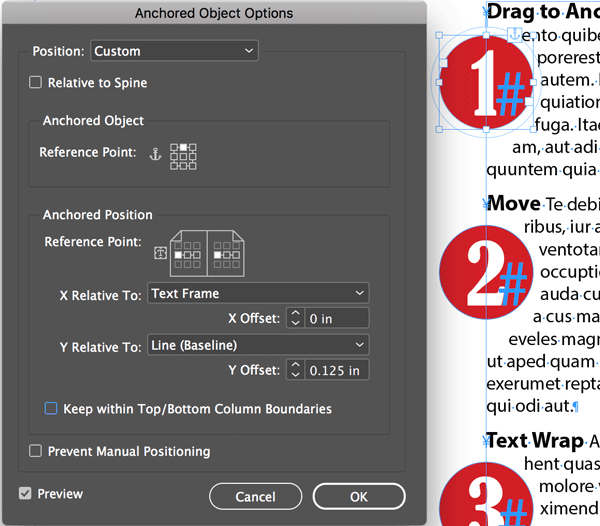
Figure 20
Reminder: As before, if you’re setting up something this complex, you should save the settings in an object style.
End of Article Markers
Many newsletters have short articles, and it’s nice to tell the reader that an article is complete. A small icon or company logo is perfect to anchor at the end of a story.
1. Begin with a text frame filled with text. Separately, place the company logo or some lovely little icon graphic, and size it to fit on the last line. Hold the Shift key, and drag the little anchor box icon between the punctuation mark and the end-of-story marker (Figure 21).

Figure 21
2. Place your cursor between the punctuation and the logo, and choose Type > Insert Special Character > Other > Right Indent Tab (or press Shift+Tab). This puts in a flexible tab that will push the logo all the way to the right indent of the text frame, no matter how much text appears before it, or how wide the text frame is (Figure 22).

Figure 22
3. To repeat the logo at the end of another story, select the right-indent tab and the logo with the Type tool, and copy and paste it anywhere (Figure 23).

Figure 23
Another way to make the end-of-story icon easy to insert into any document is to save it to a CC Library! Here’s how.
1. In the CC Libraries panel, make a new library, or display an existing library. Select the right-indent tab and the logo with the Type tool. At the bottom of the CC Libraries panel, click the + icon, and choose Text. The tab and the logo will be added to the library under a header of Text (Figure 24). Double-click on the library entry to name it.
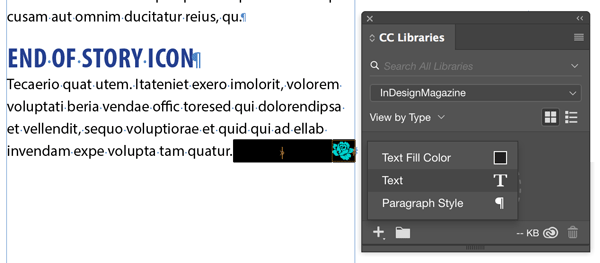
Figure 24
2. To place the logo, put your cursor at the end of any story in any document, right-click on the Text Library entry, and choose Place Inline (Figure 25). Your logo with the tab will be placed!
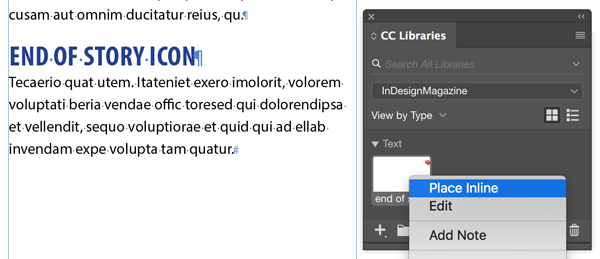
Figure 25
Download the Template Essentials
Want more anchored objects to play with? Check out this InDesignSecrets Template Essentials file, only for InDesignSecrets premium members!
Above-Line Icons
Let’s say you have a list of computer programs, such as InDesign, Illustrator, and Photoshop, and after each program name you’d like to list the new features. Your design would be much clearer if you could add an icon above the name of each program, so let’s do that.
1. Start with a list of subheads (names of the programs) and a feature list beneath (Figure 26).
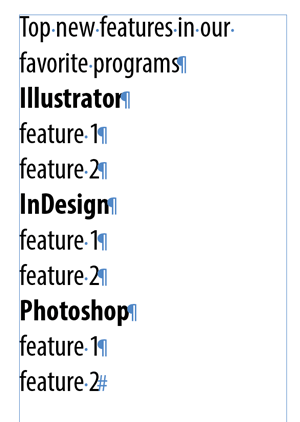
Figure 26
2. Place the icons separately, and size them. Hold the Shift key, and drag the little blue square of each icon to the beginning of the program name. Notice how the text scoots over to accommodate the icon (Figure 27).

3. With the Selection tool, select the icon. Choose Object > Anchored Objects > Options. Turn on the Above Line option. If Preview is turned on, you’ll notice the anchored icon moves above the line into which the icon was dragged; InDesign adds space as needed. Decide if you’d like the icon to sit left, right, or centered, or to follow the alignment of the line of text into which you’ve anchored the icon. Then set a custom space above and/or below to push the icon away from the subhead below it and the bullets that may be above it. Click OK (Figure 28).
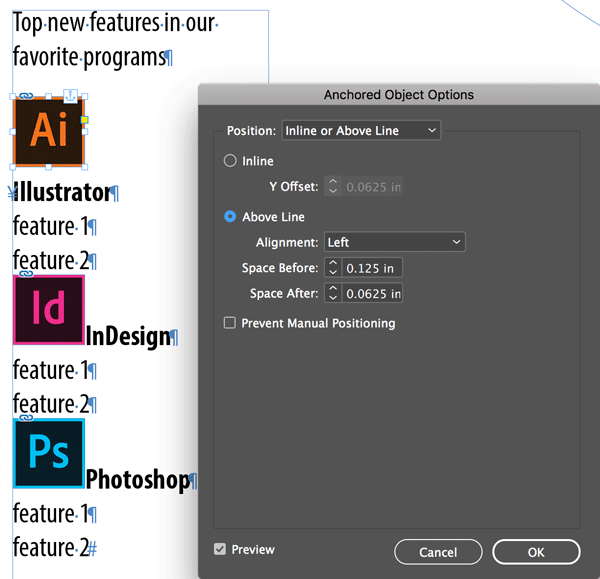
Figure 28
4. Create an Object Style, and repeat for all other icons.
Anchoring Groups
We’ve been anchoring frames and groups inside text stories, but it’s important to remember that the anchored objects can make up the entire story! For example, you could anchor 50 photos in a story, without any text—the result would appear like a grid of images. But you could add, remove, or reorder the images quickly, and the grid would “reflow.” For example, see this article.
Anchors Away
Anchoring a graphic frame, text frame, or a group into your text is the smartest way to make your job easier and more consistent. Anchor an object to text any time the object needs to follow wherever the text ends up. Once you start anchoring your graphics into text, you’ll realize how much time it saves, and how many mistakes you avoid. Creating an object style to apply the settings to multiple anchored objects is an even better way to streamline your work. I always think down the road to, when, not if, my client wants changes. Anchored objects and object styles can save hours of time and frustration. Anchors away!
More Anchored Object Tips
The more you use anchored objects, the more amazing things you’ll find you can do with them. Here are a few more tips for using anchored objects:
The Burns Effect: Using Anchored Objects in Nonintuitive Ways
Diagonal Headings in InDesign Tables
Creating Auto-Size Speech Bubbles
Creating a “Fold Back” Effect for a Heading in InDesign
Creating Dynamic Layouts Where Objects Move as Text is Added
Commenting is easier and faster when you're logged in!

Recommended for you

How to Create a Single-Image Book Promotion eBlast
Here are step-by-step instructions so you can make a single-image graphic that c...

Do Graphic Designers Need to Learn Coding to Be Competitive?
Many graphic designers find themselves feeling pressured in a more competitive m...

Tip of the Week: Text Spacing Shortcuts
The next time you need to adjust text spacing on the fly in InDesign, try these...