

You may have used Photoshop to restore and color-correct old photos. But sometimes you want to age a new image so it looks retro or vintage. Try these three techniques for unique results. Although the directions are for CS3, many of the steps also apply to earlier versions of the software.
Technique 1: Adjustment Layers
Don’t worry about making a mistake, since this technique uses adjustment layers. Even many steps after adding an adjustment, you can change opacity in the Layers palette to make the adjustment more or less visible.
Before you add a retro look to a photo, choose one that’s properly exposed with good color, such as Figure 1.
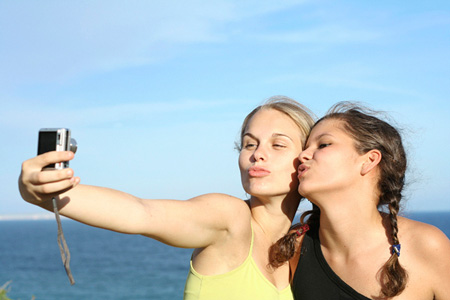
Figure 1. Let’s begin with this photo, ©istockphoto.com/mandygodbehear.
Photos start to yellow after sitting in photo albums for decades. To achieve that look, go to Layer > New Adjustment Layer > Photo Filter. Press OK to use the default Photo Filter 1 layer name. Change the filter to yellow. Change the density to 71%. Press OK (Figure 2).
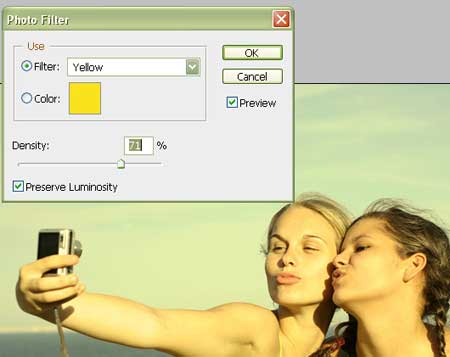
Figure 2.
Click the Background layer in the Layers palette to select it. Go to Layer > New Adjustment Layer > Levels. Press OK to use the default Levels 1 name. Click and drag the grey arrow in the middle to the left and set it to 1.46 (Figure 3).
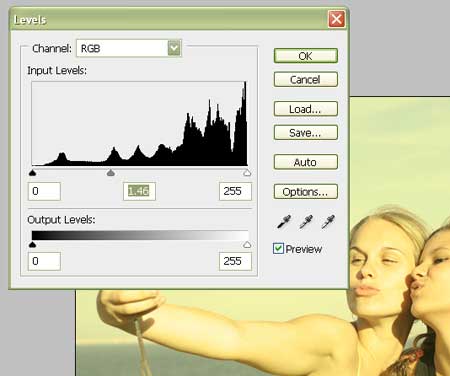
Figure 3.
Next, desaturate the image slightly to make it look like the film has faded. Click the Background layer again to select it in Layers palette. Go to Layers > New Adjustment Layer > Hue/Saturation. Press OK to use the default Levels 1 name. Change the saturation to -28 (Figure 4). Press OK.

Figure 4.
Now, add a subtly worn look with a new layer of noise. Select the eyedropper tool from the toolbar and click somewhere in the background layer. When I clicked, it changed the foreground color to the Web-safe color #e3e6aa. Press the new layer icon on the bottom of the Layers palette to create a new layer (Figure 5). Click-and-drag the new layer above all the other layers, including the adjustment layers. Press Option-Backspace (PC: Alt-Backspace) to fill the new layer with the color you sampled from the Background layer (Figure 6).

Figure 5.
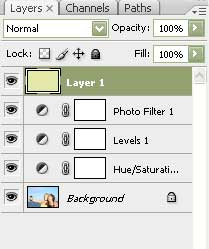
Figure 6.
Go to Filter > Noise > Add Noise and change the settings to those shown in Figure 7. Click OK. Change the layer blending mode of this noise layer to multiply and set the opacity to only 4% (Figure 8).
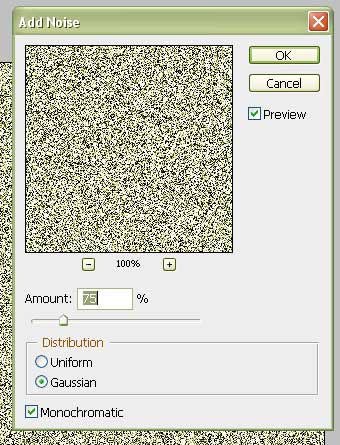
Figure 7.

Figure 8.
Add a slight vignette by selecting the Background layer in the Layers palette and then going to Filter > Distort > Lens Correction. Change the vignette amount to -72. Press OK (Figure 9).
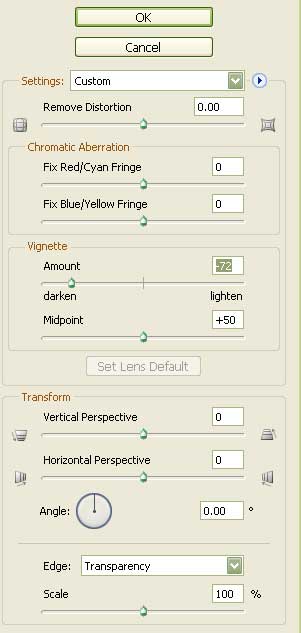
Figure 9.
Now you have a photo that looks like it could have been taken decades ago (Figure 10).
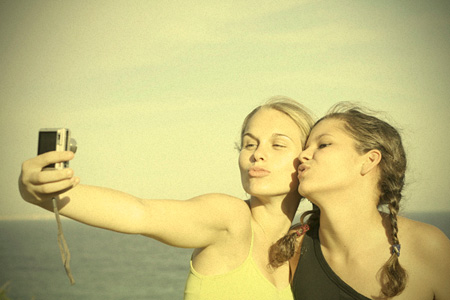
Figure 10.
Technique 2: Channels
There’s another way to achieve a worn look that yields more subtle results. Begin by opening the photo you’d like to use in Photoshop (Figure 11).

Figure 11. © istockphoto.com/Ethan Myerson
Go to Windows > Channels (Figure 12). Select the Green channel and go to Select > All to select the channel’s contents. Go to Edit > Copy, then click the Blue channel and go to Edit > Paste. Click the RGB channel to see what it looks like so far (Figure 13).

Figure 12.
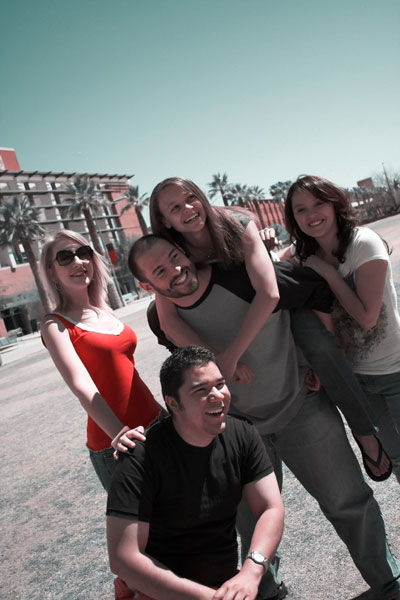
Figure 13.
Click the Layers palette to work on all channels. Add a slight vignette by going to Filter > Distort > Lens Correction. Set the vignette to -14 and click OK (Figure 14).
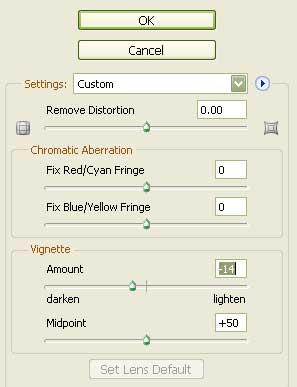
Figure 14.
The clothes may hint at when this photo was taken, but nothing else does (Figure 15)!

Figure 15.
Technique 3: Adjustment Layers and a Polaroid Effect
The channels technique doesn’t look quite right with the color in some photos, such as Figure 16. In those instances, try the following technique.

Figure 16. © istockphoto.com/Dirk Freder
First, duplicate the layer by selecting the Background layer in the Layers palette and pressing Cmd-J (PC: Ctrl-J) (Figure 17).
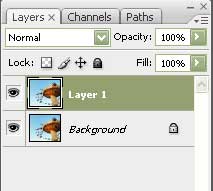
Figure 17.
Now click the Background layer in the Layers palette to select it. Go to Layer > New Adjustment Layer > Photo Filter. Click OK to use the default name Photo Filter 1. Change the Filter to Yellow and the Density to 50% (Figure 18).
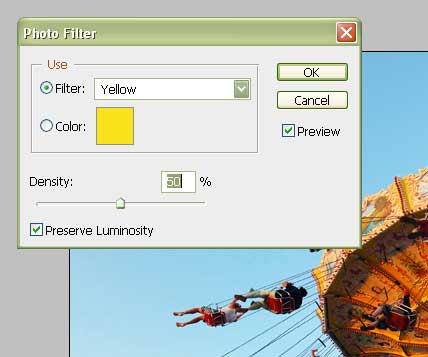
Figure 18.
The image won’t look different because the new layer on top is covering the Background layer you just modified. Click the eye icon next to the top layer to change the visibility of the layer and see the affected bottom layer.
Click the top layer, Layer 1, to select it in the Layers palette. Change the layer blending mode to Color Burn and the opacity to 50% (Figure 19).
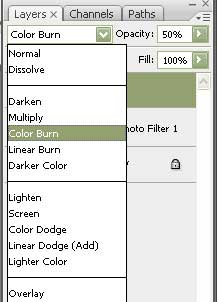
Figure 19.
This creates another retro effect, but let’s take it further by adding a Polaroid border. Make sure the background color (at the bottom of the toolbar) is white, then go to Image > Canvas Size (Figure 20). Changing the image size would resize the image stretching or compressing it. But making the canvas bigger adds space around the original image.
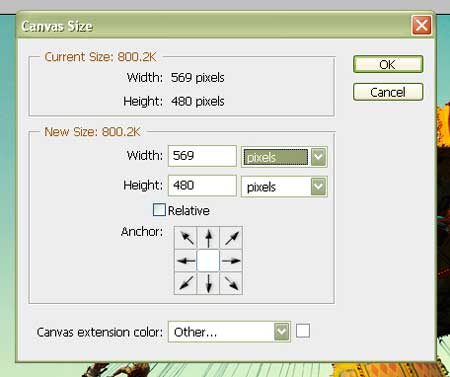
Figure 20.
Add 40 pixels to the width and height (Figure 21). Click OK (Figure 22).

Figure 21.
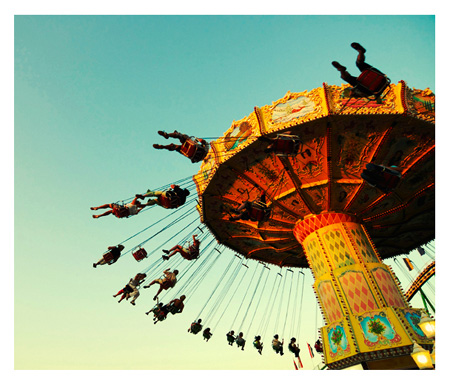
Figure 22.
You need a little bit more white area below the photo to look like a Polaroid, so go back to Image > Canvas Size, click the top middle square in the Anchor area, and add 60 pixels to the height field (Figure 23). Click OK.

Figure 23.
Click the Background layer in the Layers palette and with the Magic Wand tool, click somewhere in the white area. Set the Tolerance to something low, such as 1, to select only the white border (Figure 24).
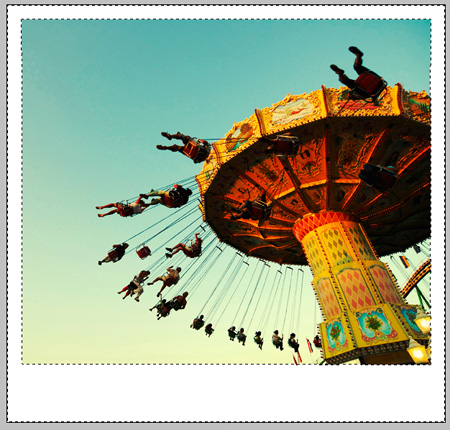
Figure 24.
Click the foreground color on the bottom of the toolbar and set it to a slight yellow-brown color. I set it to color code #e3e6aa. Press OK and go to Filter > Noise > Add Noise. Change the settings to those shown in Figure 25 and press OK.
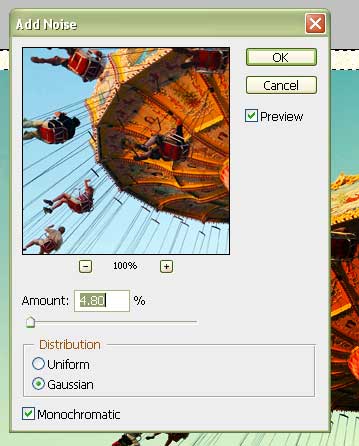
Figure 25.
Now you need to blur the noise slightly. With the border still selected, go to Filter > Blur > Gaussian Blur set the Radius to 2.5 pixels (Figure 26). Press OK.

Figure 26.
This adds a slight blur to the edge of the photo area, which helps add to the aged look (Figure 27).

Figure 27.
This article was last modified on January 5, 2023
This article was first published on February 1, 2008
Commenting is easier and faster when you're logged in!

Recommended for you

Photoshop How-To: Making Warhol-style Images
This story is taken from “Adobe Photoshop CS Creative Studio.” The b...

Top 5 Lightroom 5 Resources
It has been a week since Adobe announced the availability of the Lightroom 5 bet...

Using the Blend Tool in Adobe Illustrator
Illustrator provides many useful methods to create color blends including the Gr...