

There’s been no shortage of enthusiasm for the power and coolness of GREP in InDesign. But for someone coming from a blissfully code-free upbringing, it can be a hard thing to get a handle on. One of the hurdles for anyone learning GREP is that when you do it wrong, there’s not much feedback about what you did wrong. Often there’s no partial success. The expression you write either works or it doesn’t. And when it doesn’t, the silence coming from your machine is deafening. In the past, I’ve recommended that folks check out the GREP tutor at Rorohiko, since it gives you instant feedback as you type. But today it hit me that there’s a way to get some of that same kind of instant feedback right in InDesign by using GREP styles.
To illustrate, take some text and reduce it to plain vanilla [Basic Paragraph] or the like.
Note: some of these screen grabs are squished to the point of illegibility, but just click on them for the full-size versions.

Create a few character styles to make text stand out. I like to apply a thick underline and shift it up so it looks like highlighting.

Select the text frame containing your vanilla text.
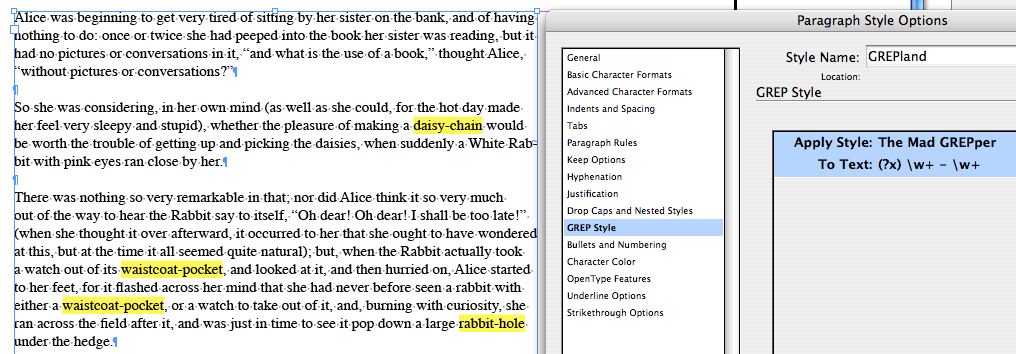
Create a new paragraph style and go to the GREP Style options. Arrange the dialog box so you can see the whole text frame. Make sure the Preview box is checked.
Click on New GREP Style, select one of your character styles, and start experimenting with expressions. Expressiomenting, if you will. Just type in the To Text field, and click anywhere in the general vicinity (outside the field). The character style will be applied to whatever your expression matches so you’ll immediately see what InDesign thinks of your GREP.
This is a nice alternative to entering the expression in Find/Change pressing Find Next repeatedly, because you get to see everything your expression matches at once. Plus, you can compare multiple expressions at the same time, and control the display of the match. You can even write (brief) comments to remind yourself what the expression is matching. Just put the comment inside (?# )

I just wish we had more than one line of space to work with in the dialog box. We have to get this thing opened up in CS5.
Speaking of space, the (?x) at the start of each expression allows me to put spaces in the expression to make it more readable. It also saves me from errors that would result if I accidentally typed a space. Not such big deals with these short expressions, but a lifesaver with the more complex ones. Then if you need to include a real space in an expression, use the Unicode value: \x{20}. Big thanks to Peter Kahrel’s GREP in InDesign CS3 for that one.
Also be aware that when comparing expressions that match the same text, the lower character style wins out.


There are a few limitations to this whole idea of GREP-styles-as-teaching tool.
First, there’s no place to try out a Change To expression. For that, you’re back to Find/Change, or Rorohiko.
Footnotes aren’t included.
Matched locations can’t be highlighted. So for example, if you use ^ to select the start of a paragraph, you won’t see the highlighting until you add something extra to highlight an adjacent character.

Hard returns won’t be highlighted, so you might want to make a character style that can change the appearance of the return character, like change the point size, scaling, or baseline shift, etc.

When you have the expressions you want, you can copy and paste them into the Find/Change dialog. Or keep them as illustrated versions of saved queries. Start a GREP collection. Trade with your friends.
Until Adobe adds a Preview option to the Find/Change dialog box, I think this is a pretty good alternative to help you get your GREP on.
This article was last modified on December 19, 2021
This article was first published on March 25, 2009
Commenting is easier and faster when you're logged in!

Recommended for you

Convert Text to Lowercase with a GREP Utility
InDesign's GREP cannot convert text to lowercase... but that doesn't mean you ca...
Add a Digit with GREP Groups
A simple introduction to grouping GREP expressions shows how easy it is to manip...
Insert a Special Character with GREP Styles
David's back with yet another fun and adventurous grep styles trick.