
A Different Light: An Introduction to Infrared Photography
Learn how to capture images in a whole new light.


This article appears in Issue 15 of CreativePro Magazine.
A few years ago, in my quest to find new ways to represent much photographed subjects and loved-to-death locations, I became drawn to infrared photography. The allure of infrared is that you can photograph light that is beyond the visible spectrum. An infrared image looks different—sometimes radically different, sometimes just slightly so. The viewer may not realize what is different, nor understand why it is different, but they will know immediately that something about the image is unusual. In an age when practically everyone has a good camera in their back pocket, and seemingly everything has been photographed and shared on Instagram a thousand times or more, infrared offers a new way of seeing. For me, it was a new frontier (Figures 1–4).
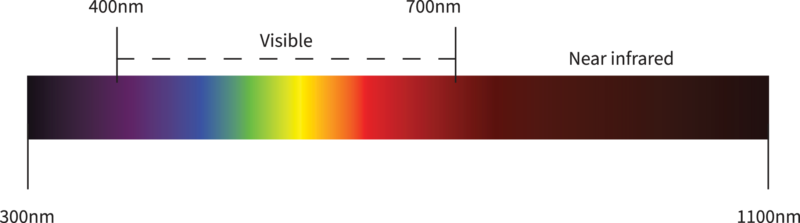
Figure 1. Our eyes can see only a quite narrow wavelength of light between 380 and 700 nanometers. Infrared photography captures the wavelengths between 700 and 1,000 nanometers, usually referred to as “near-infrared.”

Figure 2. The coastguard cottages at Cuckmere Haven, with the backdrop of the Seven Sisters cliffs, are such a popular location for landscape photography that it’s hard to bring anything new to the scene. Shooting in infrared and processing as high-contrast black and white allows a different interpretation.
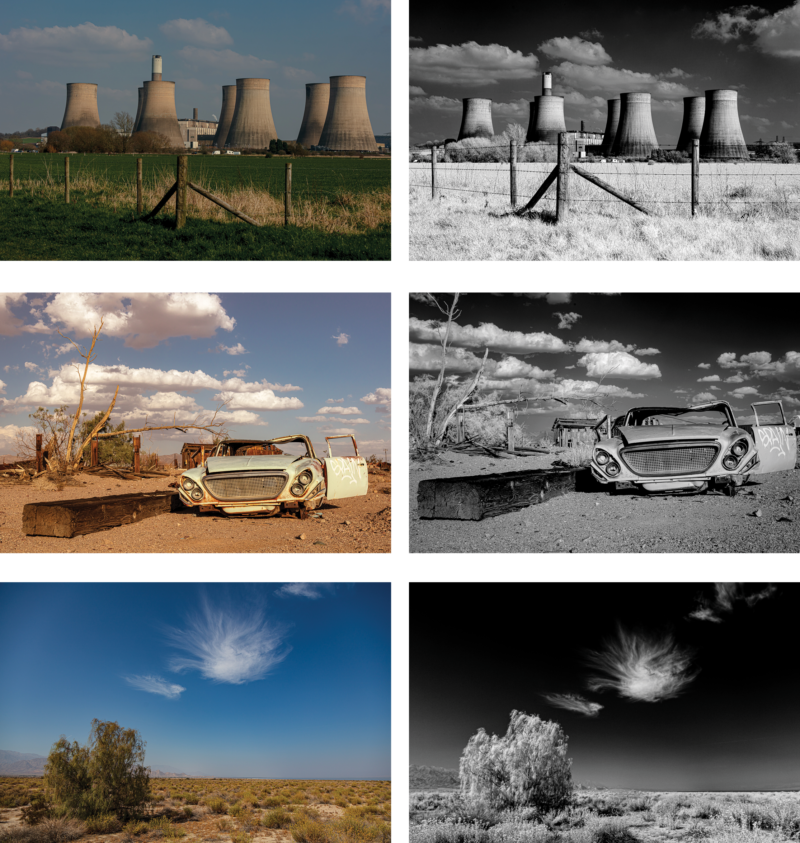
Figure 3. The same scene in color and in infrared black and white—note how much more dramatic the clouds are.
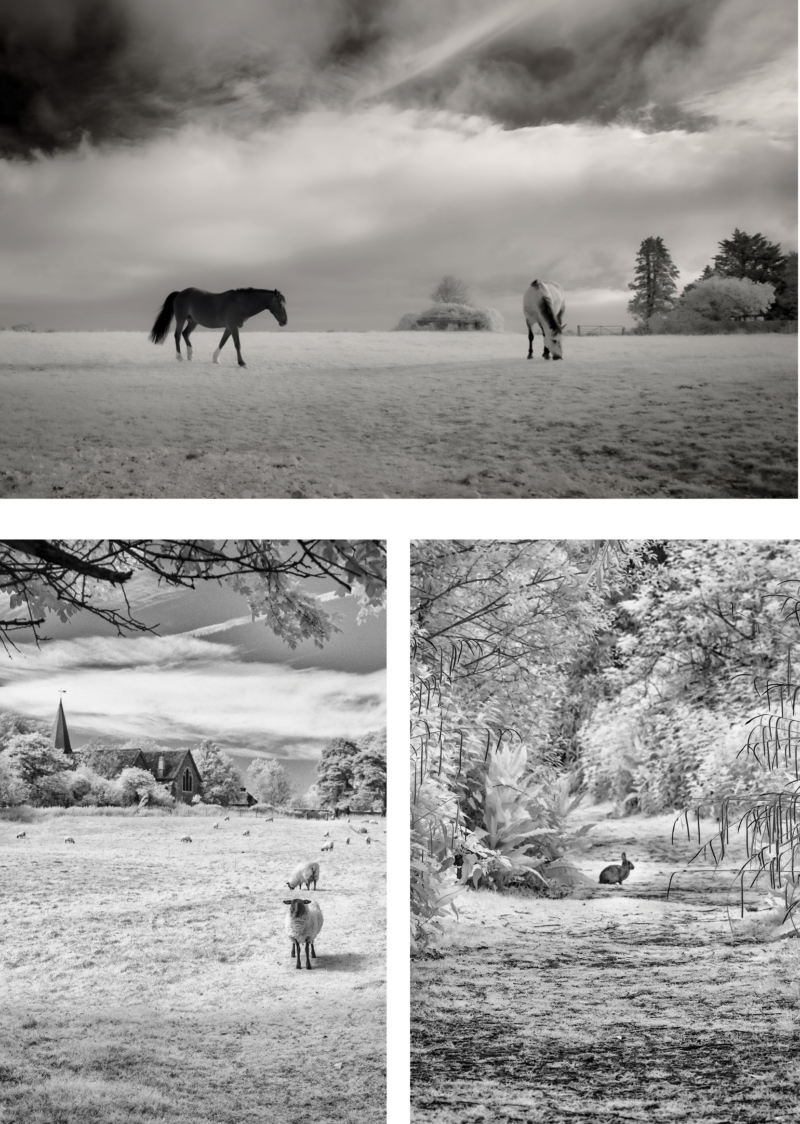
Figure 4. The snowy look of grass and foliage in infrared gives an other-worldly quality to familiar scenes.
I was drawn not only to the dramatic, occasionally ethereal, often surreal quality of infrared images, but also to the process of making them. Specifically, I was intrigued by the fact that infrared images are harder to capture than regular color images. They can’t be made with a smartphone, require more trial and error, and need some extra processing work before they’re ready for sharing. Don’t get me wrong—I love the flexibility and convenience of digital photography, but sometimes I feel it’s a bit too quick and easy, and that it’s making us into lazy photographers. Shooting in infrared demands more planning. What you see is not what you get, and that’s the attraction. And then there’s the satisfaction—similar to the delayed gratification of film photography—that comes from having to transpose what you see with your eye to how the finished image will turn out (Figures 5 and 6).
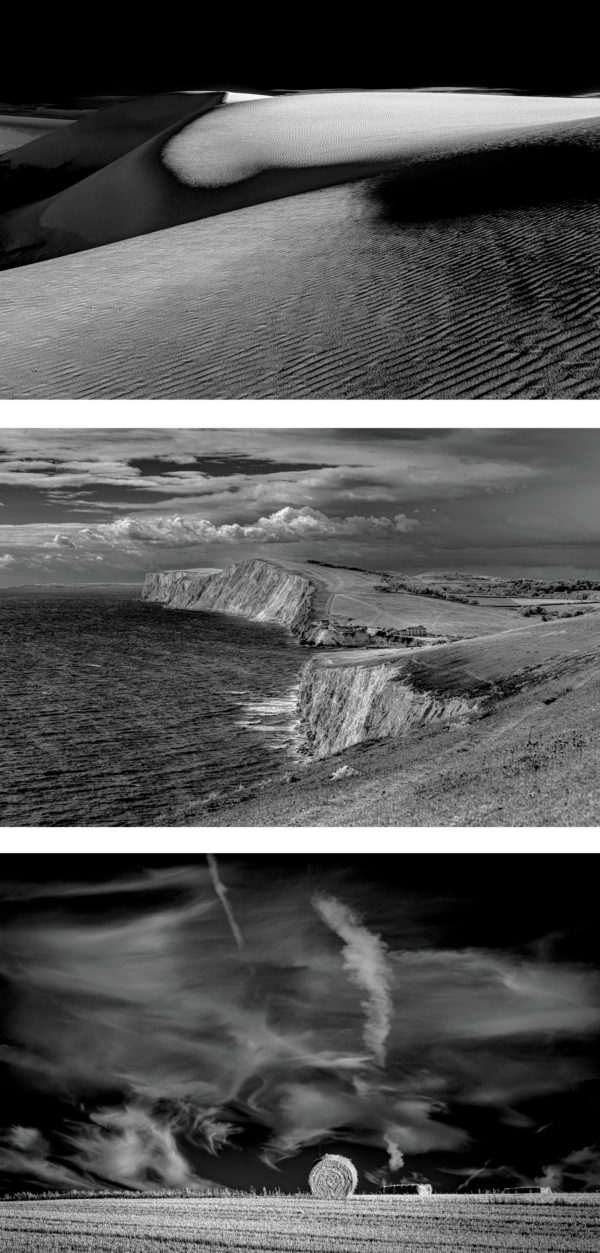
Figure 5. Black skies, black seas, and dramatic clouds are hallmarks of infrared photography.

Figure 6. Trees are a great subject for high-contrast black-and-white infrared.
When you shoot with a regular digital camera, you know pretty much what you’re going to get. That’s not true with invisible light. There is a romance and a poetry to revealing something that is always there, but out of sight. You are showing a world that is hiding in plain sight. With experience you can predict how a subject will translate to infrared, but there’s always an element of surprise.
You don’t necessarily need to know the physics, but in a nutshell, here’s how it works: Camera sensors are inherently sensitive to infrared light and so use infrared blockers. Having a camera converted to infrared involves removing the infrared blocker in front of the sensor and replacing it with a filter that blocks visible light instead.
There are two main types of conversion: dedicated infrared and full spectrum. When I had my camera converted a few years ago, I chose a 720nm conversion because my main interest was creating black-and-white images. Today, a full spectrum conversion, where the filter is replaced with a piece of clear glass, making the camera sensitive to the full spectrum of light (UV, visible, and infrared), might be the best option. You can use external filters to narrow the spectrum to a particular range, giving you multiple options with one camera (Figure 7).
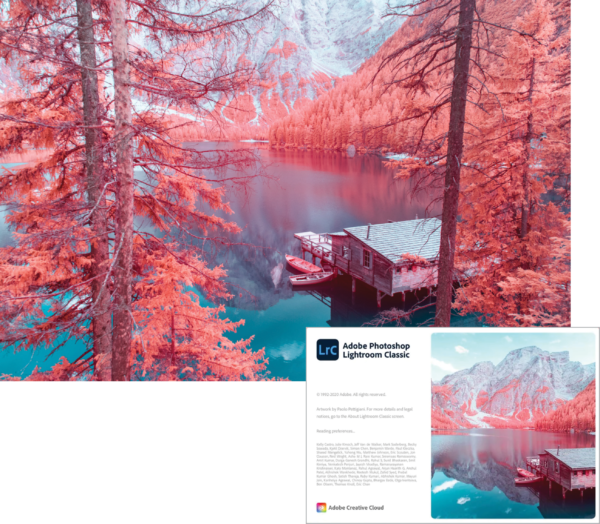
Figure 7. A “false color” infrared image by Paolo Pettigiani was used as the 2021 Lightroom Classic splash screen.
Preparing for the Challenges of Infrared
Infrared images are different, and they need to be treated differently. The pictures you get from your converted camera will start out looking strange—there’s a reason those filters are there in the first place—and you’ll need to take some steps to harness this strangeness. Because camera white balance is calibrated to visible light, when you venture outside the visible light spectrum, the preset white balance modes won’t work. So you’ll need to get familiar with your camera’s custom white balance mode. Start by pointing your camera to the ground and capture an evenly lit image of grass, making sure everything in the frame is green. Then, in your camera’s white balance settings select the image as the source for the custom white balance.
Having addressed the custom white balance, you’ll also need a custom profile for the camera. Infrared images start out with a strong red cast. The light is literally off the scale of Lightroom or Adobe Camera Raw’s color temperature sliders. Using the Adobe DNG Profile Editor you can generate a custom profile for your camera to extend the temperature scale to accommodate infrared light. Note that even if you intend to create only black-and-white images, you’ll still get a better black and white if you start with the correct white balance (Figure 8).

Figure 8a. Creating a custom profile in the DNG Profile Editor
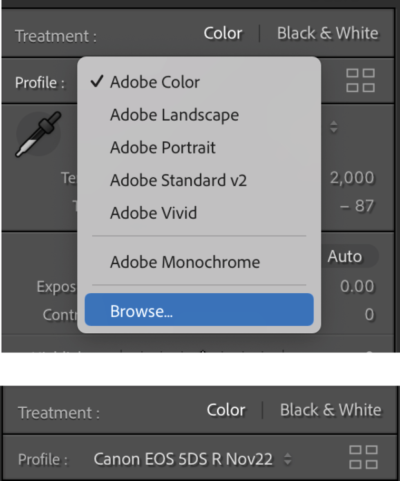
Figure 8b. Choosing the custom profile in Lightroom Classic
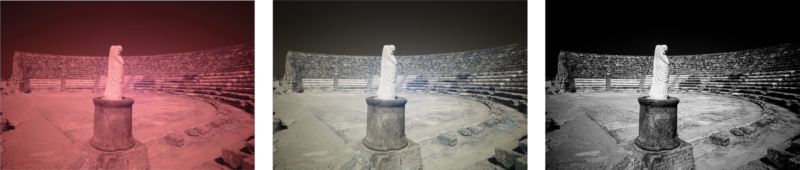
Figure 8c. The image before the custom profile is applied, with the custom profile, and converted to a high-contrast black and white
To create the profile, having downloaded and installed the DNG Profile Editor, choose a raw-format infrared image that features a lot of foliage. In Lightroom, export the unedited picture by right-clicking it and choosing Export > Export to DNG.
Open the image in the DNG Profile Editor. Click the Color Matrices tab, and drag the Temperature slider all the way to the left.
Next, export the profile, by choosing File > Export Profile, and save it in the correct folder for your operating system:
- Windows: C:\Users\[username]\AppData\Roaming\Adobe\CameraRaw\CameraProfiles
- macOS: /Users/[username]/Library/Application Support/Adobe/Camera Raw/Camera Profiles
You’ll need to quit and restart Lightroom for the profile to show up. In the Profile Browser, click your profile to apply it to the current picture. Note that profiles are camera-specific and will be available only when you work on pictures taken with that camera model.
Choosing Subjects for Infrared
There’s a reason why the most common subject for infrared photography is landscapes. Chlorophyll in leaves makes trees, forests, and fields glow when captured with infrared light, giving the image a dreamlike quality (known as the Wood Effect, after Robert W. Wood, who pioneered infrared photography in the early 20th century). Combine this with the very dark skies that are another feature of infrared images, and you can get some dramatic results (Figure 9).
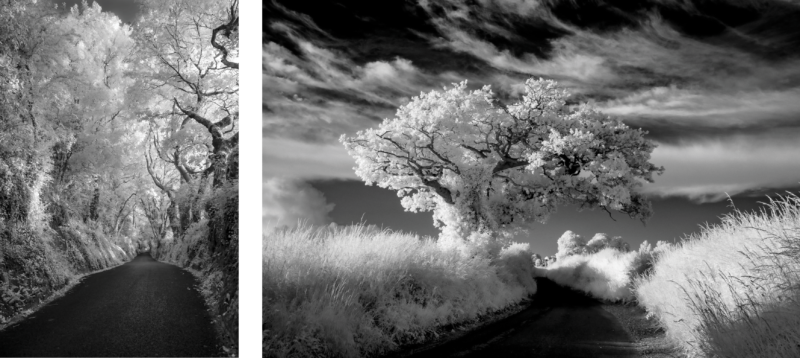
Figure 9. Foliage glows in infrared, giving an ethereal look to the image.
Architecture is another good subject for infrared. Desaturate the infrared color to create a vintage look or convert to black and white and heighten the contrast to emphasize the shape of the structure against a dark sky (Figures 10 and 11).
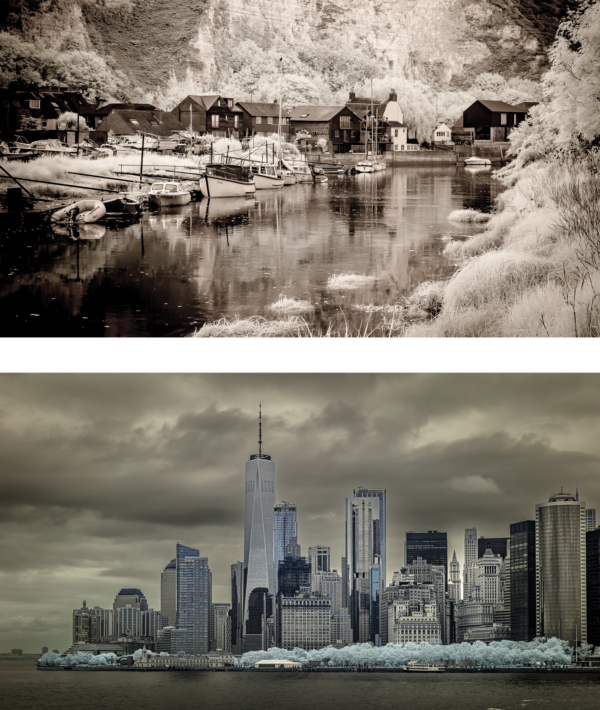
Figure 10. Desaturating, but retaining a hint of, the infrared color
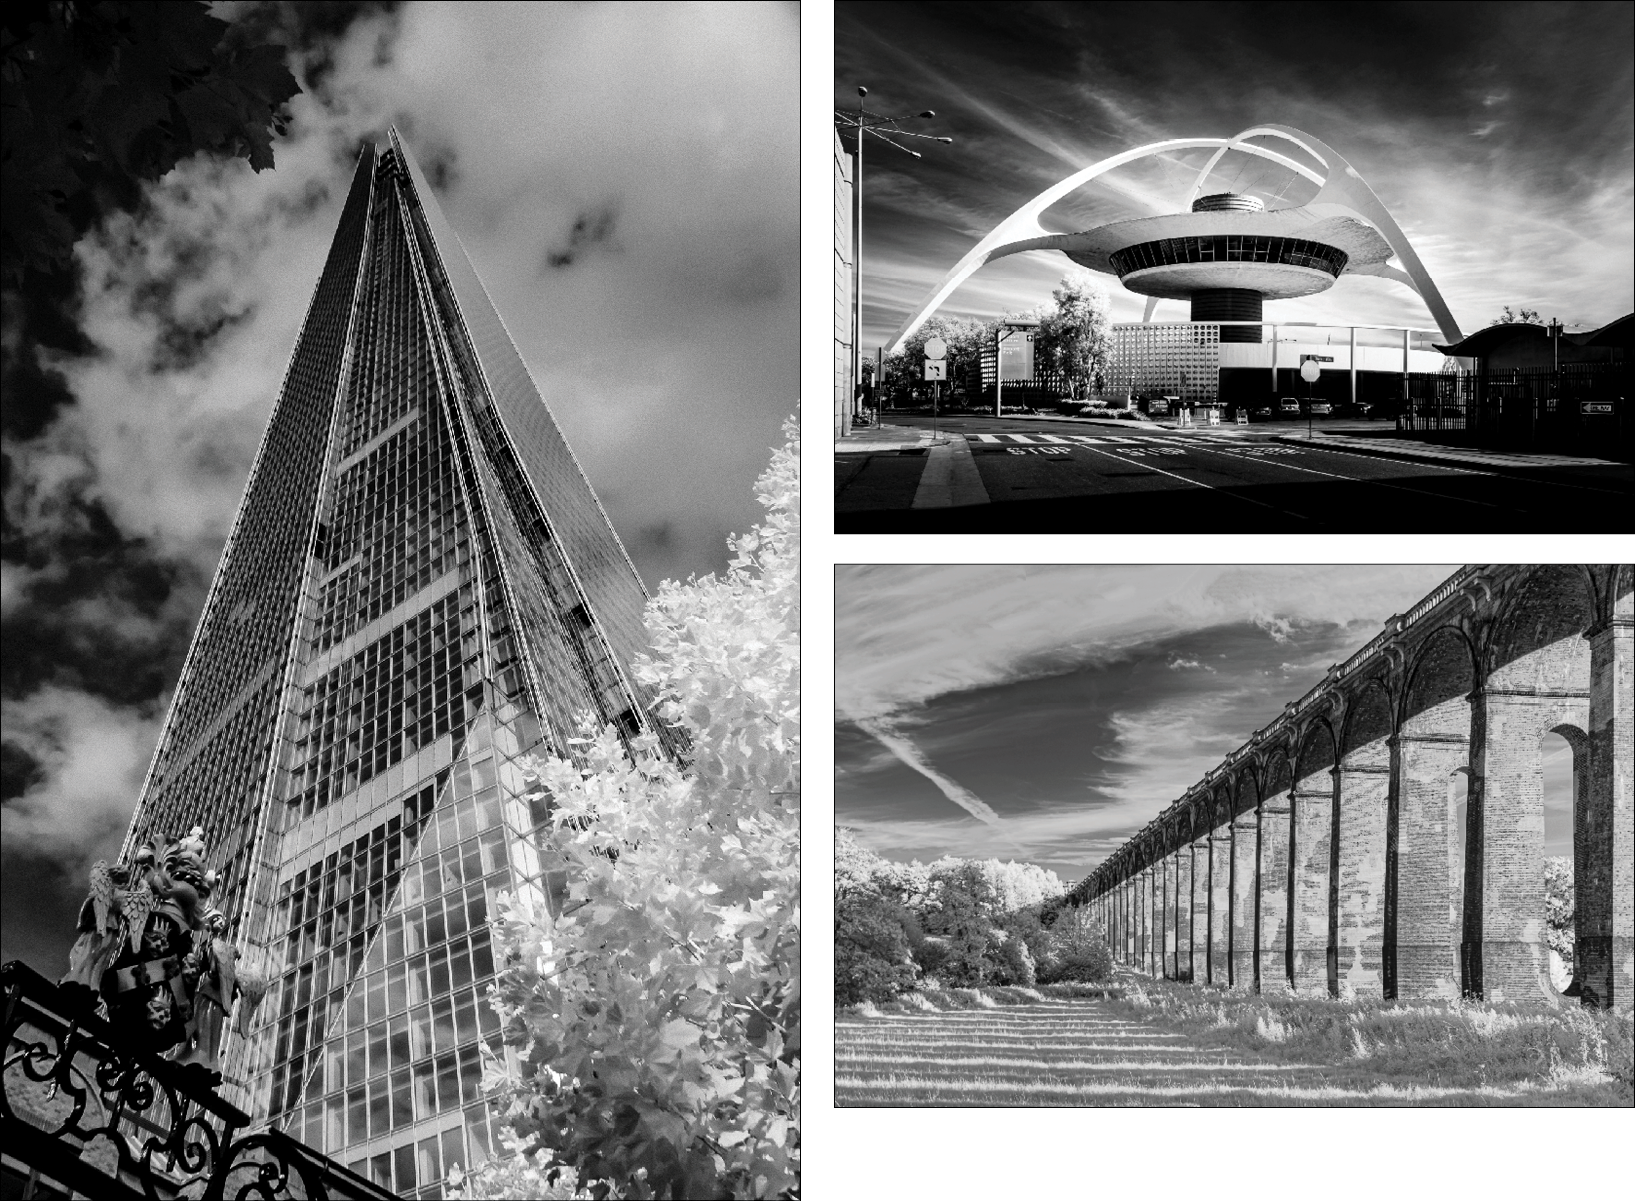
Figure 11. Architecture makes a great subject for black-and-white infrared.
Humans tend to look ghoulish in infrared with milky skin and black eyes. That said, used judiciously IR can add drama to a people shot where a conventional image might be prosaic (Figure 12).
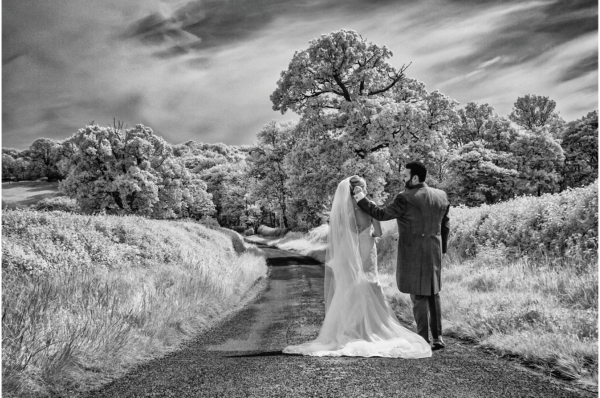
Figure 12. Infrared is typically not flattering to people, but shot from behind—and from a distance—it can bring a fresh take.
With color photography, the typical advice is to avoid shooting at noon on a bright sunny day when the light is unflattering and shadows are harsh, but this is the best time for infrared photography—especially on those days with puffy, Simpsons-like clouds, which can be biblical in infrared (Figure 13).

Figure 13. It’s all about the clouds—more contrasty in infrared because of the darkness of the skies.
While most infrared images end up black and white, it’s also possible to manipulate the infrared color for “false color” effects—admittedly, something of an acquired taste. The most common treatment is to use a Channel Mixer adjustment in Photoshop, swapping the Red and Blue channels. This gives a pinkish hue to foliage and restores skies to blue. Another useful recipe is to use an Invert adjustment applied in the Color blending mode. Combine these techniques with layer masking for more flexibility. And then every once in a while, the actual infrared color that you get in camera looks so good that little to no color tweaking is necessary (Figures 14–17).
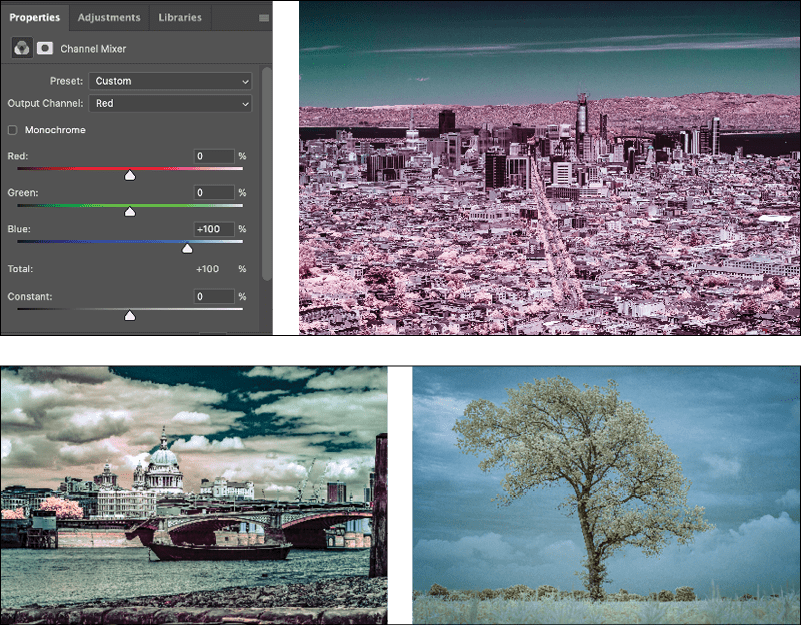
Figure 14. False color images made by using a red-blue swap Channel Mixer adjustment in Photoshop
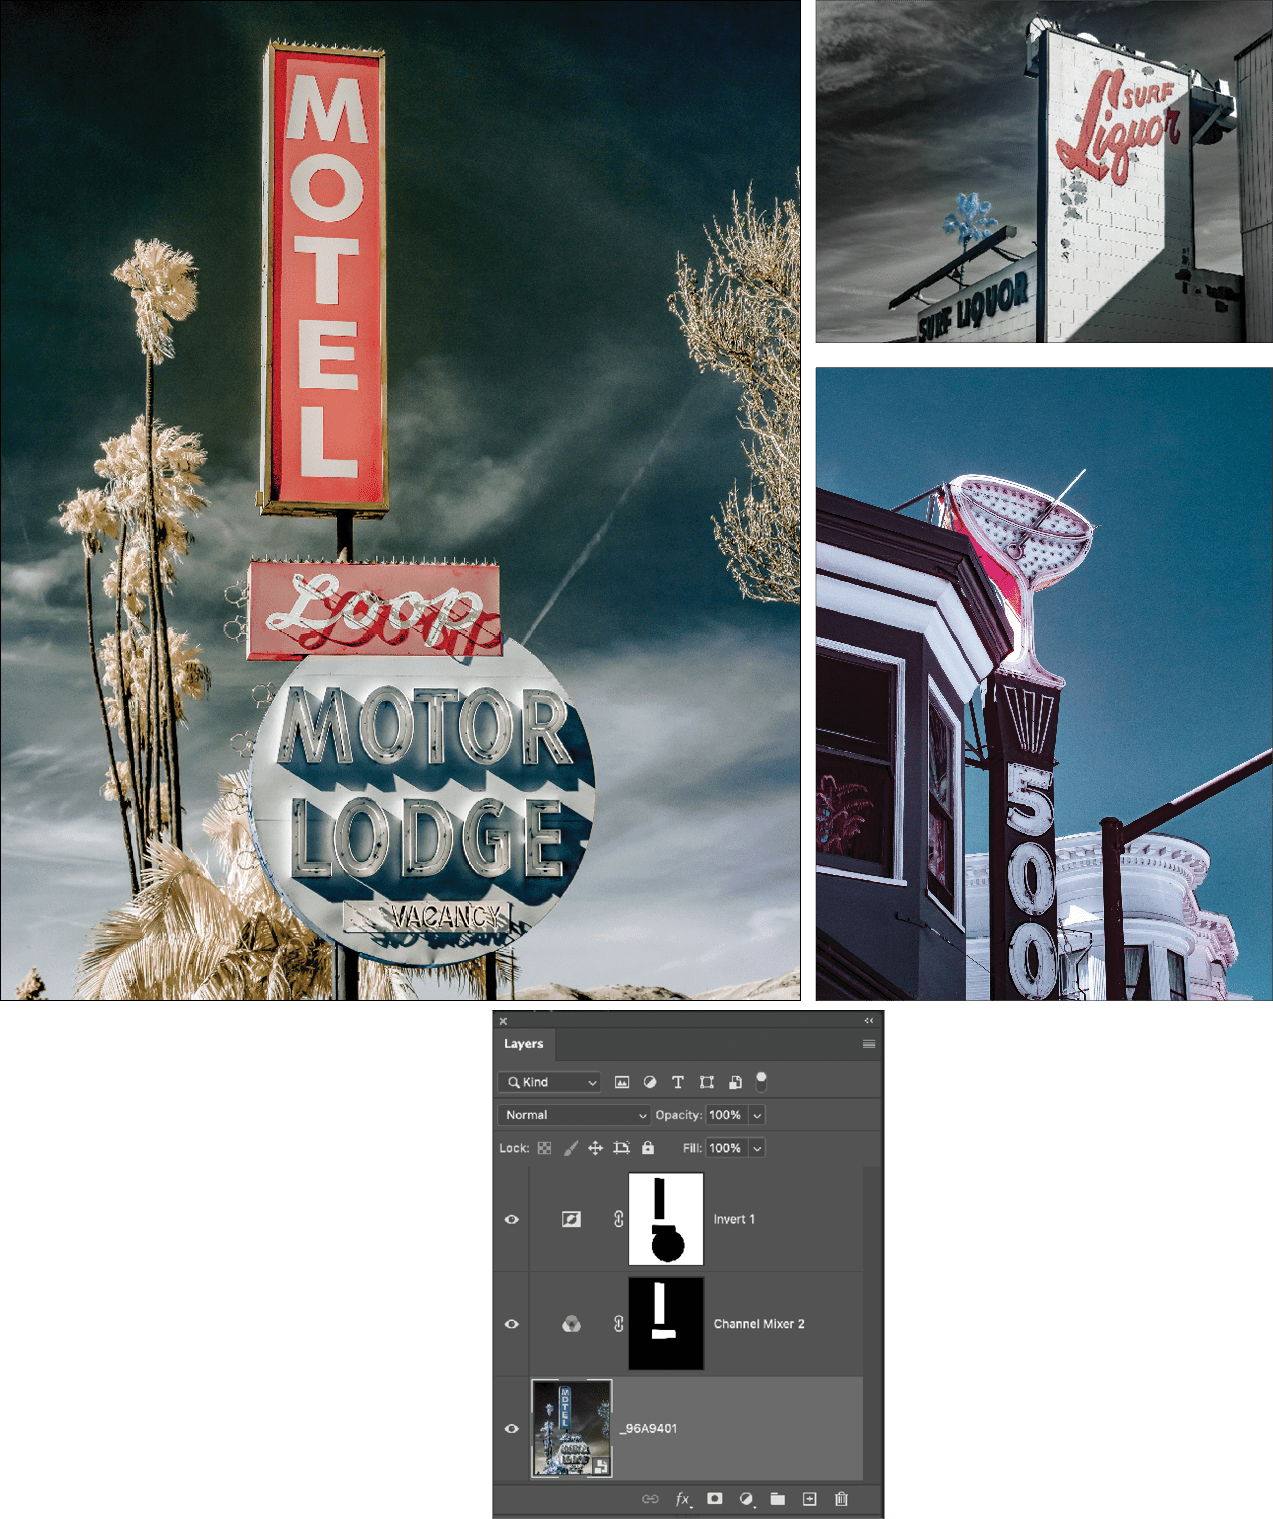
Figure 15. Adding a surreal feel to vintage signage—combining a Channel Mixer adjustment with an Invert adjustment and masking

Figure 16. Using an Invert adjustment layer—applied in the Color blending mode to restore skies to blue
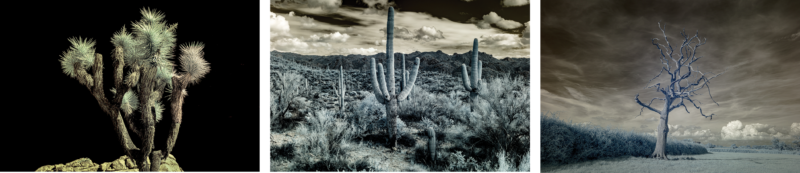
Figure 17. Embracing the in-camera infrared color
_
By far, the most flexible way to shoot infrared is to use a camera converted for that purpose. You can use the converted camera normally—handheld, with normal shutter speeds, normal composition through the viewfinder, and autofocus. But it must be said that converting a camera is not for the faint of heart: You send the camera to a dedicated service capable of making the conversion. It’s not cheap (around $300), nor is it reversible. Once converted, the camera is a one-trick pony and that’s all it will do. For that reason, those wanting to test the water typically convert an old camera that would otherwise be gathering dust.
In the US, two companies that have a big presence in the field are LifePixel and Kolari Vision. In the UK, I used Protech Photographic, who are local to me, and they did a great job.
A less invasive and cheaper approach to infrared photography is to use your normal camera with filters. The downside of this method is that it requires long exposure times, making a tripod essential, and because the filter is necessarily opaque, composing the image is difficult.
Because infrared-sensitive film is almost impossible to find, infrared film photography is impractical.
In a pinch, you can fake infrared in Photoshop with a Black & White adjustment layer preset (Figure 18). The results are okay, if you want a contrasty black-and-white image, but no substitute for the real thing.
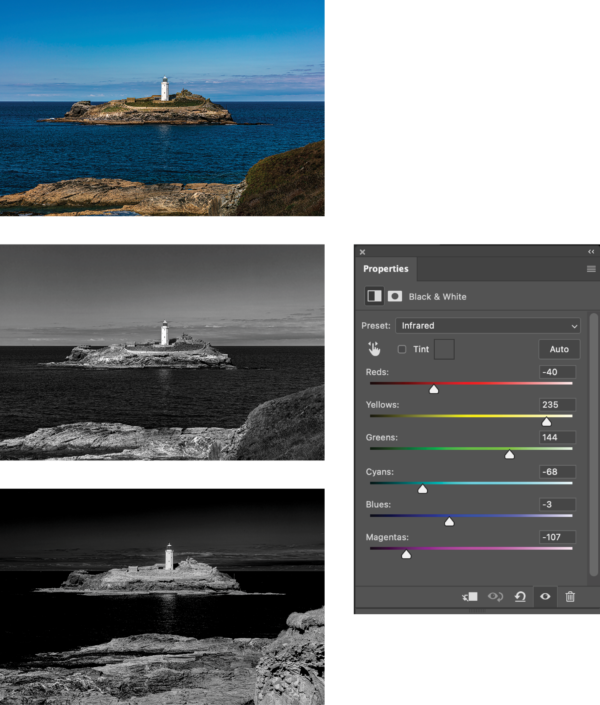
Figure 18. The color image converted to “infrared” using a Black & White adjustment layer in Photoshop, and the same scene shot on an infrared converted camera
Tips for Shooting Infrared
The first, perhaps obvious, tip is to shoot raw rather than JPEG or TIFF. This gives you the most data to work with and the flexibility of changing the image’s white balance.
When choosing camera settings, your camera’s metering will work but won’t always be accurate. Exposure meters are calibrated for visible light and won’t be accurate if you’re working with light waves from outside that spectrum. There will be some trial and error, but you quickly learn to compensate. I’ve found that metering through Live View is more accurate than metering through the viewfinder.
Lens flare can be an issue, much more so than when working with visible light, so be sure to keep your back to the sun. Certain lenses are more prone to this than others, so do some research to find those that will give you fewer problems.
There’s a lively and supportive infrared photography community online. Two Instagram accounts that I find consistently inspiring are starlitwaltz and infrared_global. Start following a few infrared accounts, and you’ll be inundated with recommendations for others in no time.
If this article has piqued your interest, maybe it’s time to breathe new life into an old camera, convert to it to infrared, and explore a different way of seeing things.
Commenting is easier and faster when you're logged in!

Recommended for you

Backups for Busy Creatives
An overview of how to prepare for a data emergency, from the literal least you c...
5 Tips for Beginning With DSLR Video
Getting into DSLR Video for the first time can feel a bit overwhelming. While ha...

The Unexpected Rebirth of Adobe DNG
The Adobe Digital Negative (DNG) format started out as an open file format for s...