

Excerpted from The CSS Detective Guide: Tricks for solving tough CSS mysteries by Denise R. Jacobs. Copyright © 2010. Used with permission of Pearson Education, Inc. and New Riders.
No matter what your level of expertise is with coding CSS, you’ll probably run up against some typical miscreants that cause layout issues. With a bit of foreknowledge, however, you can code proactively and prevent CSS crimes from being committed in your code. In case you don’t catch the problems before they happen, I’ve provided some solid troubleshooting tips as well.
Prepare Yourself with Structure and Interrogation Know-How
The first step in preventing the usual culprits from page layout foul play is to create a structured environment in your code. Having standards-based, well-formed, and organized code goes a long way toward averting misdeeds. Following are five good tips for establishing a zero-tolerance policy for bugs and problems.
1. Get Everything in Order
Putting your CSS declarations into alphabetical order is a great way to set the stage for clean code and fewer problems. Why? Because your style declarations will be easier to locate. Don’t believe me? Look for the width property in these two examples:
Example 1:
.login {
margin-top: 5px;
line-height: 1.5em;
padding-left: 5px;
float: right;
list-style-type: none;
width: 80px;
font-weight: bold;
border-left: 1px solid #69824d;
}
Example 2:
.login {
border-left: 1px solid #69824d;
float: right;
font-weight: bold;
line-height: 1.5em;
list-style-type: none;
margin-top: 5px;
padding-left: 5px;
width: 80px;
}
Of course you found the property in each example, but knowing that width was going to be at the bottom of one of the examples helped you to find it more easily, didn’t it?
2. Clearly Indicate Hierarchy
Another way to maintain control of your coding environment (which acts as a preventive measure against later problems) is to indent style declarations. My preferred method is to match the style declarations to the hierarchy of the HTML document. Suppose you have an HTML document with this hierarchy and structure:
<!DOCTYPE html PUBLIC "-//W3C//DTD XHTML 1.0 Strict//EN"
"https://www.w3.org/TR/xhtml1/DTD/xhtml1-strict.dtd">
 <html xmlns="https://www.w3.org/1999/xhtml" xml:lang="en" lang="en">
<head>
<meta http-equiv="Content-Type"
	content="text/html; charset=utf-8" />
<title>Example Website Title</title>
</head>
<body>
<div id="pagewrap">
    <div id="header">
		<h1>Website Title</h1>
       	<ul id="navigation">
	        <li><a href="#">Home</a></li>
	<li><a href="#">About</a></li>
	<li><a href="#">Contact</a></li>
      </ul>
	</div><!-- end #header -->
	<div id="contentwrap">
		<div id="maincontent">
			<h2>Main Content Title</h2>
         	<p>Main content, which is so much more
			important than the secondary content that it
			makes one teary with emotion.</p>
			<p>More main content, which has you glued
			to the screen, reading every new word with sweet
			anticipation.</p>
		</div><!-- end #maincontent -->
		 <div id="secondarycontent">
         <h3>Sidebar Title</h3>
         <p>Sidebar content, which is not as important
		as the primary content (which is why it is in the
		sidebar)</p>
	</div><!-- end #secondarycontent -->
	</div><!-- end #cotentwrap -->
	<div id="footer">
		<p>standard copyright and footer information</p>
</div><!-- end #footer -->
</div><!-- end #container -->
</body>
</html>
You would structure the stylesheet style declarations like this:
body {...}
    #pagewrap {...}
       #header {...}
       #nav {...}
          #nav li {...}
    #contentwrap {...}
       #maincontent {...}
       #secondcontent {...}
    #footer {...}
This kind of structure in the stylesheet not only reflects the document hierarchy, but helps you to find your styles more easily.
3. Make Comments
Comments are the unsung heroes of stylesheet organization and prospective bug management. Comments in stylesheets are used for many purposes, such as writing notating styles for yourself or anyone else who may be working in the document:
font-size: 1.2em;
 /* font size change from original 1.25em */
Comments are also used to create sections in the stylesheet for better organization:
/* ---- Content Wrap Section Styles ---- */
    #contentwrap {...}
       #maincontent {...}
       #secondcontent {...}
4. Maintain Neutrality
You may have gotten to the point in your code where you’ve detected a de facto problem or one that’s waiting to happen. There are a couple of ways to take out potential code offenders.
Just as you can use comments to notate and organize your stylesheet, you can use them to remove pieces of code while troubleshooting:
#pagewrap {
 /* background: transparent url(bg_design.png) top center no-repeat;
 */ border: 1px solid #eee;
 margin: 0 auto;
 padding: 0;
 width: 990px;
}
Another good way to incapacitate styles for an element is to add x- in front of the selector:
x-#navigation {
 border: 5px solid #aaa;
 color: #456829;
 margin: 10px 5px;
 padding: 0;
 width: 350px;
 }
This is a quick way to disconnect the style from the element on the page, helping you get to the bottom of any issues in the document that much faster.
5. Establish a Perimeter
A final tool in your arsenal against delinquent styles and wayward elements is to box them in and show their boundaries. By adding either the border or outline property to the style declaration block, you can clearly delineate the periphery of the element. Here’s an example using border:
#secondcontent {
 border: 1px dotted blue;
 font-size: .90em;
 float: right;
 margin: 0;
 padding: 0;
 width: 250px;
 }
Or you can use outline:
#secondcontent {
 outline: 1px dotted green;
 font-size: .90em; float: right;
 margin: 0;
 padding: 0;
 width: 250px; }
NOTE: The border and outline colors are included in the color names on purpose. Why? If you normally use hexadecimal or RGB color codes in your CSS, you’ll know that the styles with color names are for testing purposes only. The outline property is positioned out of alphabetical order for the same reason to indicate that the declaration is temporary and for testing only.
What’s the difference between border and outline? A border is a component of the box model, so giving an element a border adds to the dimensions of the element. In contrast, outline is not part of the box model. Instead, an outline is drawn on top of the element’s box. Thus, the outline property doesn’t add to the dimension of the element.
Which technique is better? That depends on which browser you’re using for testing. outline is great for modern browsers, but isn’t supported by Internet Explorer 6 and 7. For delineating elements in these older browsers, border is a better bet.
Page Layout Misdemeanors: Bringing the Usual Suspects to Justice
Now you have some tools to get to the bottom of layout problems. Unfortunately, your page still displays some of these common issues, and you aren’t quite sure of the problem. Here’s an overview of five of the most common problems, their sources, and solutions for fixing them.
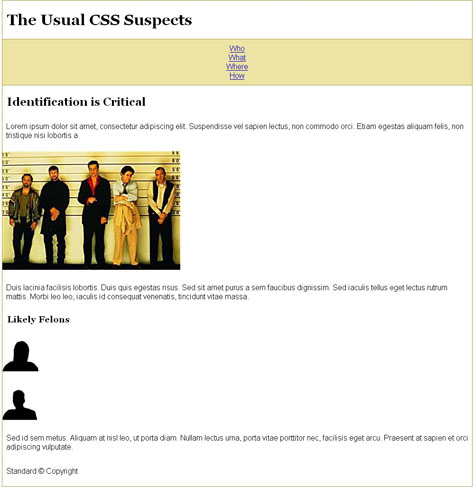
Elements Lack Style
Issue: The page styles show up until a certain point; after that, the styles aren’t rendering (see Figure 1).

Culprit: Author error: Omissions, mispelingz, and is syntax bad.
Often the little details can make all the difference in the world. A missing bracket at the end of a style declaration block is a major game-changer, because its absence tells the browser that the style block is unfinished, and therefore none of the styles following that point in the code will render. Code like the following will cause problems for everything after the last line:
#nav {
 background-color: #EDE3A5;
 border-top: 1px solid #AA9B4A;
 list-style-type: none;
 margin: 0;
 padding: 10px 0;
 text-align: center;
Misspelled selectors, properties, and values all have a similar (although less dramatic) effect. Misspelled selectors cause the styles of the entire declaration block to be ignored. However, the effect of a misspelled property or value, or a missing closing semicolon, is limited to that particular style declaration not the entire selection block.
Finally, bad syntax will render your styles ineffective. Keep an eye out for these common mistakes:
* Incorrect syntax of shorthand styles (many shorthand properties require values for the style to be applied):
No:
#promo {border: solid black;}
Yes:
#promo {border: 1px solid black;}
* Problems with the syntax of complex selectors:
Are you sure?
.last li #footer {text-align: right;}
Looking good!
#footer li.last {text-align: right;}
Starting a selector name with a number:
Not so much:
#5mistakes {padding: 0;} #fivemistakes {padding: 0;}
Solution: a href=”https://qa-dev.w3.org:8001/css-validator/”>Validating your CSS code is the easiest way to catch author errors and is well worth incorporating into your workflow. Humans sometimes make mistakes. Luckily, we have applications that can catch them!
Elements Won’t Go Where They’re Told
Issue: You’re trying to center an element, and it just won’t go there (see Figure 2).
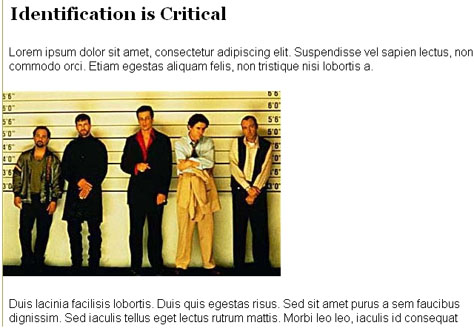
Culprit: Your element isn’t fully defined, and thus the browser doesn’t have enough information to render the style.
.centeredimg {
 margin: 0 auto;
 width: 380px;
 }
 ...
<div class="centeredimg">
 <img src="police-line-up.jpg" alt="line-up" />
 </div>
Solution: If you’re using margin-left: auto; margin-right: auto; to center your element, remember that the browser also needs the width of the element to be able to calculate how much to offset the left and right margins:
.centeredimg {
 margin: 0 auto;
 width: 380px;
 }
NOTE: Resist the urge to use text-align: center. This property should be reserved for centering text inside an element.
Make sure that you know the properties and how they work. It may help to revisit the CSS specifications.
Mystery Whitespace
Issue: There’s extra space around your element (see Figure 3). What gives?

Culprit: Margin or padding values are not explicit.
Browsers are programmed with default values for margins and padding for page elements. Chances are that the elements in your specific design call for totally different values. If you don’t make the margins or padding around elements explicit, the extra space may stem from inheriting and displaying the default values rather than your desired values.
Solution: Employ a CSS reset to establish the baseline values for particular elements on the page, and then style the desired element; alternatively, you can just style the element with the needed values directly. Either way, you’ll get the correct amount of space (or lack thereof) around your element.
Element Overlaps Text/Borders
Issue: An image floated to the side of text overlaps the container’s border, which wasn’t your intention (see Figure 4).
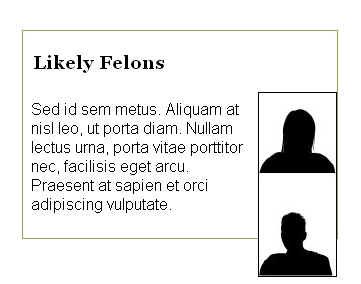
Culprit: Uncontained floats.
Floats need to be contained properly inside of the parent element, or the parent will “collapse”; that is, the parent will shrink to the size of its content, except for that of its float.
Solution: For the float to be shown entirely within the parent container, the float needs to be cleared. There are many ways to clear floats, but I’ll share these two popular techniques:
* Float (nearly) Everything (FnE): If the parent container is itself a float, it will contain the child float.
* Easy clear: With the “easy clear” method, you create an entity with the generated content property and then apply the clear property to it. You style the entity to take up no space and disappear. On the page, it’s invisible, but it forces your floated element to clear, and thus forces the parent to contain it properly.
The traditional easy-clear is usually structured as follows:
.clearfix {display: inline-block;}
 .clearfix:after {
 clear: both;
 content: ".";
 display: block;
 font-size: 0;
 height: 0;
 visibility: hidden;
 }
NOTE: The period (“.”) is the generated content: It has neither size nor height, and is hidden.
Floats Drop on Page
Issue: You’ve calculated the numbers correctly, but one of the floats still drops below the intended space (see Figure 5).

Culprit: Double-margin float bug (IE6).
If you have the pleasure of having to code for IE6 because of your site’s audience, then you’ll probably encounter the double-margin float bug. This bug comes from having a margin value set on the same side where a element is floated. Suppose an element has styles like this:
#secondcontent {
 border: 1px solid #33cc99;
 float: right;
 margin: 15px 15px 0 0;
 width: 300px;
 }
Then the double-margin float bug will turn the 15-pixel right margin into 30 pixels! That additional space will most likely cause the float to drop down on the page and break the layout.
Solution: IE6 is becoming less of a concern as more users finally adopt newer browsers, but this problem still needs to be addressed. The quick-and-easy solution is to add the following to your element’s code:
#secondcontent {
 border: 1px solid #33cc99;
 display: inline;
 float: right;
 margin: 15px 15px 0 0;
 width: 300px;
 }
This addition will fix the problem.
Book ‘Em, Danno!
By learning these techniques and pointers, you’re well on your way to wrestling problems to the ground before they cause irreparable damage to your page layouts. Staying organized, knowing how to remove styles when necessary, and shining a light on errant elements are necessary tricks to have up your sleeve. Staying abreast of the latest solutions to common problems also can help you to avoid those troubles in the future.
Excerpted from The CSS Detective Guide: Tricks for solving tough CSS mysteries by Denise R. Jacobs. Copyright © 2010. Used with permission of Pearson Education, Inc. and New Riders.
This article was last modified on December 17, 2022
This article was first published on June 7, 2010
Commenting is easier and faster when you're logged in!

Recommended for you

Interview with Sabine Lenz, The Paper Queen
Q&A with Sabine Lenz, who is presenting at CreativePro Week 2025

How to Add Slide Numbers and Footers in PowerPoint
Learn how to add numbers and footers to your PowerPoint slides, customize the in...

RF and RM Submissions, Now at Inmagine!
Royalty-Free stock photo library Inmagine Corp LLC is now accepting submissions...