

In a recent podcast, David and I were grousing about the Pencil tool and how it’s basically useless (well, compared to other InDesign tools, at least). But we soon received an e-mail from designer/InDesign trainer Carolyn Casey who told us about a neat way her co-worker uses the tool for initial layouts.
Carolyn explained:
We work in text book publishing and work with low res jpegs for the initial layout. We do lots of pop-silos and vignettes. I would always do a quick path in Photoshop, then drop the image in the page.
My co-worker uses the pencil tool to make a quick silo with the pencil tool in InDesign. She starts with a rectangle picture frame, then clicks on the edge of the frame and drags the shape out with the pencil tool. As long as you connect with the other side of the frame, you can create a custom closed path. You can go back with the smooth tool to refine the shape, if necessary.
I had dismissed the Pencil tool’s ability to edit existing paths (in addition to creating new ones) because I figured the Pen tool was easier. But when I tried the Pencil tool method, I loved it! It’s not a substitute for a final, clean clipping path that you’d create in Photoshop, but it’s just the ticket for quick silos in InDesign while you’re experimenting with design approaches.
(Edit: We’ve been asked what a “silo” is. In graphic design, a silo, short for silhouette, is a photo or drawing in which only the main subject or object is visible. Other elements in the image, typically the background, have been hidden/masked out with a clipping path or layer mask.)
Modify Pencil Tool Settings
It helps if you start by double-clicking the Pencil tool and adjusting some of its default settings. Here are the settings I found worked best for me:

Mainly, I increased the Smoothness to around 50% so that the path created by the tool would have fewer points (making it easier to tweak) and I decreased the “Within” setting to 2 pixels for more accurate cursor feedback. That is, the Pencil cursor would lose its little “x” (indicating it detected an existing path and would edit it) only when it was within 2 pixels of a selected path.
The toughest part about this method is starting and stopping exactly on the selected path (the image path); otherwise you end up drawing out new path slivers within the image. A little practice and adjusting of settings will make it easier.
Outline the Silo
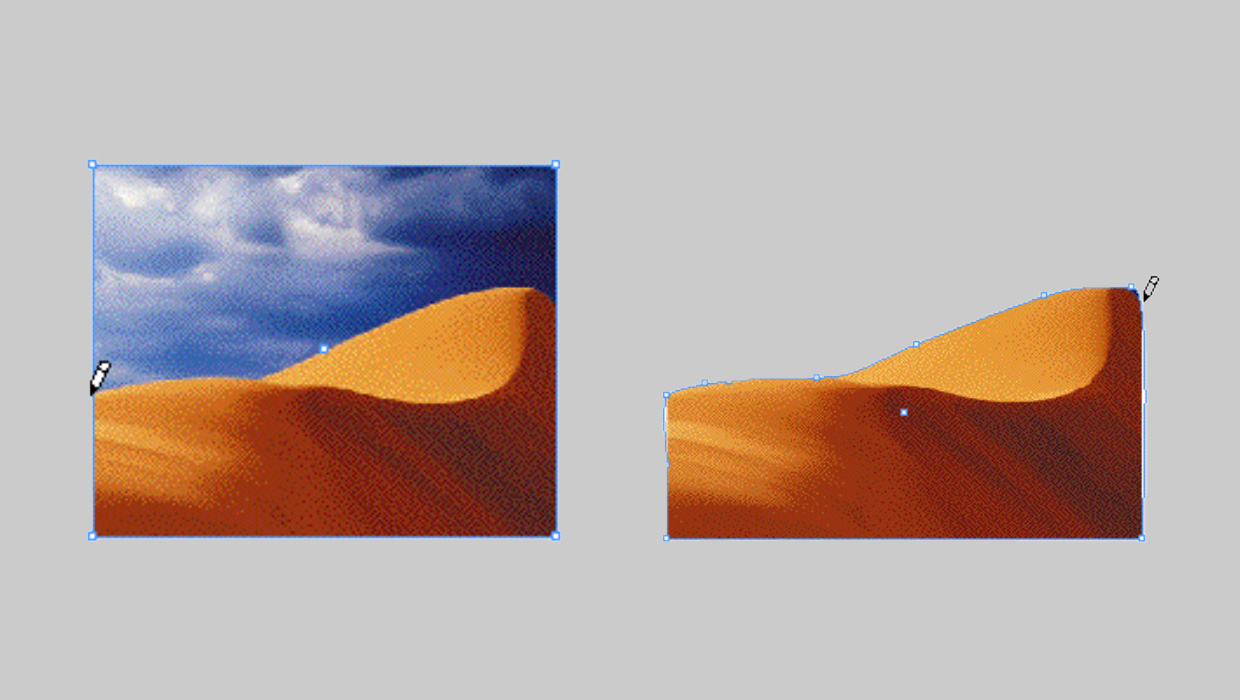
Start with a placed, selected image. Then, switch to the Pencil tool and position its cursor at the location on the image frame where you want the silo (the “cut-out”) to start. Below, I’ve placed one of the Photoshop sample images, with the intent to silo the sand dune and hide the sky. So I put my cursor at the left edge of the frame where the sand meets the sky.

Note that the tip of the Pencil is its hot spot. Don’t start dragging until you’re sure the tip of the pencil is exactly on the path; if you see an asterisk next to the cursor, you’re too far away.
Now drag the pencil around the shape in the image you want to silo, keeping the mouse button depressed until you reach another edge of the existing frame. It makes no difference how fast you drag the path, so take your time.
Release the mouse button when the tip of the Pencil is exactly at an edge of the original image frame. You get no cursor feedback for this so it might take a couple attempts to get it right. (Edit > Undo is your friend.)
Here’s the image after I released the mouse button:
I thought that was very cool, and very fast, once I got the hang of it. Thanks, Carolyn! (And thanks to your co-worker!)
This article was last modified on August 28, 2023
This article was first published on February 5, 2007
Commenting is easier and faster when you're logged in!

Recommended for you


Tip of the Week: Making Torn Paper Effects
This InDesign tip on making torn paper effects was sent to Tip of the Week email...

History 2.1 Plug–in for Adobe InDesign and InCopy is Released
DTP Tools announces immediate availability of its Adobe InDesign and InCopy plug...