


1. This technique will wrap your art around objects and make it hug every contour like magic. To follow along using the texture shown in this tutorial (Figure 1), download the JPG file and open it in Photoshop. You must be in RGB mode.
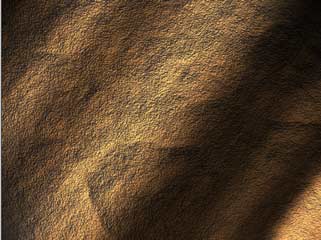
Figure 1. You can download this image or use a texture of your own.
2. Open the Channels palette and click on each channel until you find the one with the most contrast (dark to light). In this case, it’s the Red channel (Figure 2).

Figure 2. One channel will have more contrast than the other three.
3. Now make a new document out of the channel. Either right-click/Control-click on the Red channel area of the Channels palette or click on the top-right arrow to open the drop-down menu. Choose “Duplicate Channel.”
In the resulting window’s Document drop-down, choose “New” as the destination (Figure 3). Click OK.
Figure 3. You don’t need to name the new document yet.
You now have a new document. This will become the displacement map.
4. Apply a 0.7 Gaussian blur (Filter > Blur > Gaussian Blur) to lower the sharp detail a bit (Figure 4). This will make for a smoother image in the end.
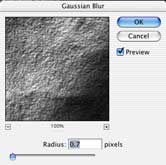
Figure 4. For images with more texture than you like, try a slight blur.
5. Save the document as a .psd. Any name will work; just remember it and the location (Figure 5). I put mine on the desktop. You’ve now created a displacement map for use later on.

Figure 5. Don’t forget where you saved the displacement map.
6. Back in the original document, click on the RGB channel in the the Channels Palette to restore the default channel display (Figure 6).
Figure 6.
7. Open the Layers palette and add artwork or text on a new, top layer (Figure 7). This should be the content you want to follow the texture of the displacement map.

Figure 7. You can displace text or another image.
Make sure you have everything you want to displace on one layer. If you want to displace text, rasterize it now by right-clicking/Control-clicking in the Layers palette next to that layer’s name and choosing “Rasterize Layer” from the pop-up menu.
8. Now apply the displacement map by going to Filter > Distort > Displace (Figure 8).
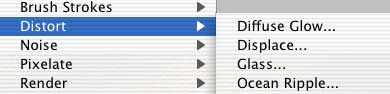
Figure 8. It’s time to apply the map.
9. Use the settings shown in Figure 9 when the Displace palette opens. Click OK.

Figure 9. These settings work well for the sample image, but you can experiment with endless variations.
10. You will see a browser asking you to choose a displacement map.
Navigate to the desktop and load the image you saved in step 5 (Figure 10). Click Open.
Figure 10. Navigate to your displacement map file.
11. You will now see your artwork distort to hug the texture of the rock (Figure 11).
Figure 11. We’re not done yet!
12. Let’s jazz it up a bit. In the drop-down Mode menu of the Layers palette, choose Overlay mode to add some realistic blending (Figure 12).

Figure 12. The Overlay mode is in the drop-down menu.
Duplicate the distorted layer to add a bit more strength to the effect.
13. The result of the blending mode is shown in Figure 13. See how the color blends in with the texture.
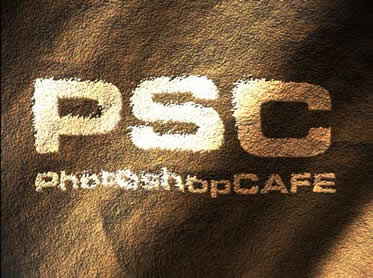
Figure 13. That’s pretty cool.
14. Figure 14 is the same image but with a variation. I added an inner shadow layer style to the top layer and dropped the opacity of the second layer to 30%.
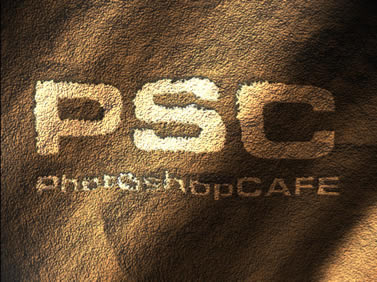
Figure 14. My favorite.
This article was last modified on January 3, 2023
This article was first published on April 26, 2006
Commenting is easier and faster when you're logged in!

Recommended for you

Photoshop New Features Guide Updated
Earlier this year, I wrote about a great resource for Photoshop users, the Photo...
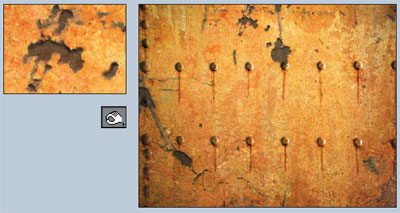
Photoshop How-To: Aging Metal Textures
If, like me, you like the patina of aged, rusty metal, then this Photoshop trick...
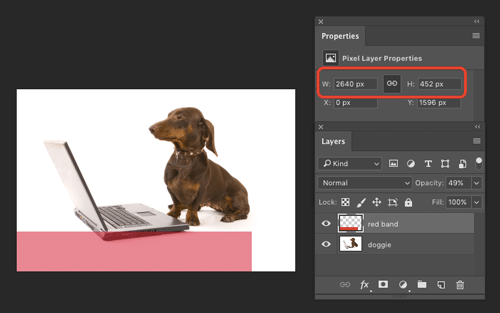
How to Find the Size of a Layer in Photoshop
Learn how to find the exact pixel dimensions of a layer in Photoshop!